
Flutter RiverpodでDIをしてテスタビリティを向上させる
Flutter Riverpod は状態管理の package です。
Flutter Riverpod は DI としても利用できてテスタビリティを向上させることができます。
DI をするとインスタンスの mocking が可能になり、テスタビリティが向上します。
Flutter では代表的な Mockito という mock package があるので、そちらを利用して 基本的な UnitTest を書くことができます。
また、Http 通信をする 箇所は通信を mock する MockWebServer という package があるので、そちらを利用して UnitTest を書くことができます。
今回は題材として簡単な Github の repository 検索アプリを選びました。
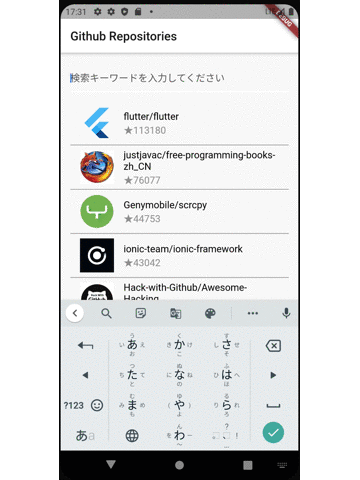
検索キーワードで Github の repository 検索をするシンプルなアプリです。
アーキテクチャは簡易的な MVVM を利用しています。
Model 層は API response を処理する Repository と Http 通信を行う ApiClient で構成します。
今回 ApiClient > Repository > ViewModel の順で DI していきます。
repository 検索アプリで使用している package はこちらです。
- 状態管理
- Reiverpod(hooks_riverpod)
- Provider
- StateNotifierProvider
- AsyncValue
- useProvider
- ProviderScope
- Reiverpod(hooks_riverpod)
- 状態変更通知
- StateNotifier
- Freezed アノテーション
- FreezedAnnotation
- immutable オブジェクトコード生成
- Freezed
- Json 解析コード生成
- JsonSerializable
- Http 通信
- Http
- ToastMessage 表示
- FlutterToast
- Testing with mock
- Mockito
- MockWebServer
今回は DI に関連する箇所のみ掲載しますので、ソースコード全体は Github を参照ください。
筆者はまだ Flutter 初学者の為、説明や実装が誤っていたらぜひ Twitter で DM 頂くか、Contact まで連絡お願いします!
環境
- macOS Big Sur 11.1
- Android Studio 4.1.2
- Flutter 1.22.6
- Dart 2.10.5
Riverpod package の install
pubspec.yaml に Riverpod package を追記します。
今回の題材の Github repository 検索アプリで使用しているその他の package は Github を参照ください。
- pubspec.yaml
dependencies:
  hooks_riverpod:
hooks_riverpod に Riverpod の Provider StateNotifierProvider AsyncValue useProvider などが含まれています。
Riverpod の package は他にも riverpod や flutter_riverpod があるのですが、今回は useProvider という Flutter Hooks を利用する為、 hooks_riverpod package を使用します。
最後に flutter pub get を実行して package を install してください。
API からの response 情報を格納する RepositoryEntity クラスを実装する
まず API response の情報を格納する入れ物である Entity クラスを実装します。
lib/repository_entity.dart
@freezed
abstract class RepositoryEntity with _$RepositoryEntity {
  const factory RepositoryEntity({
    @required final int id,
    @required final String fullName,
    final String description,
    final String language,
    @required final String htmlUrl,
    @required final int stargazersCount,
    @required final int watchersCount,
    @required final int forksCount,
    @required final RepositoryOwnerEntity owner,
  }) = _RepositoryEntity;

  factory RepositoryEntity.fromJson(Map<String, dynamic> json) =>
      _$RepositoryEntityFromJson(json);
}

@freezed
abstract class RepositoryOwnerEntity with _$RepositoryOwnerEntity {
  const factory RepositoryOwnerEntity({
    @required final String avatarUrl,
  }) = _RepositoryOwnerEntity;

  factory RepositoryOwnerEntity.fromJson(Map<String, dynamic> json) =>
      _$RepositoryOwnerEntityFromJson(json);
}
Freezed を利用してオブジェクトを immutable(不変)にしています。
また、 factory RepositoryEntity.fromJson で API からの json response を解析し、json 要素を entity の property に mapping しています。
Freezed の説明は今回本質では無いので割愛いたします。
Freezed はとても便利な package なので別の記事で紹介したいと思います。
Http 通信をする ApiClient クラスを実装する
実際に Http 通信を行う ApiClient クラスを実装します。
lib/github_api_client.dart
abstract class GithubApiClient {
  Future<String> get(String endpoint);
}

class GithubApiClientImpl implements GithubApiClient {
  // factory コンストラクタは instanceを生成せず常にキャッシュを返す(singleton)
  factory GithubApiClientImpl({String baseUrl = 'https://api.github.com'}) {
    return _instance ??= GithubApiClientImpl._internal(baseUrl);
  }
  // クラス生成時に instance を生成する class コンストラクタ
  GithubApiClientImpl._internal(this.baseUrl);
  // singleton にする為の instance キャッシュ
  static GithubApiClientImpl _instance;
  // GithubAPIの基底Url
  final String baseUrl;

  Future<String> get(String endpoint) async {
    final url = '$baseUrl$endpoint';
    try {
      final response = await http.get(url);
      return _parseResponse(response.statusCode, response.body);
    } on SocketException {
      throw Exception('No Internet connection');
    }
  }

  String _parseResponse(int httpStatus, String responseBody) {
    switch (httpStatus) {
      case 200:
        return responseBody;
        break;
      default:
        final decodedJson = json.decode(responseBody) as Map<String, dynamic>;
        throw Exception('$httpStatus ${decodedJson['message']}');
        break;
    }
  }
}
SocketException の通信エラーハンドリングや、Http ステータスの分岐処理を行うヘルパークラスです。
今回 GET しか実装していませんが、本来は POST/PUT/DELETE メソッドも実装します。
また、今回は次に実装する GithubRepository クラスからしかアクセスしませんが、様々な箇所で呼ばれることを想定して singleton パターンで実装しています。
他、ApiClient と Repository は DI するインスタンスの差し替えを容易にする為、abstract class を実装し implements で継承しています。
Http 通信結果を処理する Repository クラスを実装する
次に Http 通信結果を処理する Repository クラスを実装します。
lib/github_repository.dart
abstract class GithubRepository {
  Future<List<RepositoryEntity>> searchRepositories(String searchKeyword);
}

class GithubRepositoryImpl implements GithubRepository {
  GithubRepositoryImpl(this._apiClient);

  final GithubApiClient _apiClient;

  @override
  Future<List<RepositoryEntity>> searchRepositories(
      String searchKeyword) async {
    final responseBody = await _apiClient
        .get('/search/repositories?q=$searchKeyword&sort=stars&order=desc');

    final decodedJson = json.decode(responseBody) as Map<String, dynamic>;
    final repositoryList = <RepositoryEntity>[];
    if (decodedJson['total_count'] as int == 0) {
      return repositoryList;
    }
    for (final itemJson in decodedJson['items']) {
      repositoryList
          .add(RepositoryEntity.fromJson(itemJson as Map<String, dynamic>));
    }
    return repositoryList;
  }
}
ここでは api.github.com の searchAPI を GET して repository 情報の json response を取得、内容を entity 配列に変換し返却しています。
DI 出来るように GithubRepository(this._apiClient) コンストラクタで ApiClient を受け取っています。
画面の状態を扱う ViewModel クラスを実装する
次に ViewModel を実装します。
ViewModel は View の状態を扱うクラスで、先程作成した repository の searchRepositories を実行しています。
その結果を受け取り、View の画面状態を変更します。
lib/repository_list_view_model.dart
class RepositoryListViewModel
    extends StateNotifier<AsyncValue<List<RepositoryEntity>>> {
  RepositoryListViewModel(this._githubRepository)
      : super(const AsyncValue.loading()) {
    searchRepositories('flutter');
  }

  final GithubRepository _githubRepository;

  Future<void> searchRepositories(String searchKeyword) async {
    if (searchKeyword.isEmpty) {
      return;
    }

    state = const AsyncValue.loading();
    try {
      final repositoryList =
          await _githubRepository.searchRepositories(searchKeyword);
      state = AsyncValue.data(repositoryList);
    } on Exception catch (error) {
      state = AsyncValue.error(error);
    }
  }
}
DI できるように RepositoryListViewModel(this._githubRepository) で Repository を受け取っています。
Riverpod の Provider と StateNotifierProvider で DI をする
先程実装した、ApiClient クラス、Repository クラス、ViewModel クラスをそれぞれ DI していきたいと思います。
Riverpod で DI する箇所は main.dart です。
- lib/main.dart
final apiClientProvider = Provider.autoDispose(
  (_) => GithubApiClientImpl(),
);

final githubRepositoryProvider = Provider.autoDispose(
  (ref) => GithubRepositoryImpl(ref.read(apiClientProvider)),
);

final repositoryListViewModelProvider = StateNotifierProvider.autoDispose(
  (ref) => RepositoryListViewModel(ref.read(githubRepositoryProvider)),
);

void main() {
  debugPaintSizeEnabled = false;
  runApp(
    ProviderScope(
      child: RepositoryListView(),
    ),
  );
}
各インスタンス生成時に Repository は ApiClient のインスタンスを受け取り、ViewModel は Repository のインスタンスを受け取り DI をしています。
Riverpod の Provider で それぞれ ApiClient、Repository、ViewModel のインスタンスを保持した Provider オブジェクト生成しています。
ViewModel は画面状態を保持、通知する StateNotifier を継承しているので、それに対応した StateNotifierProvider を使用しています。
StateNotifierProvider は StateNotifier から通知された画面状態変更を View の子 Widget に通知・伝搬してくれます。
StateNotifierProvider を利用するには対象の親 Widget を ProviderScope で囲います。
次に各 Provider では ref.read で Provider で保持しているインスタンスを取得、Provider を参照します。
final repositoryListViewModelProvider = StateNotifierProvider.autoDispose(
  (ref) => RepositoryListViewModel(ref.read(githubRepositoryProvider)),
);
また、Provider の autoDispose は使用されなくなった Provider を自動破棄してくれます。
これにより、ViewModel の Provider が使用されなくなったら、芋づる式に他の Provider も破棄してくれます。
これで Riverpod を使用して DI を実現することができました。
おわりに
次回は Mockito と MockWebServer を利用して、Riverpod で DI したクラスの UnitTest を書いていきます。
しかし Riverpod はとても便利な package ですね。
Riverpod の中でも非同期処理時のローディングとエラー処理を楽に実装できる AsyncValue はありそうで無かった機能なのでオススメです。
AsyncValue は検索してもあまり情報がなかったので記事にしました!
最後に、今回実装したアプリの全てのソースコードは Github にあるので参照ください。
筆者はまだ Flutter 初学者の為、実装や説明が誤っていたらぜひ Twitter で DM 頂くか、Contact まで連絡お願いします!