
AmplifyでNext.jsアプリにGraphQLのAPIを追加する
筆者は最近 Next.js と AWS Amplify をかじっている Web アプリ開発初心者です。
本ブログでは今後数回に渡って Next.js と Amplify で Web アプリを高速に作れないか検証していきます。
今回は Amplify CLI を利用して GraphQL の API をアプリケーションに追加します。
環境
- macOS Big Sur 11.15.2
- Amplify 5.6.0
- Next.js 11.1.2
- Typescript 4.4.3
前提
Amplify 環境の作成は前回の記事を参照頂いて、ホスティングまで行ってください。
正常にホスティングまで出来ていれば amplify status コマンドを実行して以下のように表示されるかと思います。
$ amplify status

    Current Environment: dev

┌──────────┬────────────────┬───────────┬─────────────────┐
│ Category │ Resource name  │ Operation │ Provider plugin │
├──────────┼────────────────┼───────────┼─────────────────┤
│ Hosting  │ amplifyhosting │ No Change │                 │
└──────────┴────────────────┴───────────┴─────────────────┘


Amplify hosting urls:
┌──────────────┬────────────────────────────────────────────┐
│ FrontEnd Env │ Domain                                     │
├──────────────┼────────────────────────────────────────────┤
│ main         │ https://main.XXXXXXXXXXXXXX.amplifyapp.com │
└──────────────┴────────────────────────────────────────────┘
GraphQL API を作成する
Amplify CLI コマンドを実行して GraphQL API を作成します。
以下のコマンドを実行してください。
amplify add apiコマンドを実行し、設問には以下のように回答します。
$ amplify add api
? Please select from one of the below mentioned services: GraphQL
? Provide API name: todoapi
? Choose the default authorization type for the API API key
? Enter a description for the API key: demo
? After how many days from now the API key should expire (1-365): 7
? Do you want to configure advanced settings for the GraphQL API No, I am done.
? Do you have an annotated GraphQL schema? No
? Choose a schema template: Single object with fields (e.g., “Todo” with ID, name, description)
? Do you want to edit the schema now? Yes
Successfully added resource todoapi locally と表示されれば API 作成処理完了です。
エディタが開き、scheme.graphql が表示されます。
type Todo @model {
  id: ID!
  name: String!
  description: String
}
以下コマンドを実行して作成したローカルのバックエンドリソースをクラウドにプロビジョニングします。
amplify push初回の amplify push は GraphQL API のコードを生成するか聞かれるので Yes を入力します。
ここでは GraphQL の Query/Mutation/Subscription を行うための codegen コマンドの設定を行なっています。
? Do you want to generate code for your newly created GraphQL API Yesコード生成言語ターゲットを選択します。 typescript を利用するので typescript を選択します。
? Choose the code generation language target
  javascript
❯ typescript
  flow
graphql クエリ、ミューテーション、サブスクリプションのファイル名パターンを入力します。そのまま Enter を入力します。
? Enter the file name pattern of graphql queries, mutations and subscriptions src/graphql/**/*.js可能なすべての GraphQL 操作(クエリ、ミューテーション、サブスクリプション)を生成/更新します。 Yes を入力します。
? Do you want to generate/update all possible GraphQL operations - queries, mutations and subscriptions Yesステートメントの最大の深さを入力します。
スキーマが深くネストされている場合はデフォルトから増やしてください、とのことなのでここは 3 を入力します。
maximum statement depth では、schema.graphql の type のネスト構造をどこまで読み取るかを設定します。
depth 設定を変えたい場合は$ amplify update codegen コマンドにより同様の設定を行うことが可能です。
? Enter maximum statement depth [increase from default if your schema is deeply nested] 3生成されるコードのファイル名を入力します。そのまま Enter を入力します。
? Enter the file name for the generated code (src/API.ts)しばらく待つとクラウドにプロビジョニングされて処理が完了します。
ここで表示される GraphQL endpoint と API KEY は後ほど利用するので控えておいてください。
✔ Generated GraphQL operations successfully and saved at src/graphql
✔ Code generated successfully and saved in file src/API.ts
✔ All resources are updated in the cloud

GraphQL endpoint: https://XXXXXXXXXXXXXXXXXX.appsync-api.ap-northeast-1.amazonaws.com/graphql
GraphQL API KEY: XXXXXXXXXXXXXXXXXXXX
amplify status コマンドを実行すると Category に Api が追加されていることが分かります。
$ amplify status

    Current Environment: dev

┌──────────┬────────────────┬───────────┬───────────────────┐
│ Category │ Resource name  │ Operation │ Provider plugin   │
├──────────┼────────────────┼───────────┼───────────────────┤
│ Hosting  │ amplifyhosting │ No Change │                   │
├──────────┼────────────────┼───────────┼───────────────────┤
│ Api      │ todoapi        │ No Change │ awscloudformation │
└──────────┴────────────────┴───────────┴───────────────────┘

GraphQL endpoint: https://XXXXXXXXXXXXXXXXXX.appsync-api.ap-northeast-1.amazonaws.com/graphql
GraphQL API KEY: XXXXXXXXXXXXXXXXXXXX


Amplify hosting urls:
┌──────────────┬────────────────────────────────────────────┐
│ FrontEnd Env │ Domain                                     │
├──────────────┼────────────────────────────────────────────┤
│ main         │ https://main.XXXXXXXXXXXXXX.amplifyapp.com │
└──────────────┴────────────────────────────────────────────┘
amplify mock で動作確認
以下コマンドを実行するとローカルに mock サーバが立ち上がり GraphQL の確認が可能です。
amplify mockamplify mock では以下サービスが mock としてエミュレート可能です。
- AppSync
- API
- リゾルバーのテンプレートマッピング
- DynamoDB
- Lambda 関数
- Lambda
- 直接発火する場合
- AppSync から呼び出される場合
- S3 ストレージとしてアプリケーションで使用される場合
- Cognito
- GraphQL からユーザープール認証をする場合(JWT を実際のサービスから取得する必要有り)
mock サーバが起動し終わると以下のログが確認できます。
$ amplify mock
The following types do not have '@auth' enabled. Consider using @auth with @model
- Todo
Learn more about @auth here: https://docs.amplify.aws/cli/graphql-transformer/auth
GraphQL schema compiled successfully.
Edit your schema at /Users/kazuma/Documents/github/next/next-amplify-deploy-sample/amplify/backend/api/todoapi/schema.graphql or place .graphql files in a directory at /Users/kazuma/Documents/github/next/next-amplify-deploy-sample/amplify/backend/api/todoapi/schema
Creating new table TodoTable
Running GraphQL codegen
✔ Generated GraphQL operations successfully and saved at src/graphql
✔ Code generated successfully and saved in file src/API.ts
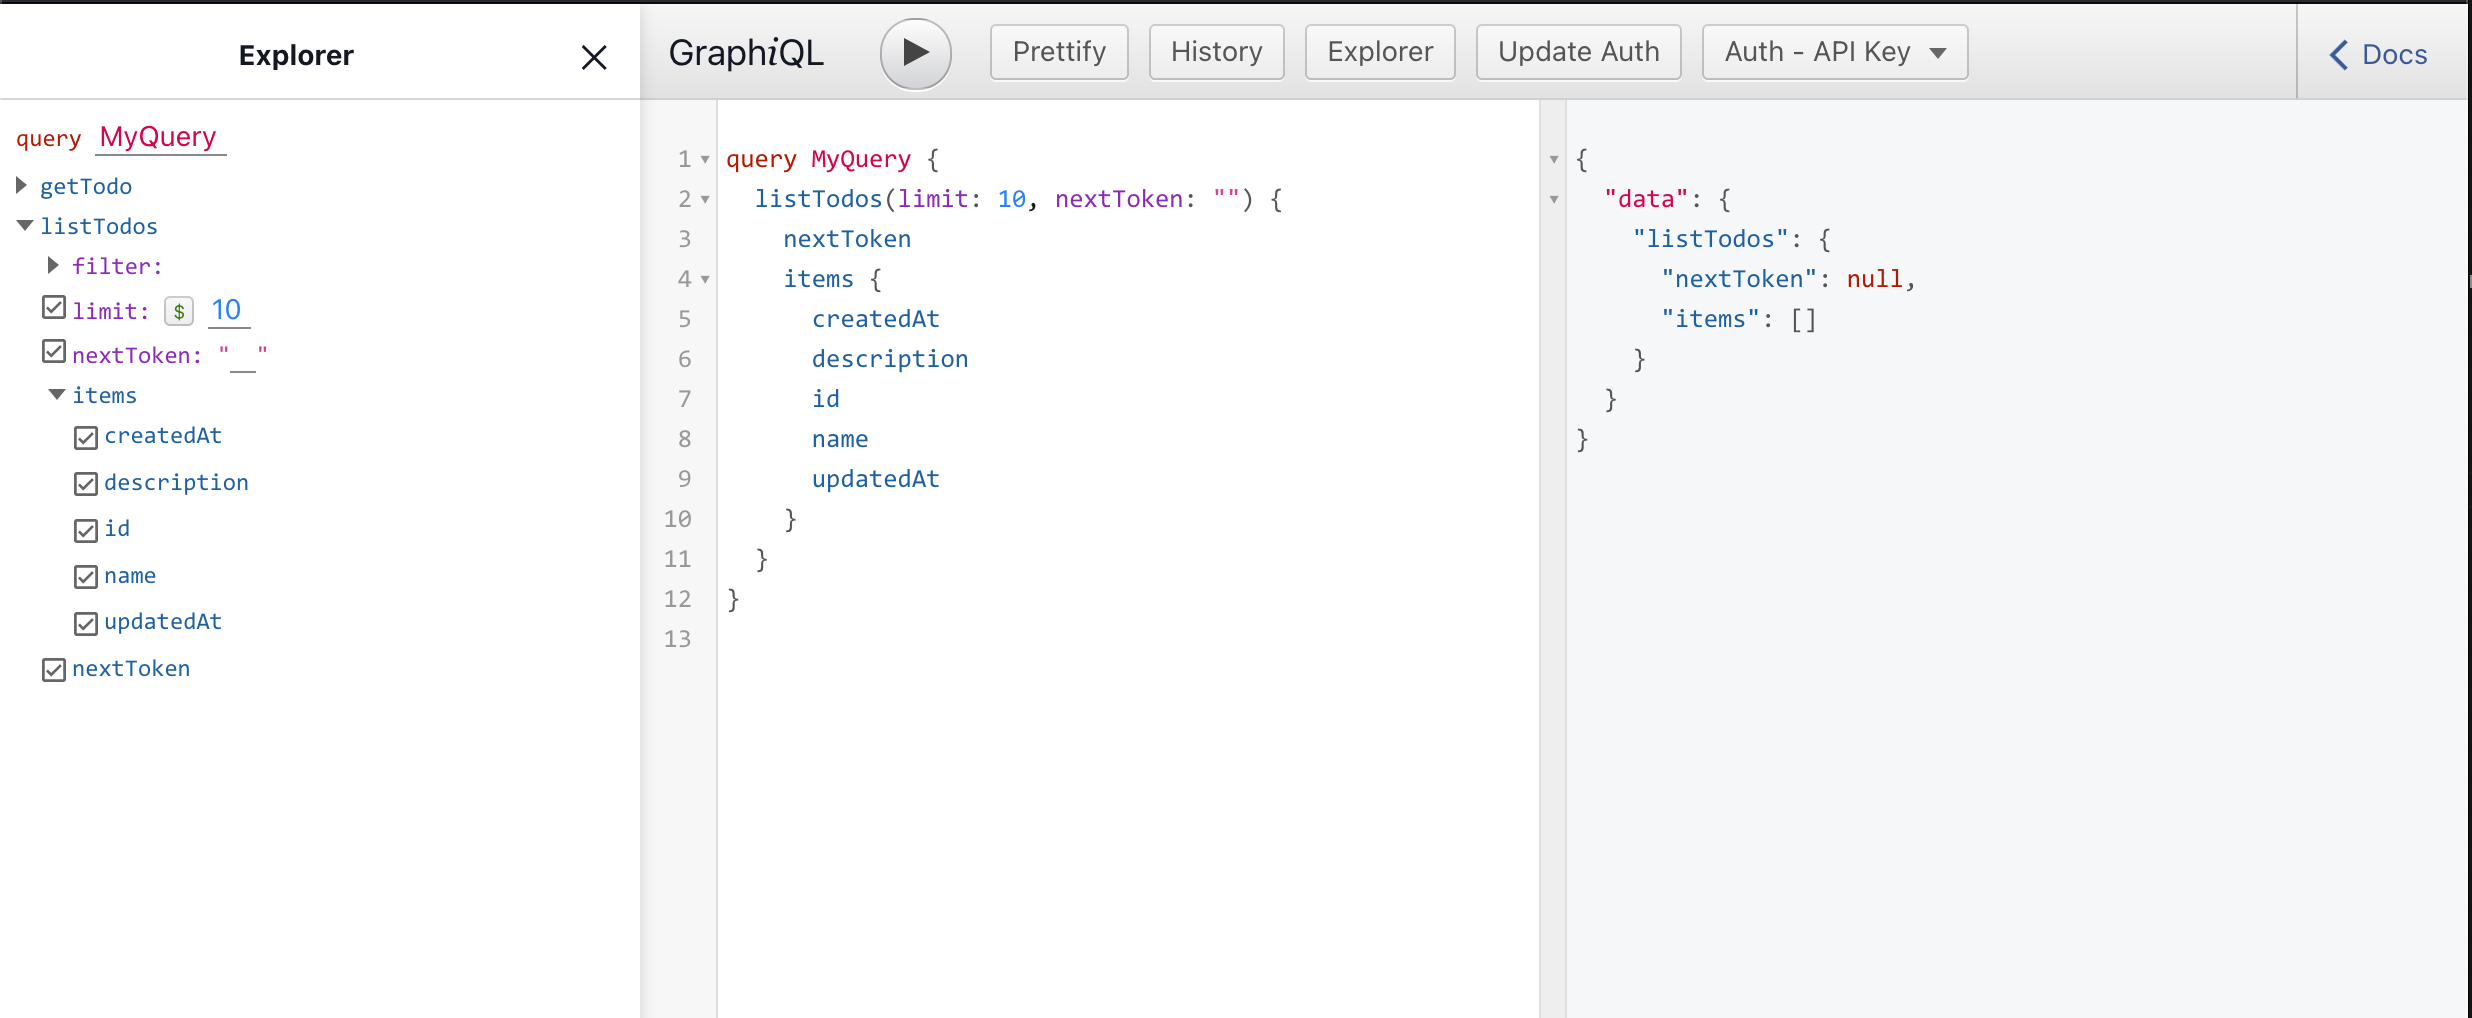
AppSync Mock endpoint is running at http://192.168.1.15:20002ログで出力された http://192.168.1.15:20002 にアクセスすると GraphiQL 画面が立ち上がりローカルで GraphQL を実行することができます。
amplify mock を実行して mock サーバを実行中は Amplify の環境変数が格納されている src/aws-exports.js の awsappsyncgraphqlEndpoint の向き先がローカルに書き換わります。
const awsmobile = {
  aws_project_region: 'ap-northeast-1',
  aws_appsync_graphqlEndpoint: 'http://192.168.1.15:20002/graphql',
  aws_appsync_region: 'ap-northeast-1',
  aws_appsync_authenticationType: 'API_KEY',
  aws_appsync_apiKey: 'XXXXXXXXXXXXXXXXXXX',
  aws_appsync_dangerously_connect_to_http_endpoint_for_testing: true,
};

export default awsmobile;
Next.js に Amplify 設定を追加する
yarn または npm を使用してアプリに Amplify package を追加します。
- npm
npm install aws-amplify- yarn
yarn add aws-amplifyAmplify を利用可能にするには、これから実装する各ファイルの先頭に以下の Amplify 設定の読み込みをします。
import Amplify, { API, graphqlOperation } from 'aws-amplify';
import awsconfig from '../../src/aws-exports';
Amplify.configure(awsconfig);