
Cypress Component TestingとRTLでReactコンポーネント テストを書く (Next.js x TypeScript x Jest対応)
Next.js と Typescript のプロジェクトで Cypress component testing library と React testing library (RTL) の React コンポーネントテストを書いてみます。
Cypress は Web アプリケーションの E2E testing tool です。
現在はまだアルファ版ですが、Cypress でも Cypress component testing library を利用すれば Jest や Mocha と同様の React コンポーネントテストができます。
Jest でテストされるコンポーネントは jsdom を使用した仮想化されたブラウザでレンダリングされます。
Cypress component testing library は Jest とは違い、実際のブラウザを使用してコンポーネントをレンダリングします。
jsdom でレンダリングされたコンポーネントに比べ、ブラウザでレンダリングされたコンポーネントの方がテスト実行時の実環境の再現度が高いです。
また、Cypress の E2E テストでネックになるテストの実行速度も Cypress component testing では比較的高速に動作します。
更に、Cypress testing library (CTL) を利用すれば、 React testing library と同様の記述でテストを書くことができます。
CTL は RTL 同様、以下のようにセマンティックな HTML 要素に対してアクセスします。
CTL を利用すればアクセシビリティを意識したセマンティックな HTML のプロダクトコードが書けるようになります。
cy.findByRole('button', { name: /Jackie Chan/i }).click();
cy.findByRole('button', { name: /Button Text/i }).should('exist');
cy.findByRole('button', { name: /Non-existing Button Text/i }).should('not.exist');
cy.findByLabelText(/Label text/i, { timeout: 7000 }).should('exist');
// findByRole _inside_ a form element
cy.get('form')
  .findByRole('button', { name: /Button Text/i })
  .should('exist');
cy.findByRole('dialog').within(() => {
  cy.findByRole('button', { name: /confirm/i });
});
それでは Next.js x TypeScript 環境で Cypress/Jest/Cypress component testing/React testing library/Cypress testing library のセッティングをしていきます。
後半は実際に Jest と Cypress のコンポーネントテスト、 Cypress の E2E テストを書き、それぞれの特徴、記法を比較していきます。
環境
- macOS Big Sur 11.6
- Next 12.0.8
- React 17.0.2
- TypeScript 4.5.4
- npm 8.1.2
- Node 16.13.0
Next.js プロジェクトの作成
以下コマンドを実行して Next.js プロジェクトを作成します。
--typescript オプションで TypeScript を利用可能にします。
npx create-next-app cypress-rtl-component-testing --typescriptTesting package を install
Cypress, Jest, React Testing Library の Testing package を install します。
Next.js への Jest、RTL 導入手順は Next.js オフィシャルの Jest and React Testing Library を参照して進めます。
npm、yarn それぞれ以下コマンドを実行してください。
- npm
npm install --save-dev jest @testing-library/react @testing-library/jest-dom @testing-library/user-event @testing-library/react-hooks @testing-library/cypress cypress @cypress/react @cypress/webpack-dev-server webpack-dev-server- yarn
yarn add --dev jest @testing-library/react @testing-library/jest-dom @testing-library/user-event @testing-library/react-hooks @testing-library/cypress cypress @cypress/react @cypress/webpack-dev-server webpack-dev-serverそれぞれ install package は以下の用途になります。
- jest
- Jest 本体。Snapshot test や Unit test を実行する
- @testing-library/react
- React testing library を利用可能にする
- @testing-library/jest-dom
- Jest カスタムマッチャーを利用可能にする
- @testing-library/user-event
- Unit test でクリックや文字入力などユーザーインタラクションを実行する
- @testing-library/react-hooks
- Unit Test で React Hooks を利用可能にする
- @testing-library/cypress
- Cypress testing library を利用可能にする
- cypress
- Cypress の本体 package。E2E テストを実行可能にする
- @cypress/react
- Cypress component test runner を使用して、React コンポーネントテストを実行する
- webpack-dev-server
- Cypress を動作させる為の webpack ローカル開発サーバー
- @cypress/webpack-dev-server
- @cypress/react を利用したコンポーネントテストを動作させる為の webpack ローカル開発サーバー
ディレクトリ構成
テスト対象ファイルとテストファイルのディレクトリ構成は以下構成となります。
root
├── cypress
│    ├── component
│    |       └── todo.spec.tsx
│    └── integration
│            └── todo-page.spec.ts
├── src
│    ├── components
│            ├── todo.tsx
│            └── todo.test.tsx
├── tsconfig.json- todo.tsx
- テスト対象コンポーネントファイル
- todo.test.tsx
- Jest component testing ファイル
- todo.spec.tsx
- Cypress component testing ファイル
- todo-pge.spec.ts
- Cypress E2E testing ファイル
Cypress component testing ではテスト対象のコンポーネントとテストファイルは同じ階層にあるべきとされていますが、今回は CTL を使用する関係上、Cypress デフォルトの cypress/component ディレクトリ配下に置きます。
以後、上記構成を前提とした TypeScript、Jest、Cypress 設定をします。
Next.js 設定
Next.js12 から導入された Rust で作られたビルドツールである SWC を有効化します。
next.config.js に swcMinify: true を追記します。
/** @type {import('next').NextConfig} */
module.exports = {
  reactStrictMode: true,
  swcMinify: true, // added
};
筆者のケースでは SWC を有効化しないと Cypress component testing の cypress open-ct でコンポーネントテスト実行時に Cannot GET /__cypress/src/index.html エラーが発生しテストが実行されませんでした。
また、後述する Jest 設定では SWC を使用したビルド設定をします。
TypeScript の設定
tsconfig.json の設定で baseUrl をルートから src ディレクトリに変更します。
include も併せて参照するファイルパスに src ディレクトリを追記します。
{
  "compilerOptions": {
    "target": "es5",
    "lib": ["dom", "dom.iterable", "esnext"],
    "allowJs": true,
    "skipLibCheck": true,
    "strict": true,
    "forceConsistentCasingInFileNames": true,
    "noEmit": true,
    "esModuleInterop": true,
    "module": "esnext",
    "moduleResolution": "node",
    "resolveJsonModule": true,
    "isolatedModules": true,
    "jsx": "preserve",
    "incremental": true,
    "baseUrl": "src" // added
  },
  // "include": ["next-env.d.ts", "**/*.ts", "**/*.tsx"],
  "include": ["next-env.d.ts", "src/**/*.ts", "src/**/*.tsx"], // adds src directory in include paths
  "exclude": ["node_modules"]
}
Jest 設定
Jest の設定です。
Jest をコマンドラインから実行する為のショートカットを設定します。
package.json に "test": "jest" を追記します。
  "scripts": {
    "dev": "next dev",
    "build": "next build",
    "start": "next start",
    "lint": "next lint",
    "test": "jest" // added
  },
jest.config.js の作成
次に Jest の設定を行う為、ルートディレクトリに jest.config.js ファイルを作成して以下を追記します。
// jest.config.js
const nextJest = require('next/jest');

const createJestConfig = nextJest({
  // Provide the path to your Next.js app to load next.config.js and .env files in your test environment
  dir: './',
});

// Add any custom config to be passed to Jest
const customJestConfig = {
  setupFilesAfterEnv: ['<rootDir>/jest.setup.js'],
  // if using TypeScript with a baseUrl set to the root directory then you need the below for alias' to work
  moduleDirectories: ['node_modules', '<rootDir>/', 'src'],
  testPathIgnorePatterns: ['<rootDir>/cypress/'],
  testEnvironment: 'jest-environment-jsdom',
};

// createJestConfig is exported this way to ensure that next/jest can load the Next.js config which is async
module.exports = createJestConfig(customJestConfig);
Next.js 12 のリリース以降、Next.js には Jest の構成が組み込まれています。
設定の最初に import している require('next/jest') には基本的な Jest の設定がされています。
上記の設定で SWC でコンパイルされるようになります。
SWC は Next.12 より導入された Rust で作られたビルドツールで、Babel より高速にコンパイルされるとされています。
また、cypress 配下のディレクトリは Cypress の E2E テストで実行されるテストファイルを配置します。
その為、 testPathIgnorePatterns に cypress ディレクトリを追加して Jest のテスト対象から除外しています。
その他の Jest の細かい設定については Configuring Jest を参照ください。
jest.setup.js の作成
最後に Jest カスタムマッチャーを利用出来るようにする為、ルートディレクトリに jest.setup.js ファイルを作成して以下を追記します。
import '@testing-library/jest-dom/extend-expect';Cypress 設定
Cypress をコマンドラインから実行するショートカットを作成する為、package.json に 以下を追記します。
  "scripts": {
    "cy:open": "cypress open",
    "cy:run": "cypress run",
    "cy:open:firefox": "cypress open --browser firefox",
    "cy:run:firefox": "cypress run --browser firefox",
    "cy:open:ct": "cypress open-ct",
    "cy:run:ct": "cypress run-ct",
    "cy:open:ct:firefox": "cypress open-ct --browser firefox",
    "cy:run:ct:firefox": "cypress run-ct --browser firefox"
  },
それぞれのコマンドの内容です。
cypress open- Cypress の IDE を起動して GUI 上から E2E テストを実行
cypress run- Cypress をヘッドレスモードで起動して CUI 上から E2E テストを実行。主に CI 環境で使用
cypress open-ctcypress openと同じく IDE を起動して GUI 上からコンポーネントテストを実行
cypress run-ctcypress runと同じくヘッドレスモードで起動して CUI 上からコンポーネントテストを実行
--browser chrome or firefox オプションでテストで使用するブラウザを選択できます。
cypress open や run はデフォルトで chrome で起動するので、firefox オプションのみ設定しています。
次にコマンドの動作確認の為、以下 Cypress 起動コマンドを実行します。yarn を利用している方は npm を yarn に置き換えてください。
npm run cy:open以下 Cypress の IDE が起動します。
同時にプロジェクトのルートディレクトリに以下 cypress の基本構成ディレクトリとファイルが自動生成されます。
cypress
├── fixtures
│   └── example.json
├── integration
│   ├── 1-getting-started
│   └── 2-advanced-examples
├── plugins
│   └── index.js
└── support
    ├── commands.js
    └── index.js
生成された cypress ディレクトリに対して設定を追加していきます。
TypeScript 設定
Cypress 用の TypeScript 設定をする為、 cypress/tsconfig.json ファイルを作成して以下を追記します。
types には Cypress 本体の cypress と CTL の @testing-library/cypress を設定します。
// cypress/tsconfig.json
{
  "extends": "../tsconfig.json",
  "compilerOptions": {
    "noEmit": true,
    "isolatedModules": false,
    // be explicit about types included
    // to avoid clashing with Jest types
    "types": ["cypress", "@testing-library/cypress"]
  },
  "include": ["../node_modules/cypress", "./**/*.ts", "./**/**.tsx"]
}
ルートディレクトリの tsconfig.json と設定を分けて、Cypress のテス実装時の lint で意図せず Jest の警告が発生することを防ぎます。
Cypress は Mocha の構文を利用しているため、多くのコマンドが Jest と重複してしまいます (describe,beforeEach,expect etc..) 。
tsconfig ファイルを Jest と Cypress 分けることで lint エラーを防ぐことができます。
Next.js 用の Cypress component testing plugin 設定
Next.js で Cypress component testing を実行する為の設定をします。
cypress/plugins/index.js の内容を以下設定に書き換えます。
// cypress/plugins/index.js
const injectNextDevServer = require('@cypress/react/plugins/next');

/**
 * @type {Cypress.PluginConfig}
 */
// eslint-disable-next-line no-unused-vars
module.exports = (on, config) => {
  // `on` is used to hook into various events Cypress emits
  // `config` is the resolved Cypress config
  if (config.testingType === 'component') {
    injectNextDevServer(on, config);
  }
  return config;
};
cypress.json 設定
自動生成された cypress.json に以下を追記します。
{
  "baseUrl": "http://localhost:3000",
  "includeShadowDom": true
}
Cypress E2E テストの cy.visit クエリコマンドで の baseUrl 記述を省略する為、baseUrl に npm run dev で起動するローカルサーバーの URL を記述します。
includeShadowDom は cy.get などのクエリコマンドの結果に Shadow DOM 内の要素を含める設定です。
例えば、Shadow DOM が使われているコンポーネント(MUI など UI ライブラリや、Amazon Cognito など外部から提供されたコンポーネント) を利用する場合に有効化します。
デフォルト false となっています。
Cypress testing library 設定
CTL の設定をします。
cy オブジェクトを拡張した cy.findByRole などのクエリコマンドを利用可能にする為、 cypress/support/commands.js ファイルに以下 1 行追加します。
// cypress/support/commands.js
import '@testing-library/cypress/add-commands';
.gitignore ルールを追記する
プロジェクトを git 管理する場合は .gitignore に以下を追記します。
Cypress オフィシャルの example にある cypress-example-recipes/.gitignore ファイルの内容を追記してください。
- .gitignore
node_modules
.tmp
.sass-cache
.DS_Store
npm-debug.log
tmp
.projects
*.orig

screenshots
videos
out.js
examples/*/cypress/logs
examples/*/cypress/downloads
snapshots.js
.nyc_output
coverage
dist
test-data.json
Component test を書く
実際に Component test を書いてみます。
題材として簡単な Todo コンポーネントを作成します。
Todo を追加してリスト表示するだけのコンポーネントです。
以下のファイルを作成します。
src/components/todo.tsxsrc/components/todo-list.tsxsrc/components/add-todo.tsxsrc/pages/todo.tsx
// src/components/todo.tsx
import React, { useState } from 'react';
import AddTodo from './add-todo';
import TodoList from './todo-list';

export type Todo = {
  id: string;
  description: string;
};

const Todo: React.FC = () => {
  const [items, setItems] = useState<Todo[]>([]);

  return (
    <div>
      <AddTodo setItems={setItems} />
      <TodoList items={items} />
    </div>
  );
};

export default Todo;
// src/components/todo-list.tsx
import React from 'react';
import { Todo } from './todo';
type Props = {
items: Todo[];
};
const TodoList: React.FC<Props> = ({ items }) => {
return (
<ul>
{items.map((item) => (
<li key={item.id} aria-label={item.description}>
{item.description}
</li>
))}
</ul>
);
};
export default TodoList;// src/components/add-todo.tsx
import React, { useRef } from 'react';
import { Todo } from './todo';
type Props = {
setItems: React.Dispatch<React.SetStateAction<Todo[]>>;
};
const AddTodo: React.FC<Props> = ({ setItems }) => {
const textInputRef = useRef<HTMLInputElement>(null);
const todoSubmitHandler = (event: React.FormEvent) => {
if (!textInputRef.current) return;
event.preventDefault();
const enteredText = textInputRef.current.value;
setItems((items: Todo[]) => [...items, { id: Math.random().toString(), description: enteredText }]);
textInputRef.current.value = '';
};
return (
<form onSubmit={todoSubmitHandler}>
<div>
<input type='text' aria-label='description' ref={textInputRef} />
</div>
<button type='submit'>Add</button>
</form>
);
};
export default AddTodo;// src/pages/todo.tsx
import type { NextPage } from 'next';
import Head from 'next/head';
import Todo from '../src/components/todo';
import styles from '../styles/Home.module.css';
const TodoPage: NextPage = () => {
return (
<div className={styles.container}>
<Head>
<title>Todo list</title>
<link rel='icon' href='/favicon.ico' />
</Head>
<main className={styles.main}>
<h1 className={styles.title}>Welcome to your todo list.</h1>
<div className={styles.card}>
<Todo />
</div>
</main>
</div>
);
};
export default TodoPage;Jest のコンポーネントテストを書く
次に作成した Todo コンポーネントに対して Jest でテストを書いてみます。
src/components/todo.test.tsx を作成して以下を追記します。
1〜3 回 Todo タスクを追加してそれぞれリスト表示されるかテストします。
// src/components/todo.test.tsx
import { render, screen } from '@testing-library/react';
import userEvent from '@testing-library/user-event';
import Todo from './todo';

describe('Todo component testing', () => {
  beforeEach(() => {
    render(<Todo />);
    screen.getByRole('list');
    screen.queryAllByRole('listitem');
  });

  const addTodoItem = (description: string) => {
    const textbox = screen.getByRole('textbox', { name: 'description' });
    userEvent.type(textbox, description);
    screen.getByDisplayValue(description);
    userEvent.click(screen.getByRole('button', { name: 'Add' }));
    screen.getByDisplayValue('');
  };

  const verifyToAddTodoItems = (descriptions: string[]) => {
    descriptions.forEach((description: string) => {
      addTodoItem(description);
    });
    expect(screen.getAllByRole('listitem')).toHaveLength(descriptions.length);
    descriptions.forEach((description: string) => {
      screen.getByRole('listitem', { name: description });
    });
  };

  test('adds a first todo', () => {
    verifyToAddTodoItems(['first todo']);
  });

  test('adds two todo items', () => {
    verifyToAddTodoItems(['first todo', 'second todo']);
  });

  test('adds three todo items', () => {
    verifyToAddTodoItems(['first todo', 'second todo', 'third todo']);
  });
});
それでは npm test コマンドで Jest のテストを実行してみましょう。
以下 Jest のテスト実行結果です。
$ npm test

> test
> jest

"next/jest" is currently experimental. https://nextjs.org/docs/messages/experimental-jest-transformer
warn  - SWC minify beta enabled. https://nextjs.org/docs/messages/swc-minify-enabled
 PASS  src/components/todo.test.tsx
  Todo component testing
    ✓ adds a first todo (266 ms)
    ✓ adds two todo items (121 ms)
    ✓ adds three todo items (154 ms)

Test Suites: 1 passed, 1 total
Tests:       3 passed, 3 total
Snapshots:   0 total
Time:        1.836 s, estimated 3 s
Ran all test suites.
無事テストが完了することを確認してください。
ここまでは良くある Jest と RTL のテストです。
Cypress でコンポーネントテストを書く
次に Cypress component testing でテストを書いてみましょう。
cypress/component/todo.spec.tsx ファイルを作成して以下追記します。
Cypress はデフォルトで **.spec プレフィックスが付いているファイルをテスト対象とします。
Jest のテストと同じく 1〜3 回 Todo タスクを追加してそれぞれリスト表示されるかテストします。
// cypress/component/todo.spec.tsx
import { mount } from '@cypress/react';
import Todo from '../../src/components/todo';
describe('Todo component testing', () => {
beforeEach(() => {
mount(<Todo />);
cy.findByRole('list');
});
const addTodoItem = (description: string) => {
const textbox = cy.findByRole('textbox', { name: 'description' });
textbox.type(description);
textbox.should('have.value', description);
cy.findByRole('button', { name: 'Add' }).click();
textbox.should('have.value', '');
};
const verifyToAddTodoItems = (descriptions: string[]) => {
descriptions.forEach((description: string) => {
addTodoItem(description);
});
cy.findAllByRole('listitem').should('have.length', descriptions.length);
descriptions.forEach((description: string) => {
cy.findByRole('listitem', { name: description });
});
};
it('adds a first todo', () => {
verifyToAddTodoItems(['first todo']);
});
it('adds two todo items', () => {
verifyToAddTodoItems(['first todo', 'second todo']);
});
it('adds three todo items', () => {
verifyToAddTodoItems(['first todo', 'second todo', 'third todo']);
});
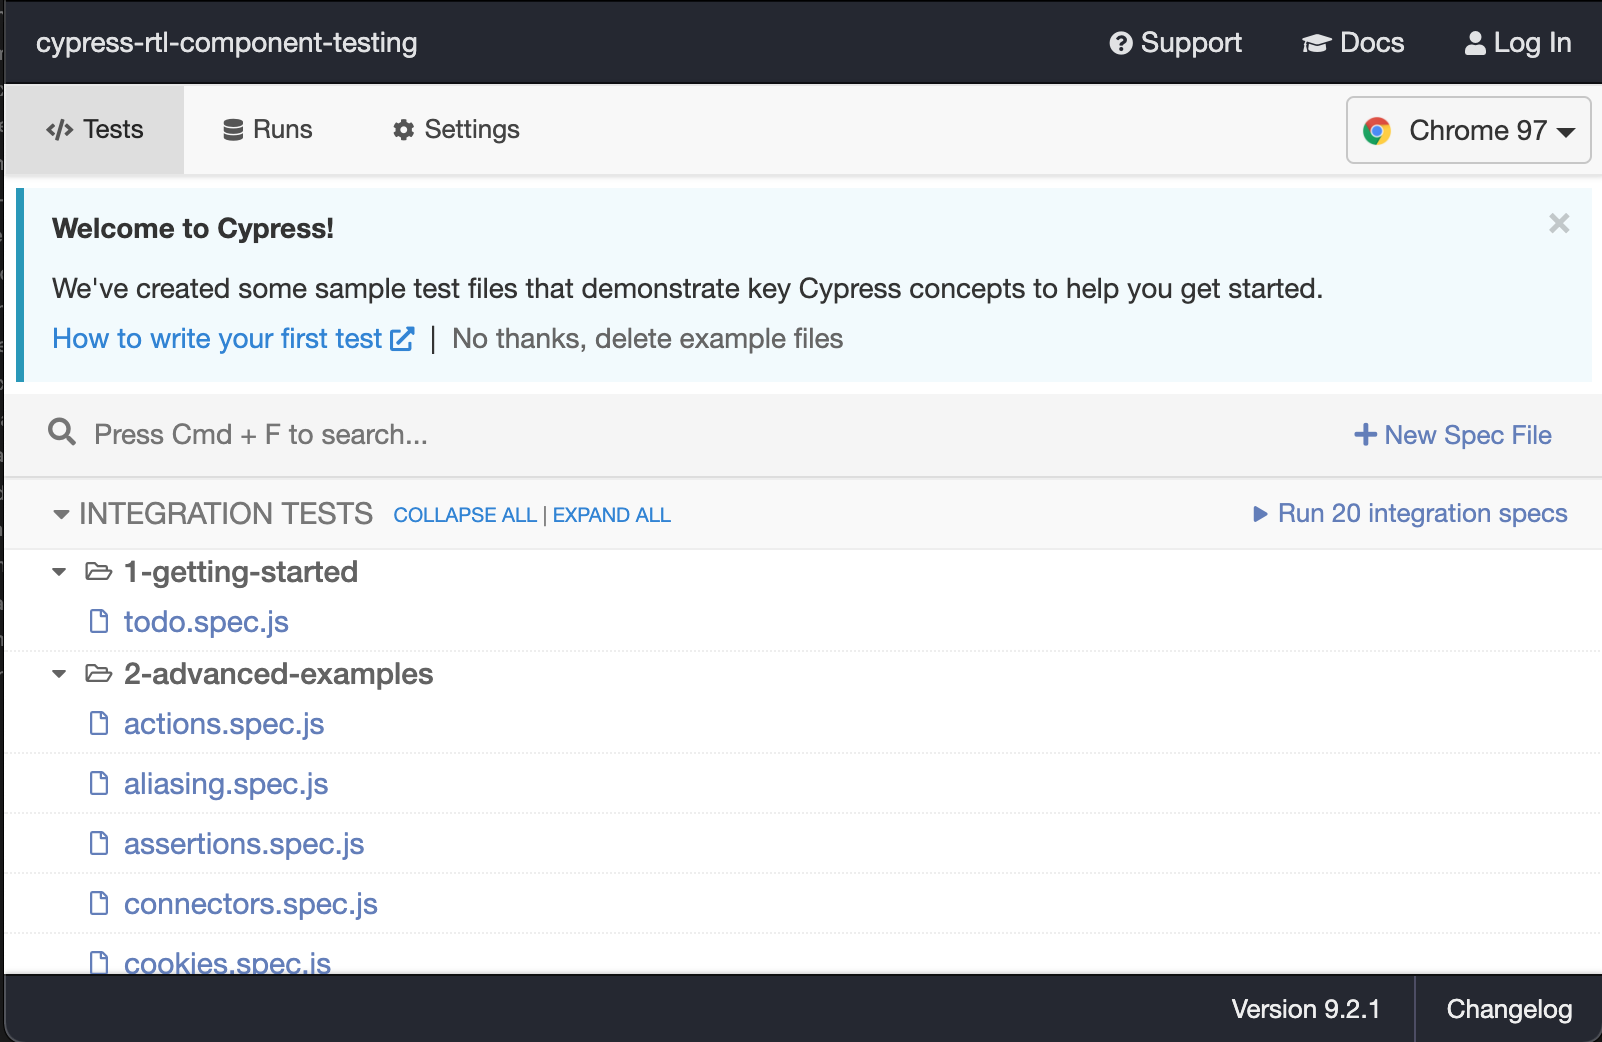
});npm run cy:open:ct コマンドを実行します。
Cypress の IDE が立ち上がるので、テストするコンポーネントを選びます。
今回作成した todo.spec.tsx を選択してテストを実行します。
以下のように GUI 上でコンポーネントテストの実行結果が分かります。
テスト実行結果は記録されるので、エラーが発生した場合は発生箇所に戻って確認することが可能です。
また、デフォルトで Chrome ブラウザが立ち上がるので、開発者ツールを開きデバッグすることも可能です。
これは Jest のテストには無い大きなメリットですね。
また、CTL を利用したクエリコマンドの記法はほぼ RTL と同じ記法で書けます。
入力ボックスに値を入力してボタンをタップ、入力ボックスの値がクリアされリストに値が反映されるか確認するクエリコマンドで比較してみましょう。
こちらは RTL の記法です。
render(<Todo />);
const description = 'first todo';
const textbox = screen.getByRole('textbox', { name: 'description' });
userEvent.type(textbox, description);
screen.getByDisplayValue(description);
userEvent.click(screen.getByRole('button', { name: 'Add' }));
screen.getByDisplayValue('');
screen.findByRole('listitem', { name: description });
こちらは CTL の記法です。
mount(<Todo />);
const description = 'first todo';
const textbox = cy.findByRole('textbox', { name: 'description' });
textbox.type(description);
textbox.should('have.value', description);
cy.findByRole('button', { name: 'Add' }).click();
textbox.should('have.value', '');
cy.findByRole('listitem', { name: description });
CTL と RTL を使えばほぼ学習コスト無しで相互にテストコードを書くことが可能です。
また、セマンティックな HTML 要素に対してアクセスする為、自然とアクセシビリティを意識することができます。
Cypress で CTL を利用しない場合、cy.get を利用して DOM 要素にアクセスする必要があり、大なり小なりの学習コストとメンテナンスコストがかかってしまいます。
Cypress で E2E テストを書く
最後に Cypress を利用した E2E テストを書いてみます。
cypress/integration/todo-page.spec.ts ファイルを作成して以下を追記します。
Jest や Cypress component testing と同じく 1〜3 回 Todo タスクを追加してそれぞれリスト表示されるかテストします。
// cypress/integration/todo-page.spec.ts
describe('Todo page testing', () => {
beforeEach(() => {
cy.visit('/todo');
cy.findByRole('list');
});
const addTodoItem = (description: string) => {
const textbox = cy.findByRole('textbox', { name: 'description' });
textbox.type(description);
textbox.should('have.value', description);
cy.findByRole('button', { name: 'Add' }).click();
textbox.should('have.value', '');
};
const verifyToAddTodoItems = (descriptions: string[]) => {
descriptions.forEach((description: string) => {
addTodoItem(description);
});
cy.findAllByRole('listitem').should('have.length', descriptions.length);
descriptions.forEach((description: string) => {
cy.findByRole('listitem', { name: description });
});
};
it('adds a first todo', () => {
verifyToAddTodoItems(['first todo']);
});
it('adds two todo items', () => {
verifyToAddTodoItems(['first todo', 'second todo']);
});
it('adds three todo items', () => {
verifyToAddTodoItems(['first todo', 'second todo', 'third todo']);
});
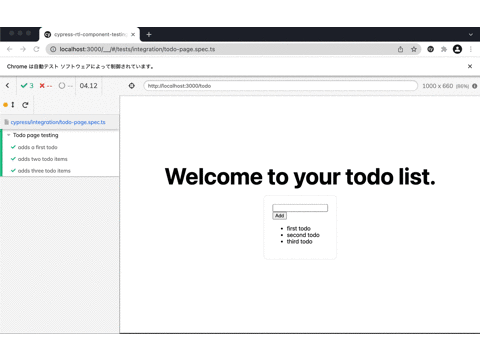
});npm run cy:open コマンドを実行します。
Cypress component testing と同じく Cypress の IDE が立ち上がるので、テストする todo ページを選びます。
今回作成した todo-page.spec.ts を選択してテストを実行します。
以下のように GUI 上でテストの実行結果が分かります。
Cypress component testing と同じくテスト実行結果は記録されるので、エラーが発生した場合は発生箇所に戻って確認、開発者ツールでデバッグすることが可能です。
また、CTL を利用すれば、Cypress component testing と E2E testing で全く同じクエリコマンド記法でテストを書く事ができます。
両者の違いといえば、mount(<Todo />); でコンポーネントをマウントしているか、 cy.visit('/todo'); で todo ページを開くかの違いだけです。
このように、CTL、RTL を使えば、Unit testing、Integration testing、E2E testing 横断して同じ様な記法でテストを書くことができます。
おわりに
ここまで見て頂くと Jest と RTL ではなく Cypress component testing と CTL で良いじゃないかと思ってしまいます。
しかし、筆者は Cypress component testing と CTL をざっと触ってみて、以下のデメリットを感じました。
- Cypress component testing はブラウザを立ち上げてからコンポーネントをマウントする為、Jest に比べてテスト実行速度が遅い
- CTL では v6 以降
findByRoleしか用意されていない為、RTL のようにgetByRoleやqueryByRoleを利用した細かいテストが書けない - Cypress の stubbing や mocking は Sion を利用している為、 Jest の spy や mock と記法の差異があり学習コストがかかる
以上のことから、筆者は以下のように使い分けるようにしています。
- 基本は Jest と RTL でコンポーネントテスト(Unit Test/Integration Test)を書く
- 検索機能等で再レンダリング要素が多い画面は、確実にブラウザにコンポーネントがレンダリングされたことを確認する為に CTL でコンポーネントテスト(Integration Test)を書く
- 画面間をまたぐテストは Cypress で E2E テストを書く
UI のテストは Storybook の Snapshot Test や Chromatic の VRT の導入がオススメです。
余談ですが、Cypress 本来の E2E テストはどうしてもテスト実行時間の遅さがネックになる上に、CI 環境ではテストが失敗するケースがある等、環境依存の問題を抱えています。
また、E2E テストは目的や方針によりバックエンドは実 API を利用するのか、モックにするのかでテストの難易度が大分変わります。
E2E テストは壊れやすく、フリーキーなテストになることを前提とする必要があります。
その壊れやすさから、E2E テストをメインにすると徐々にメンテされなくなってしまう可能性があります。
筆者はテスト全体の 7 割は Jest の Unit Test/Integration Test でカバーし、2 割は Cypress component testing の Integration Test、残り 1 割を Cypress の E2E テストで書くように心がけています。
最後に、今回実装した Todo アプリとテストは以下 github にあります。