
Next.jsのISR/SSG/SSRをAWS Amplifyにデプロイして動作させる
筆者は最近 Next.js と AWS Amplify をかじっている Web アプリ開発初心者です。
本ブログでは今後数回に渡って Next.js と Amplify で Web アプリを高速に作れないか検証していこうかと思います。
現在 Amplify は Next.js の ISR/SSG/SSR に対応してます。
最近は AWS Amplify Hosting が Next.js 11 に対応しましたね。
今回は Next.js で実装した検証用の ISR/SSG/SSR アプリを AWS Amplify にデプロイ、ホスティングをして動作検証まで行います。
やらないこと
- ISR / SSG / SSR の仕組みや解説
ISR については Vercel 公式の解説が図解入りで分かりやすかったです。
環境
- macOS Big Sur 11.15.2
- Amplify 5.6.0
- Next.js 11.1.2
- Typescript 4.4.3
Next.js のプロジェクトを作成
以下のコマンドを実行します。
yarn create next-app next-amplify-deploy-sample --typescriptソースコードの編集
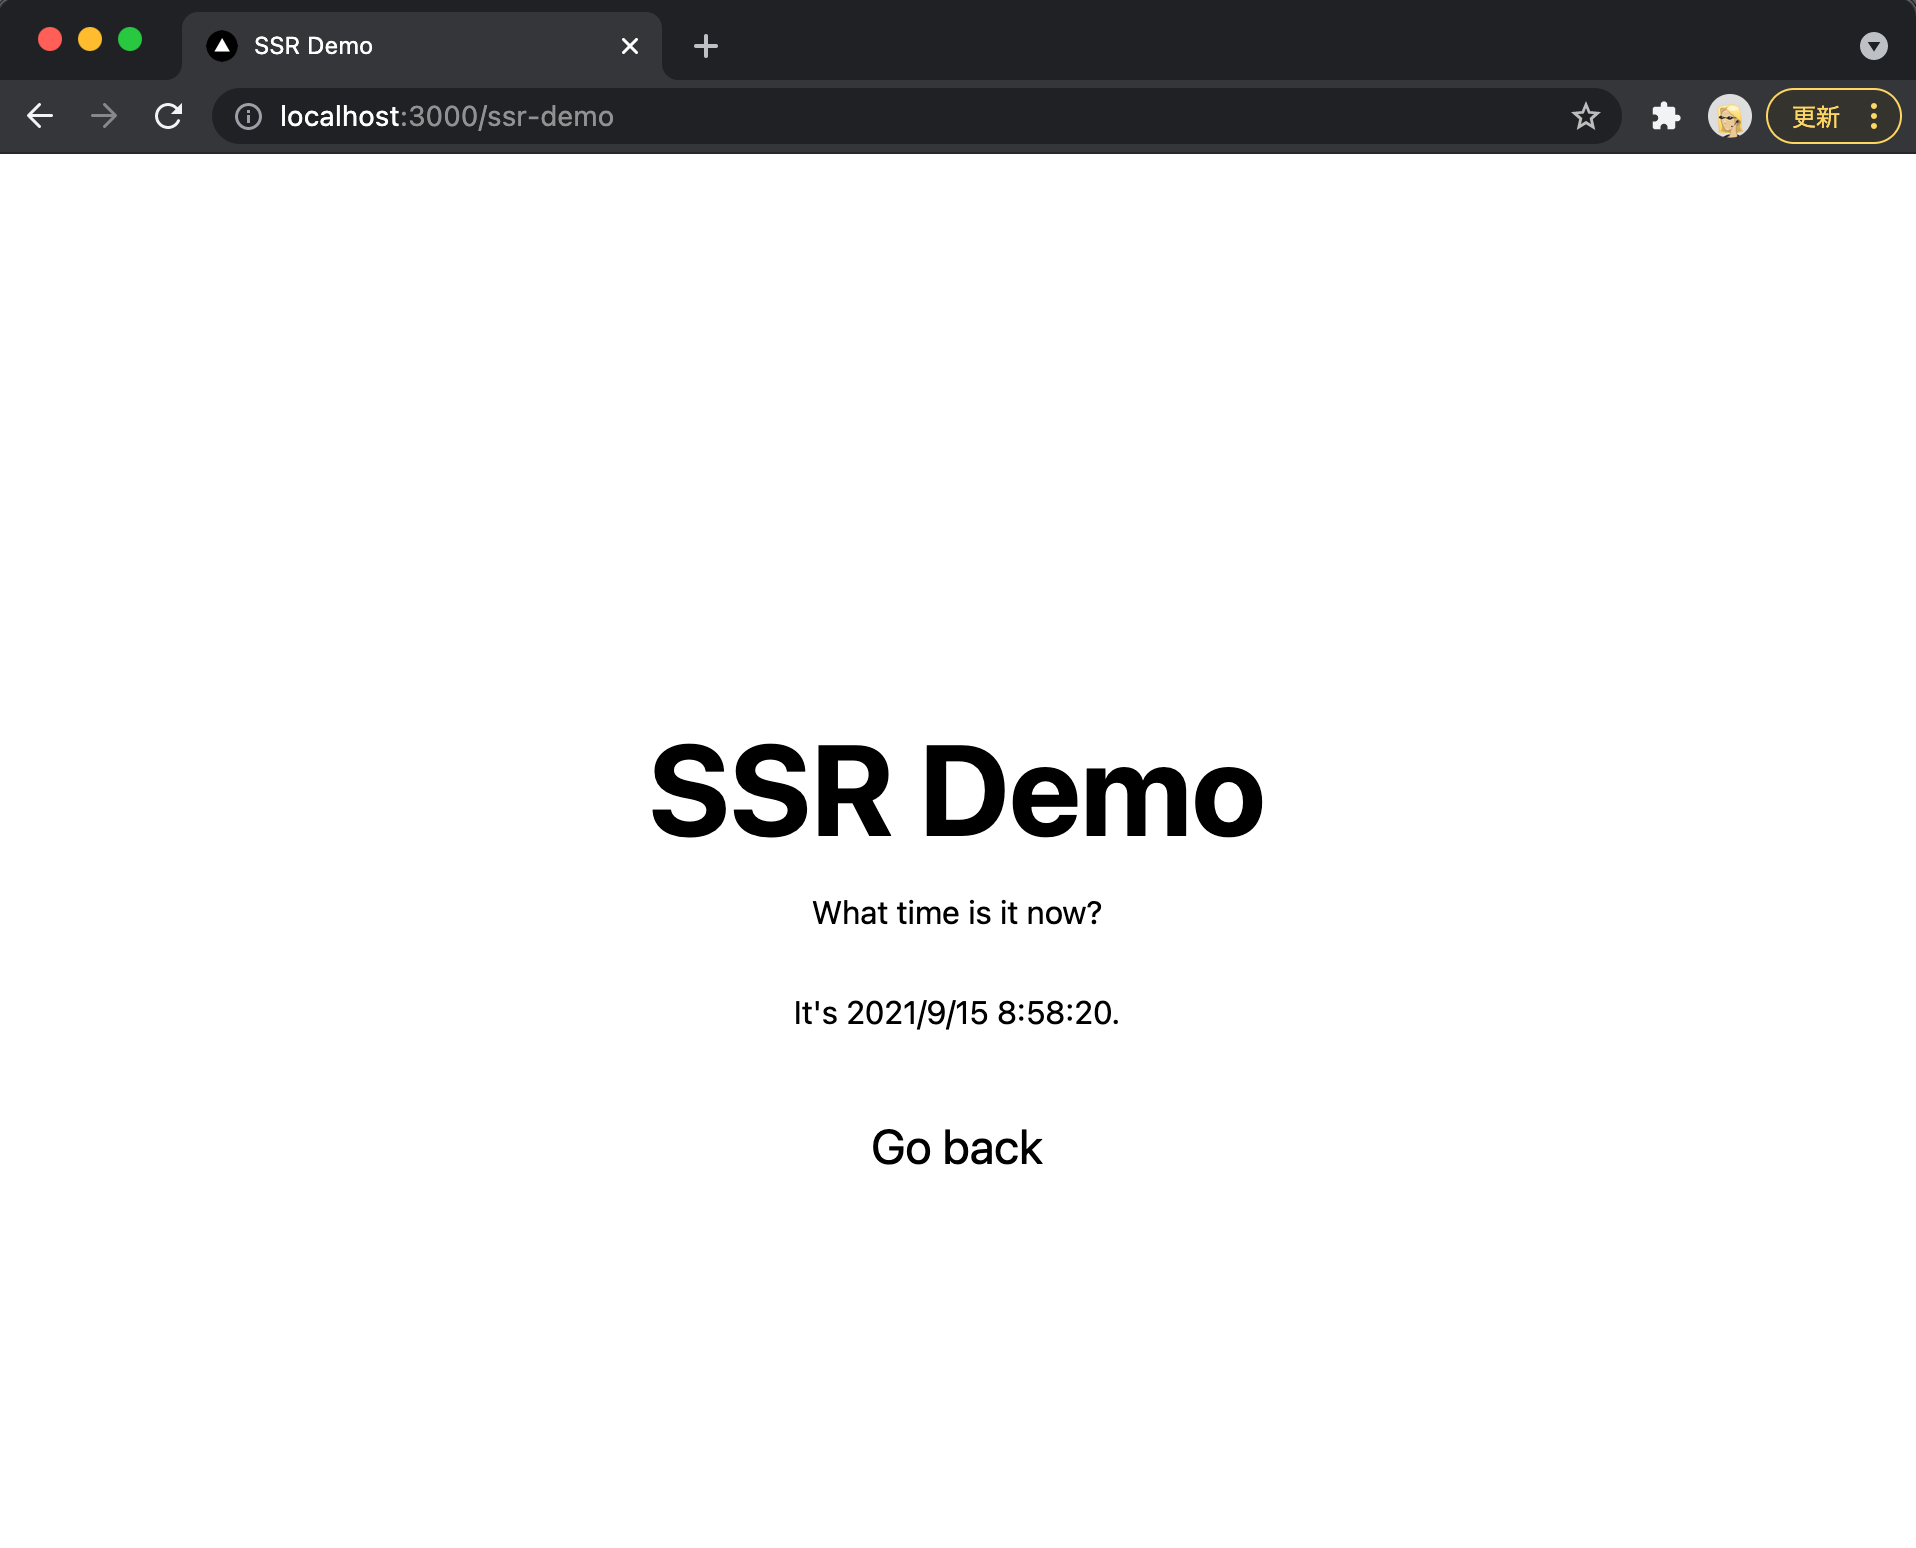
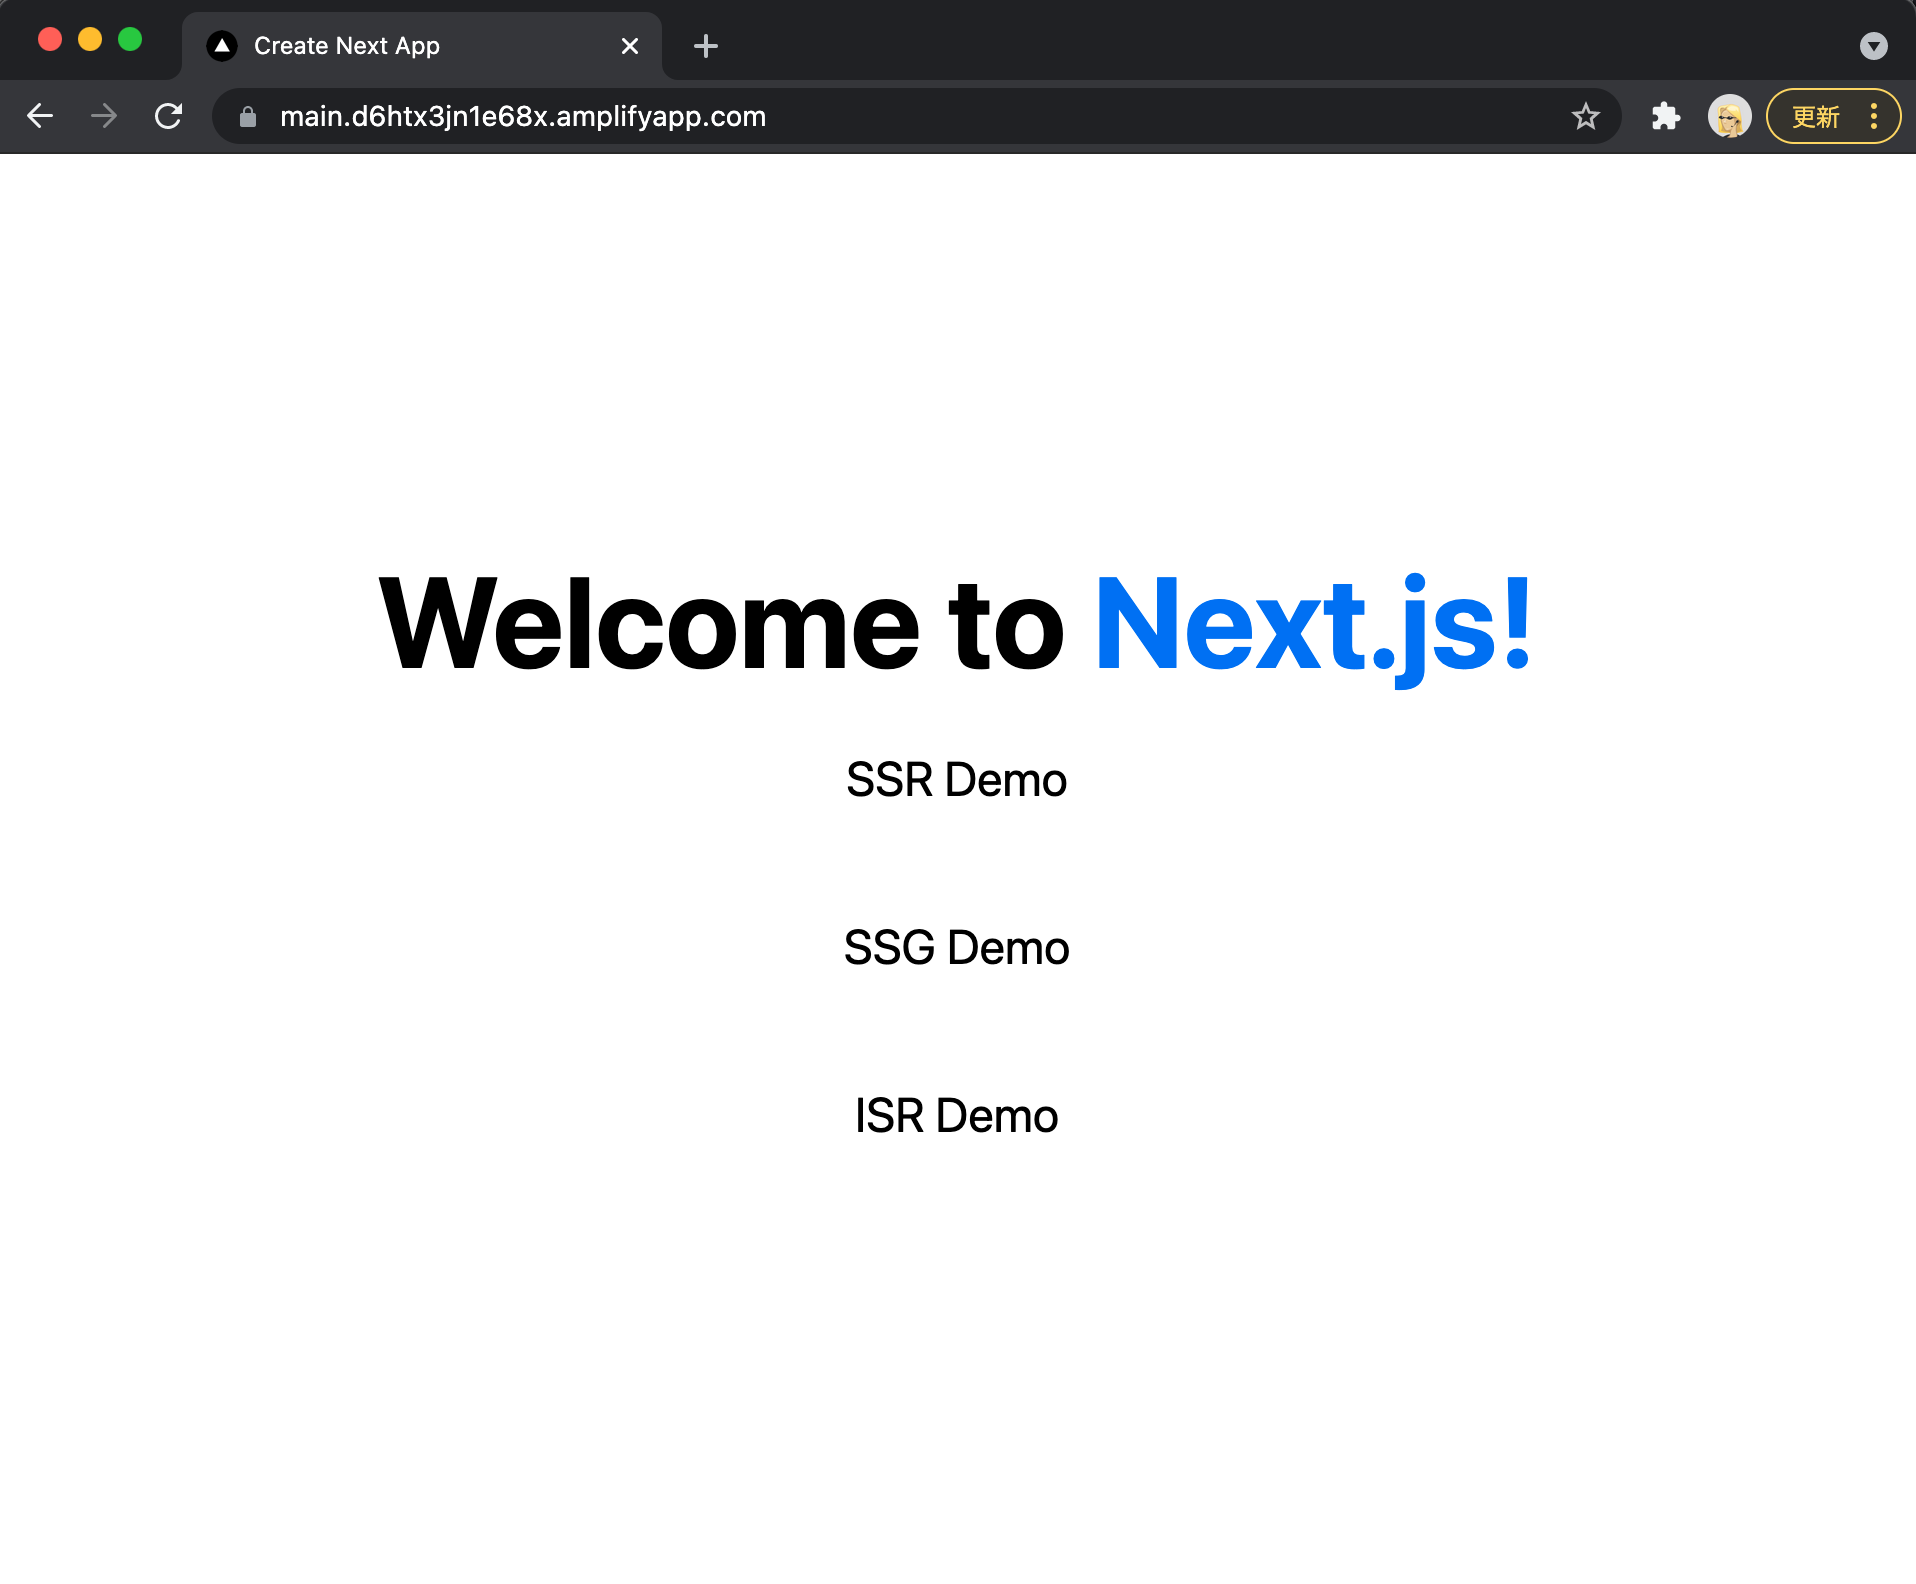
Next.js の ISR、SSG、SSR のデモ画面を作成して index から遷移できるようにします。
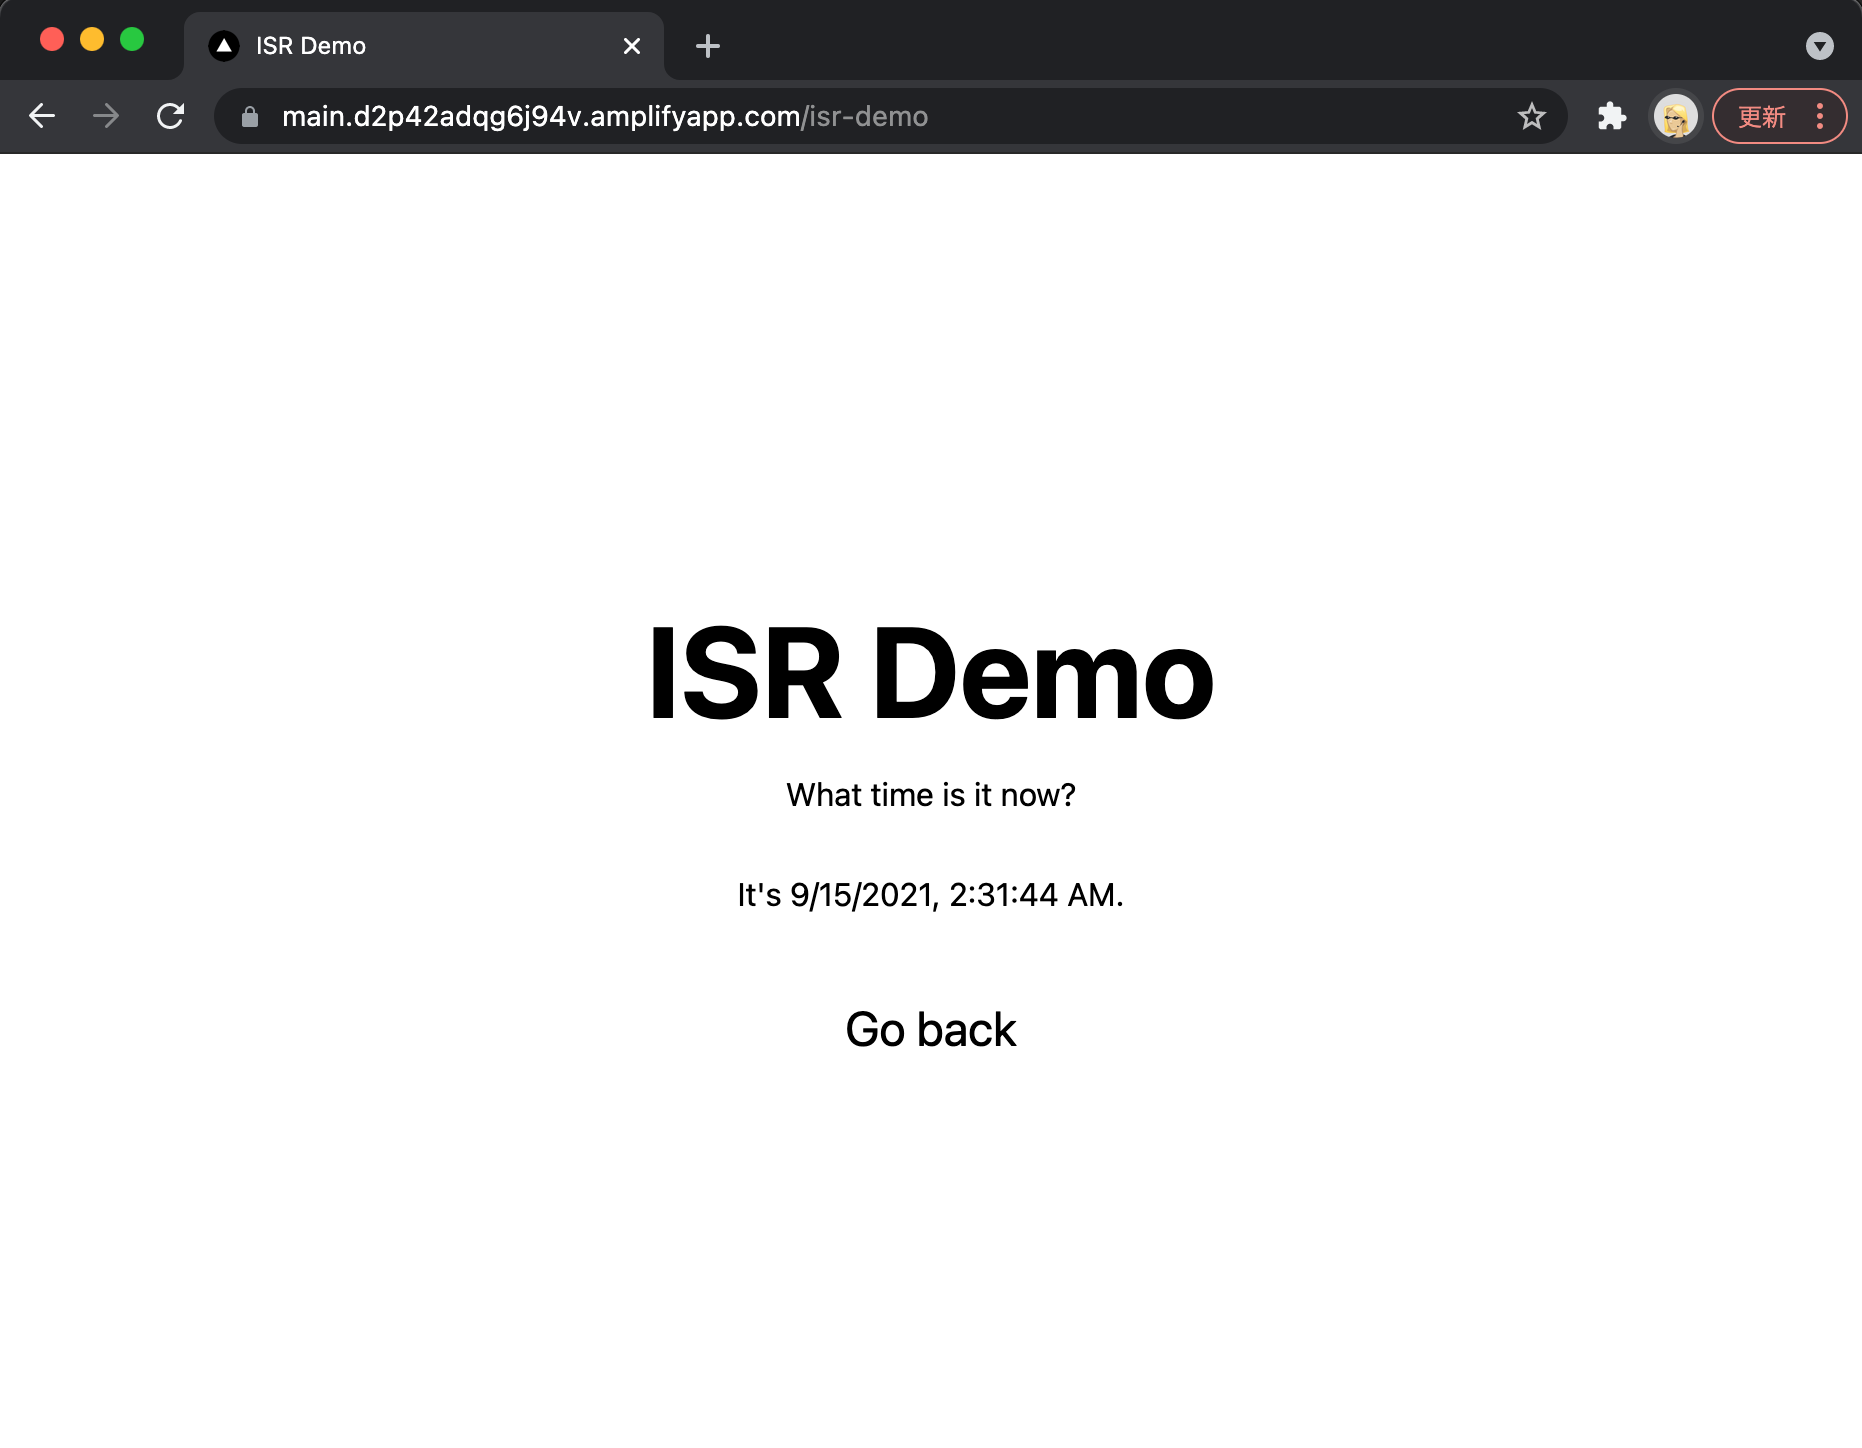
ISR、SSG、SSR の画面はそれぞれ現在時刻を表示するようにしています。
ちなみに今回は検証が目的なので、コンポーネントの共通化などリファクタしていません。
pages/ssr-demo.tsx
まず SSR 画面の実装です。 getServerSideProps を利用します。
import Head from 'next/head';
import styles from '../styles/Home.module.css';
import { GetServerSideProps } from 'next';
import Link from 'next/link';
type Props = { nowDate: string; pageTitle: string };
export default function SSRDemo(props: Props) {
return (
<div className={styles.container}>
<Head>
<title>{props.pageTitle}</title>
<meta name='description' content='Generated by create next app' />
<link rel='icon' href='/favicon.ico' />
</Head>
<main className={styles.main}>
<h2 className={styles.title}>{props.pageTitle}</h2>
<p>What time is it now?</p>
<p>It's {props.nowDate}.</p>
<p className={styles.description}>
<Link href={'/'}>
<a>Go back</a>
</Link>
</p>
</main>
</div>
);
}
export const getServerSideProps: GetServerSideProps<Props> = async (context) => {
return {
props: {
nowDate: new Date().toLocaleString(),
pageTitle: 'SSR Demo',
},
};
};pages/ssg-demo.tsx
SSG 画面の実装です。 getStaticProps を利用します。
ビルド時に外部データ(今回は現在時刻)を取得し静的 HTML を生成します。
import Head from 'next/head';
import styles from '../styles/Home.module.css';
import { GetStaticProps } from 'next';
import Link from 'next/link';
type Props = { nowDate: string; pageTitle: string };
export default function SSGDemo(props: Props) {
return (
<div className={styles.container}>
<Head>
<title>{props.pageTitle}</title>
<meta name='description' content='Generated by create next app' />
<link rel='icon' href='/favicon.ico' />
</Head>
<main className={styles.main}>
<h2 className={styles.title}>{props.pageTitle}</h2>
<p>What time is it now?</p>
<p>It's {props.nowDate}.</p>
<p className={styles.description}>
<Link href={'/'}>
<a>Go back</a>
</Link>
</p>
</main>
</div>
);
}
export const getStaticProps: GetStaticProps<Props> = async (context) => {
return {
props: {
nowDate: new Date().toLocaleString(),
pageTitle: 'SSG Demo',
},
};
};pages/isr-demo.tsx
ISR 画面の実装です。 getStaticProps を利用します。
getStaticProps の戻り値の revalidate は 5 秒に設定します。
revalidate 設定をすると、サーバの動きとして初回リクエストから 5 秒間はキャッシュを返します。
5 秒後にリクエストがあった場合キャッシュを返し、裏で外部データ(今回は現在時刻)を取得し HTML を再生成〜キャッシュを行います。
import Head from 'next/head';
import styles from '../styles/Home.module.css';
import { GetStaticProps } from 'next';
import Link from 'next/link';
type Props = { nowDate: string; pageTitle: string };
export default function ISRDemo(props: Props) {
return (
<div className={styles.container}>
<Head>
<title>{props.pageTitle}</title>
<meta name='description' content='Generated by create next app' />
<link rel='icon' href='/favicon.ico' />
</Head>
<main className={styles.main}>
<h2 className={styles.title}>{props.pageTitle}</h2>
<p>What time is it now?</p>
<p>It's {props.nowDate}.</p>
<p className={styles.description}>
<Link href={'/'}>
<a>Go back</a>
</Link>
</p>
</main>
</div>
);
}
export const getStaticProps: GetStaticProps<Props> = async (context) => {
return {
props: {
nowDate: new Date().toLocaleString(),
pageTitle: 'ISR Demo',
},
revalidate: 5, // ISR settings
};
};pages/index.tsx
index にそれぞれの画面リンクを実装します。
import type { NextPage } from 'next';
import Head from 'next/head';
import styles from '../styles/Home.module.css';
import Link from 'next/link';

const Home: NextPage = () => {
  return (
    <div className={styles.container}>
      <Head>
        <title>Create Next App</title>
        <meta name='description' content='Generated by create next app' />
        <link rel='icon' href='/favicon.ico' />
      </Head>

      <main className={styles.main}>
        <h1 className={styles.title}>
          Welcome to <a href='https://nextjs.org'>Next.js!</a>
        </h1>

        <p className={styles.description}>
          <Link href={'/ssr-demo'}>
            <a>SSR Demo</a>
          </Link>
        </p>

        <p className={styles.description}>
          <Link href={'/ssg-demo'}>
            <a>SSG Demo</a>
          </Link>
        </p>

        <p className={styles.description}>
          <Link href={'/isr-demo'}>
            <a>ISR Demo</a>
          </Link>
        </p>
      </main>

      <footer className={styles.footer}>
        <a
          href='https://vercel.com?utm_source=create-next-app&utm_medium=default-template&utm_campaign=create-next-app'
          target='_blank'
          rel='noopener noreferrer'
        ></a>
      </footer>
    </div>
  );
};

export default Home;
ローカルで動作確認
デプロイ前に ISR、SSG、SSR 画面の動作確認をローカルで行います。
yarn dev コマンドの開発モードで実行すると ISR 画面でリロード時すると都度時刻が更新されてしまうので、yarn build/start の本番モードで実行します。
yarn build
yarn start
localhost:3000 にアクセスして ISR、SSG、SSR 画面でそれぞれ画面リロードを数回行ってください。
SSR 画面は都度現在時刻が表示され、SSG 画面は時刻が変化せず、ISR 画面 は 5 秒毎時刻が変更されることを確認してください。
Github にアップロード
Amplify にデプロイする際に Github からソースを取得する為、一度 Github にソースをデプロイします。
事前に Github に next-amplify-deploy-sample リポジトリを作成します。
リポジトリは public でも private でも構いません。
次に以下 git コマンドで Github に push します。
cd next-amplify-deploy-sample
git remote add origin git@github.com:{your git hub account}/next-amplify-deploy-sample.git
git push origin main
本来、git-flow などで develop branch を用意するべきなのですが、今回は簡略化して進めます。
Amplify CLI のインストール
以下のコマンドを実行します。
npm install -g @aws-amplify/cliAmplify IAM ユーザの作成
Amplify 用の IAM ユーザーを作成します。
amplify configure コマンドを実行すると簡単に IAM ユーザーを作成できます。
amplify configure については以前の記事で解説しているので参照ください。
Amplify 環境の作成
amplify init コマンドで Amplify 環境を作成します。
amplify initamplify init コマンドを実行して、Amplify プロジェクト名を入力してください。
$ amplify init
Note: It is recommended to run this command from the root of your app directory
? Enter a name for the project nextamplifysample (Amplifyプロジェクト名)
The following configuration will be applied:
次に、Amplify のレコメンド設定を使うか選択します。
Distribution Directory Path を変更するので、n を入力してください。
Project information
| Name: nextamplifysample
| Environment: dev
| Default editor: Visual Studio Code
| App type: javascript
| Javascript framework: react
| Source Directory Path: src
| Distribution Directory Path: build
| Build Command: npm run-script build
| Start Command: npm run-script start

? Initialize the project with the above configuration? (Y/n)
Distribution Directory Path に .next を入力してください。
その他の項目はデフォルトで進めます。
? Initialize the project with the above configuration? No
? Enter a name for the environment dev
? Choose your default editor: Visual Studio Code
? Choose the type of app that you're building javascript
Please tell us about your project
? What javascript framework are you using react
? Source Directory Path:  src
? Distribution Directory Path: .next   (.nextを入力)
? Build Command:  npm run-script build
? Start Command: npm run-script start
Distribution Directory Path を .next とすると、amplify.yml の baseDirectory が.next となります。
詳しくは Amplify console guide line の Amplify build settings を参照ください。
最後に使用する AWS Profiles を選択します。
ここでは amplify configure を実行した時に作成した profile を選択します。
For more information on AWS Profiles, see:
https://docs.aws.amazon.com/cli/latest/userguide/cli-configure-profiles.html

? Please choose the profile you want to use amplify-cli-zuma-user
profile を選択し Enter を押して Initialized your environment successfully. が表示されれば amplify init は完了です。
Amplify Hosting を追加する
Amplify CLI コマンドを実行して Next.js をデプロイする CloudFront を作成します。
以下のコマンドを実行してください。
amplify add hostingコマンドを実行し、最初の設問は Select the plugin module to execute を選択します。
$ amplify add hosting
? Select the plugin module to execute (Use arrow keys)
❯ Hosting with Amplify Console (Managed hosting with custom domains, Continuous deployment)
  Amazon CloudFront and S3
次の設問は Continuous deployment を選択してください。
? Choose a type
❯ Continuous deployment (Git-based deployments)
  Manual deployment
  Learn more
以下回答と共にブラウザが起動します。
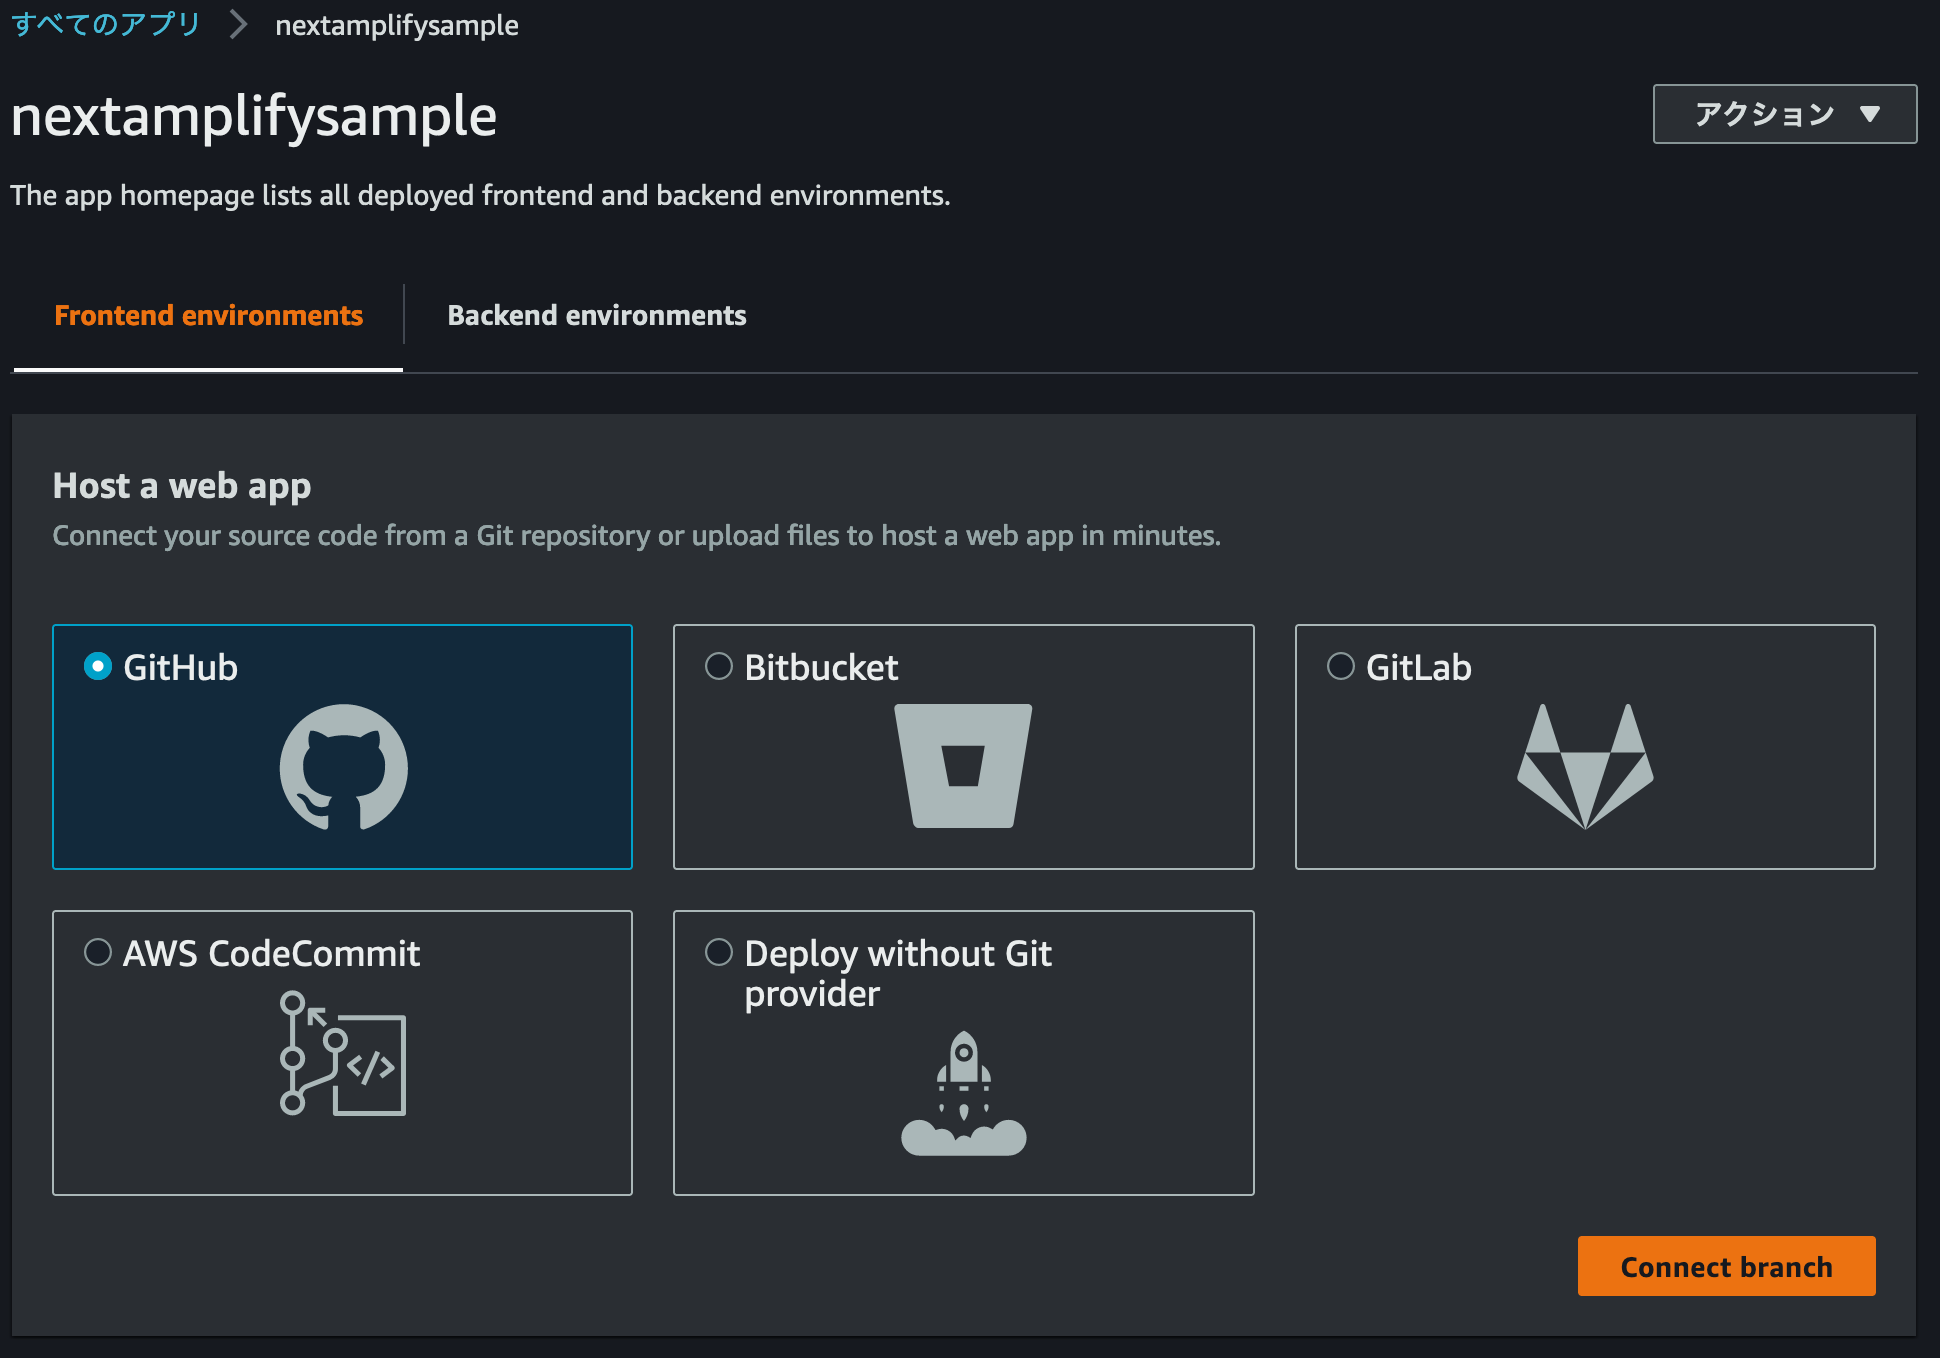
? Continuous deployment is configured in the Amplify Console. Please hit enter once you connect your repositoryAWS コンソール画面が立ち上がるので、Frontend environment から先程 push した Github リポジトリと連携する為、Github を選択し Connect branch ボタンを押下します。
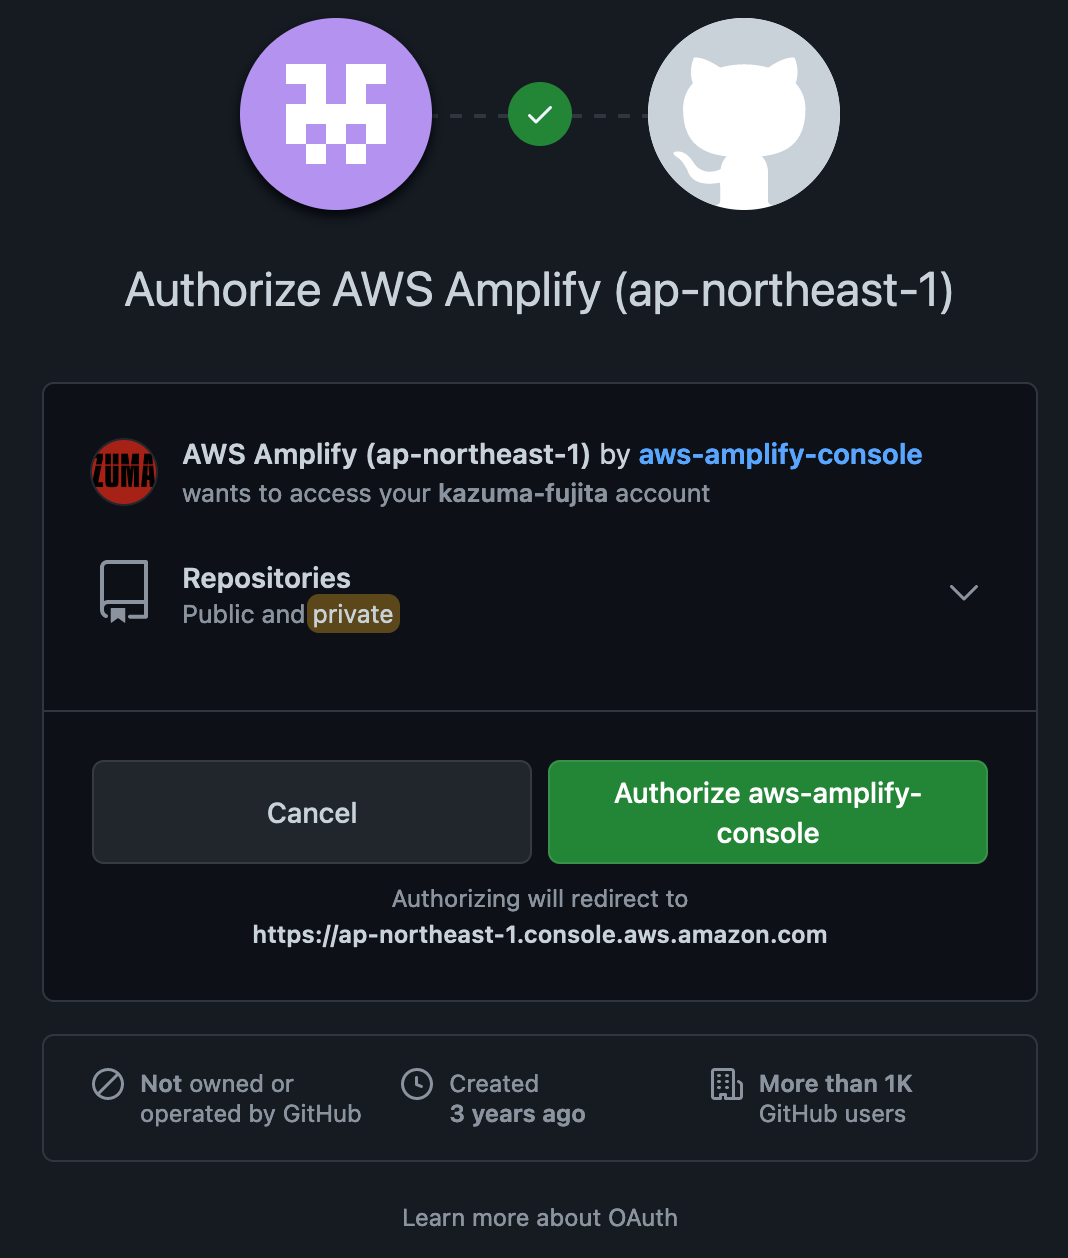
Github の Authorize AWS Amplify 画面になるので、Authorize aws-amplify-console ボタンを押下します。
Amplify コンソールに戻り「GitHub 認証が成功しました。」と表示されていることを確認します。
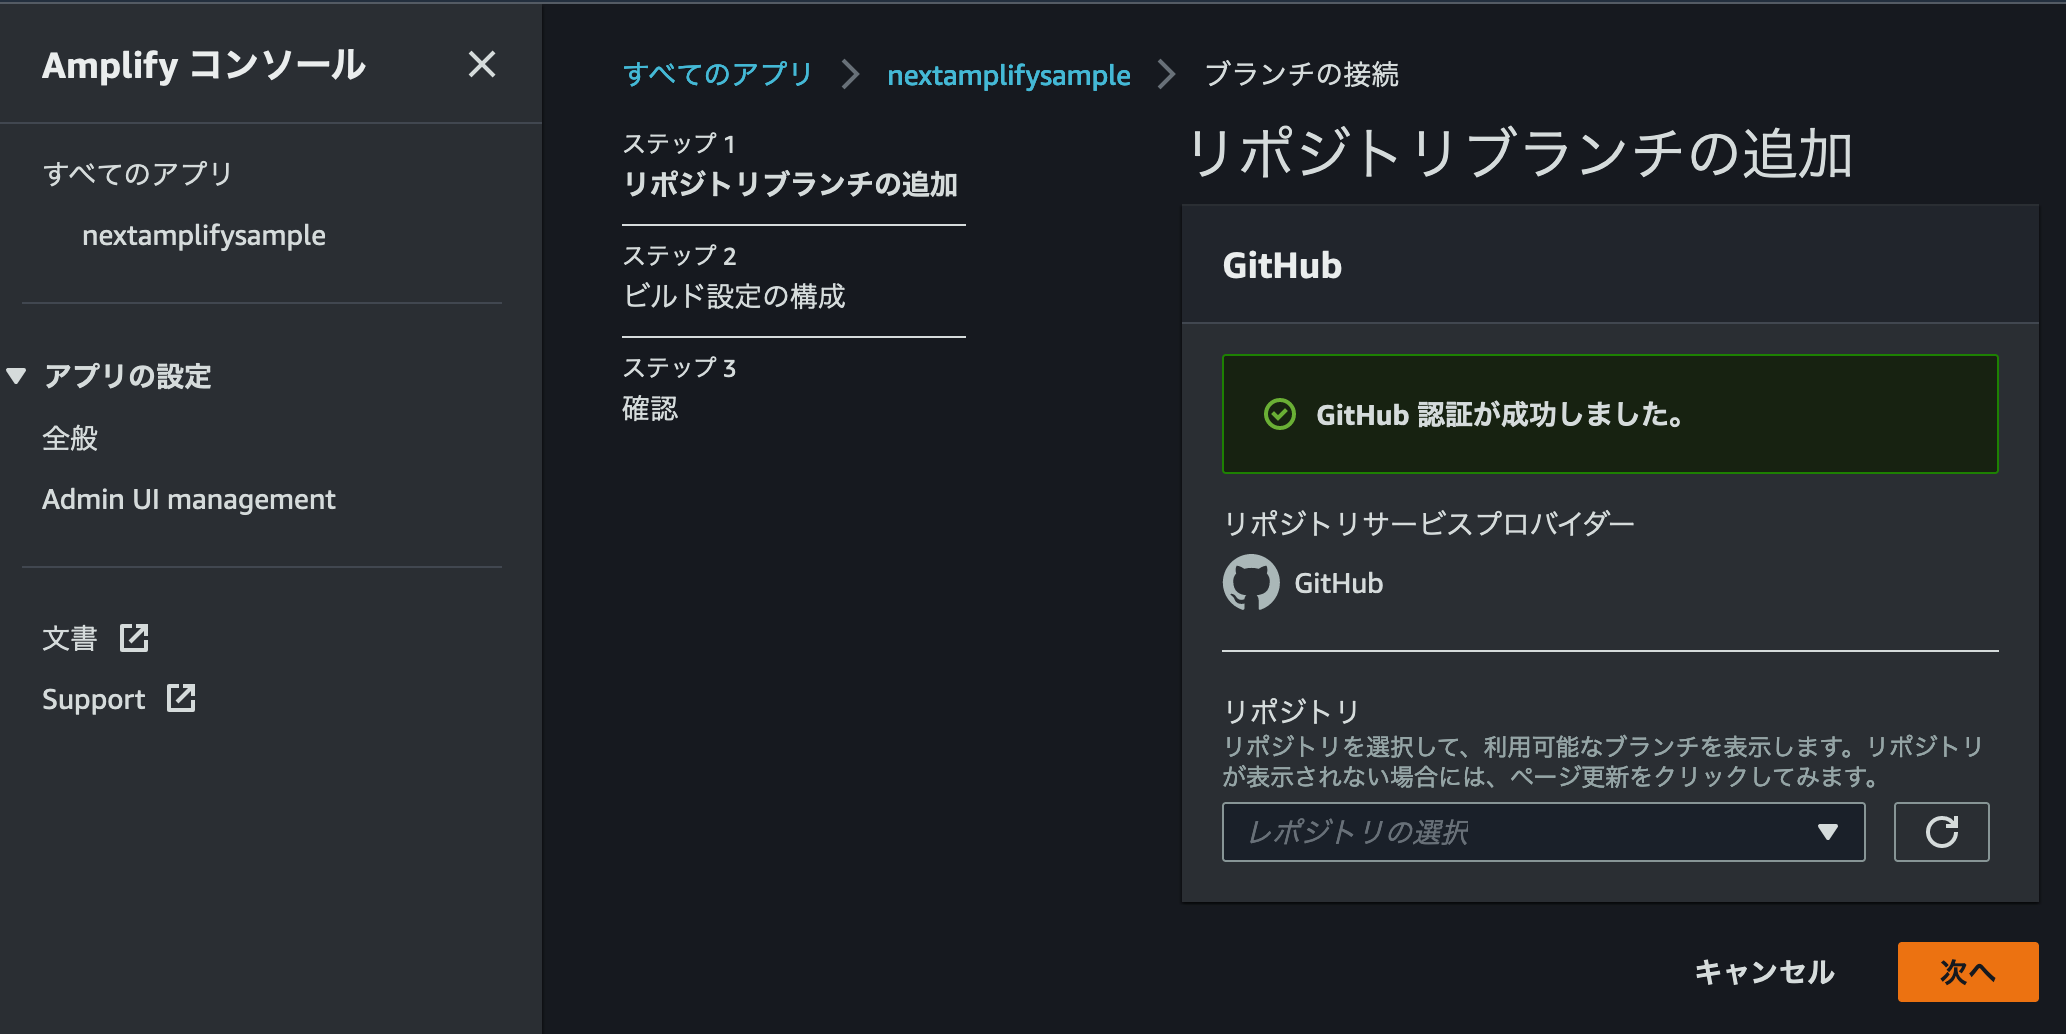
次に Amplify と連携するリポジトリとブランチを選択して 次へ ボタンを押下します。
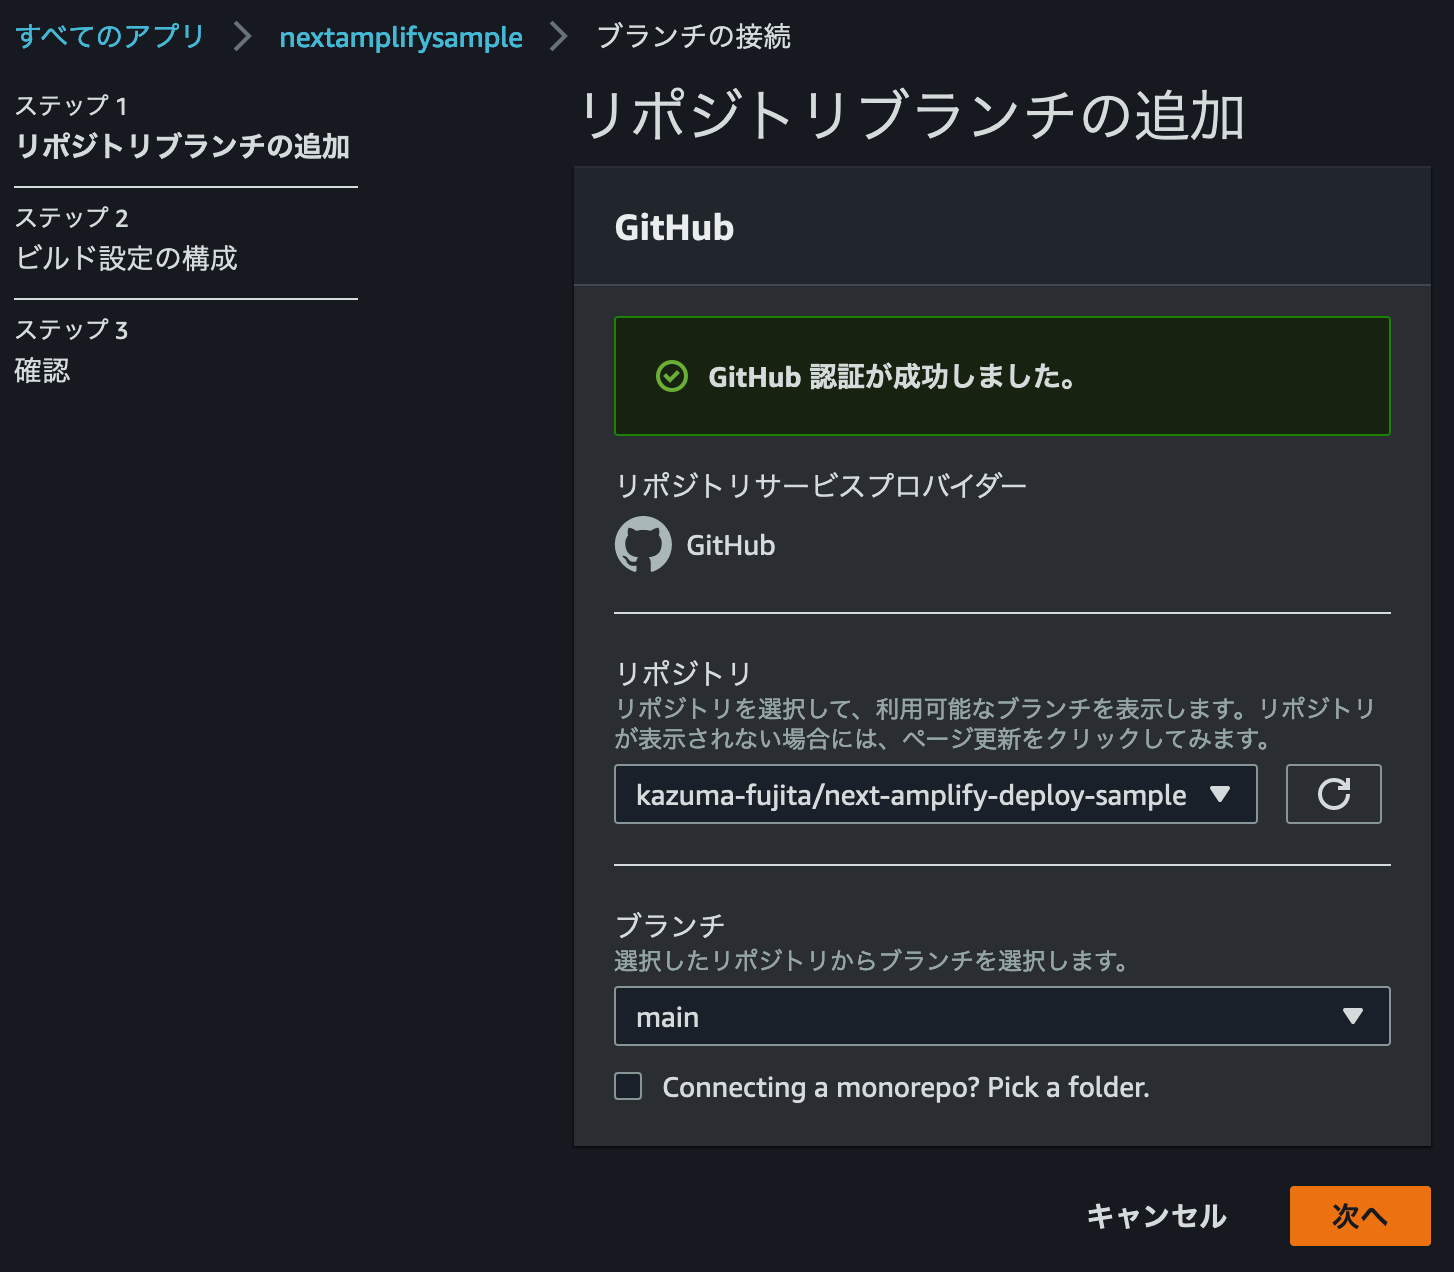
App name はデフォルトのままで OK で、 Environment は dev を選択します。
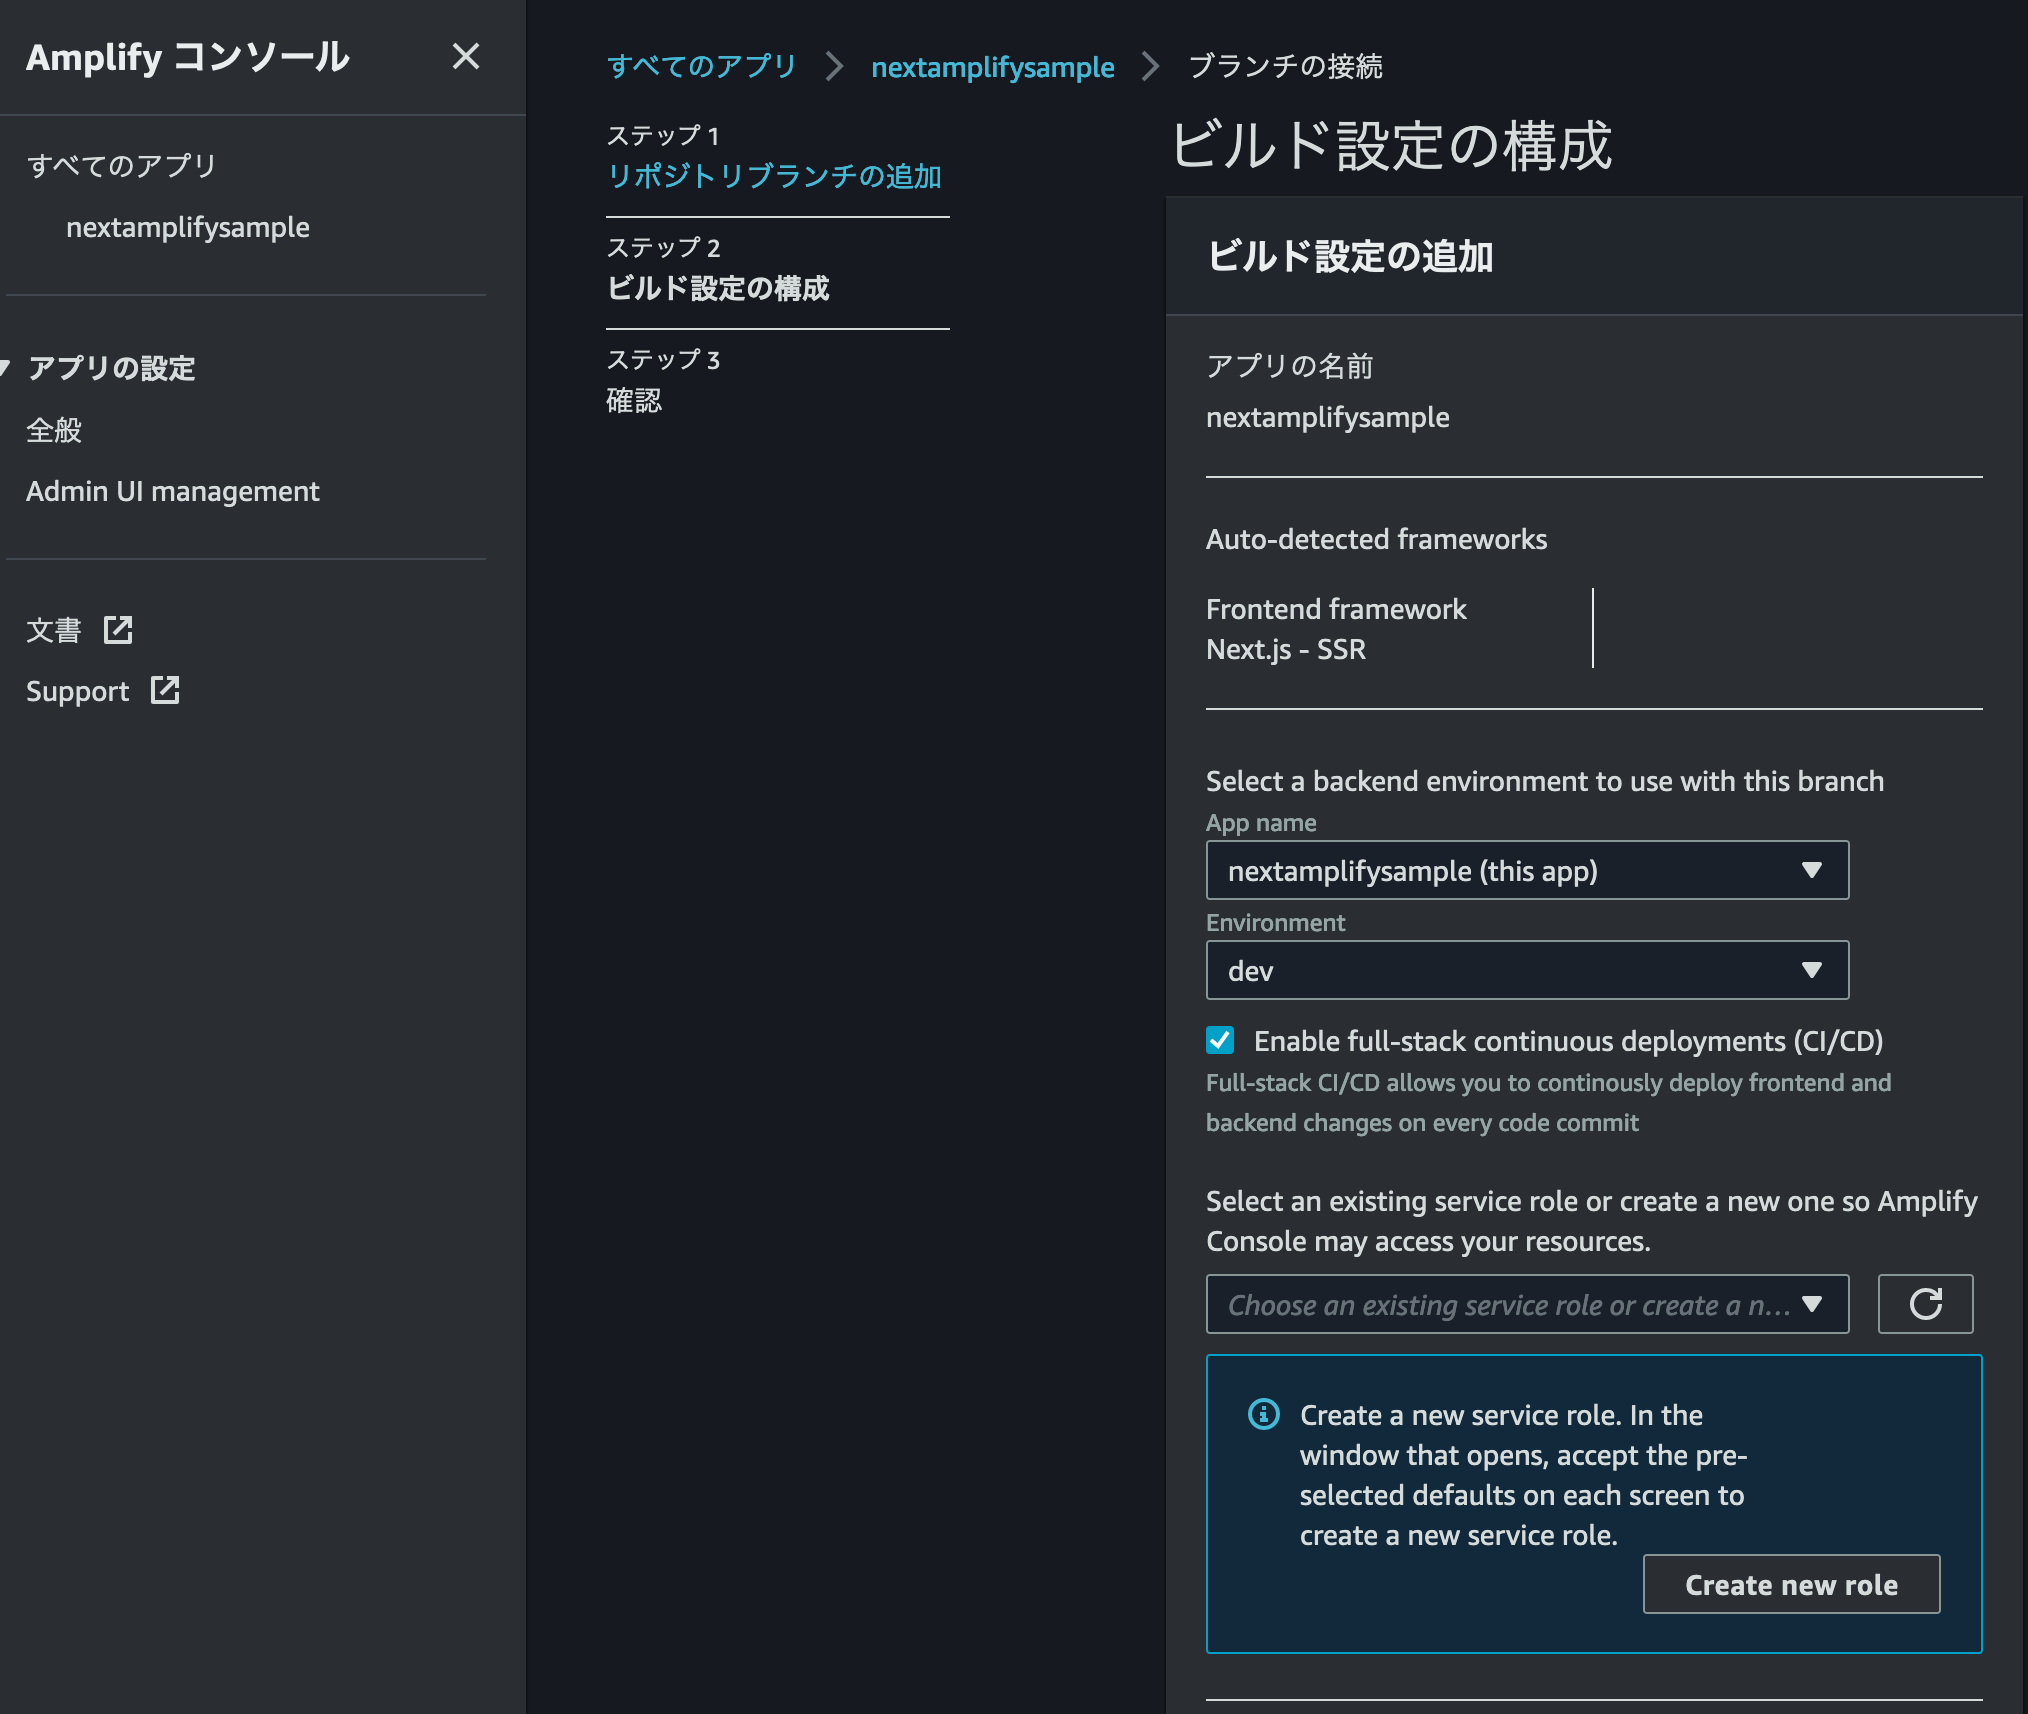
まだ Amplify 用の Service role が無いので、 Create new role ボタン押下して Service role を作成します。
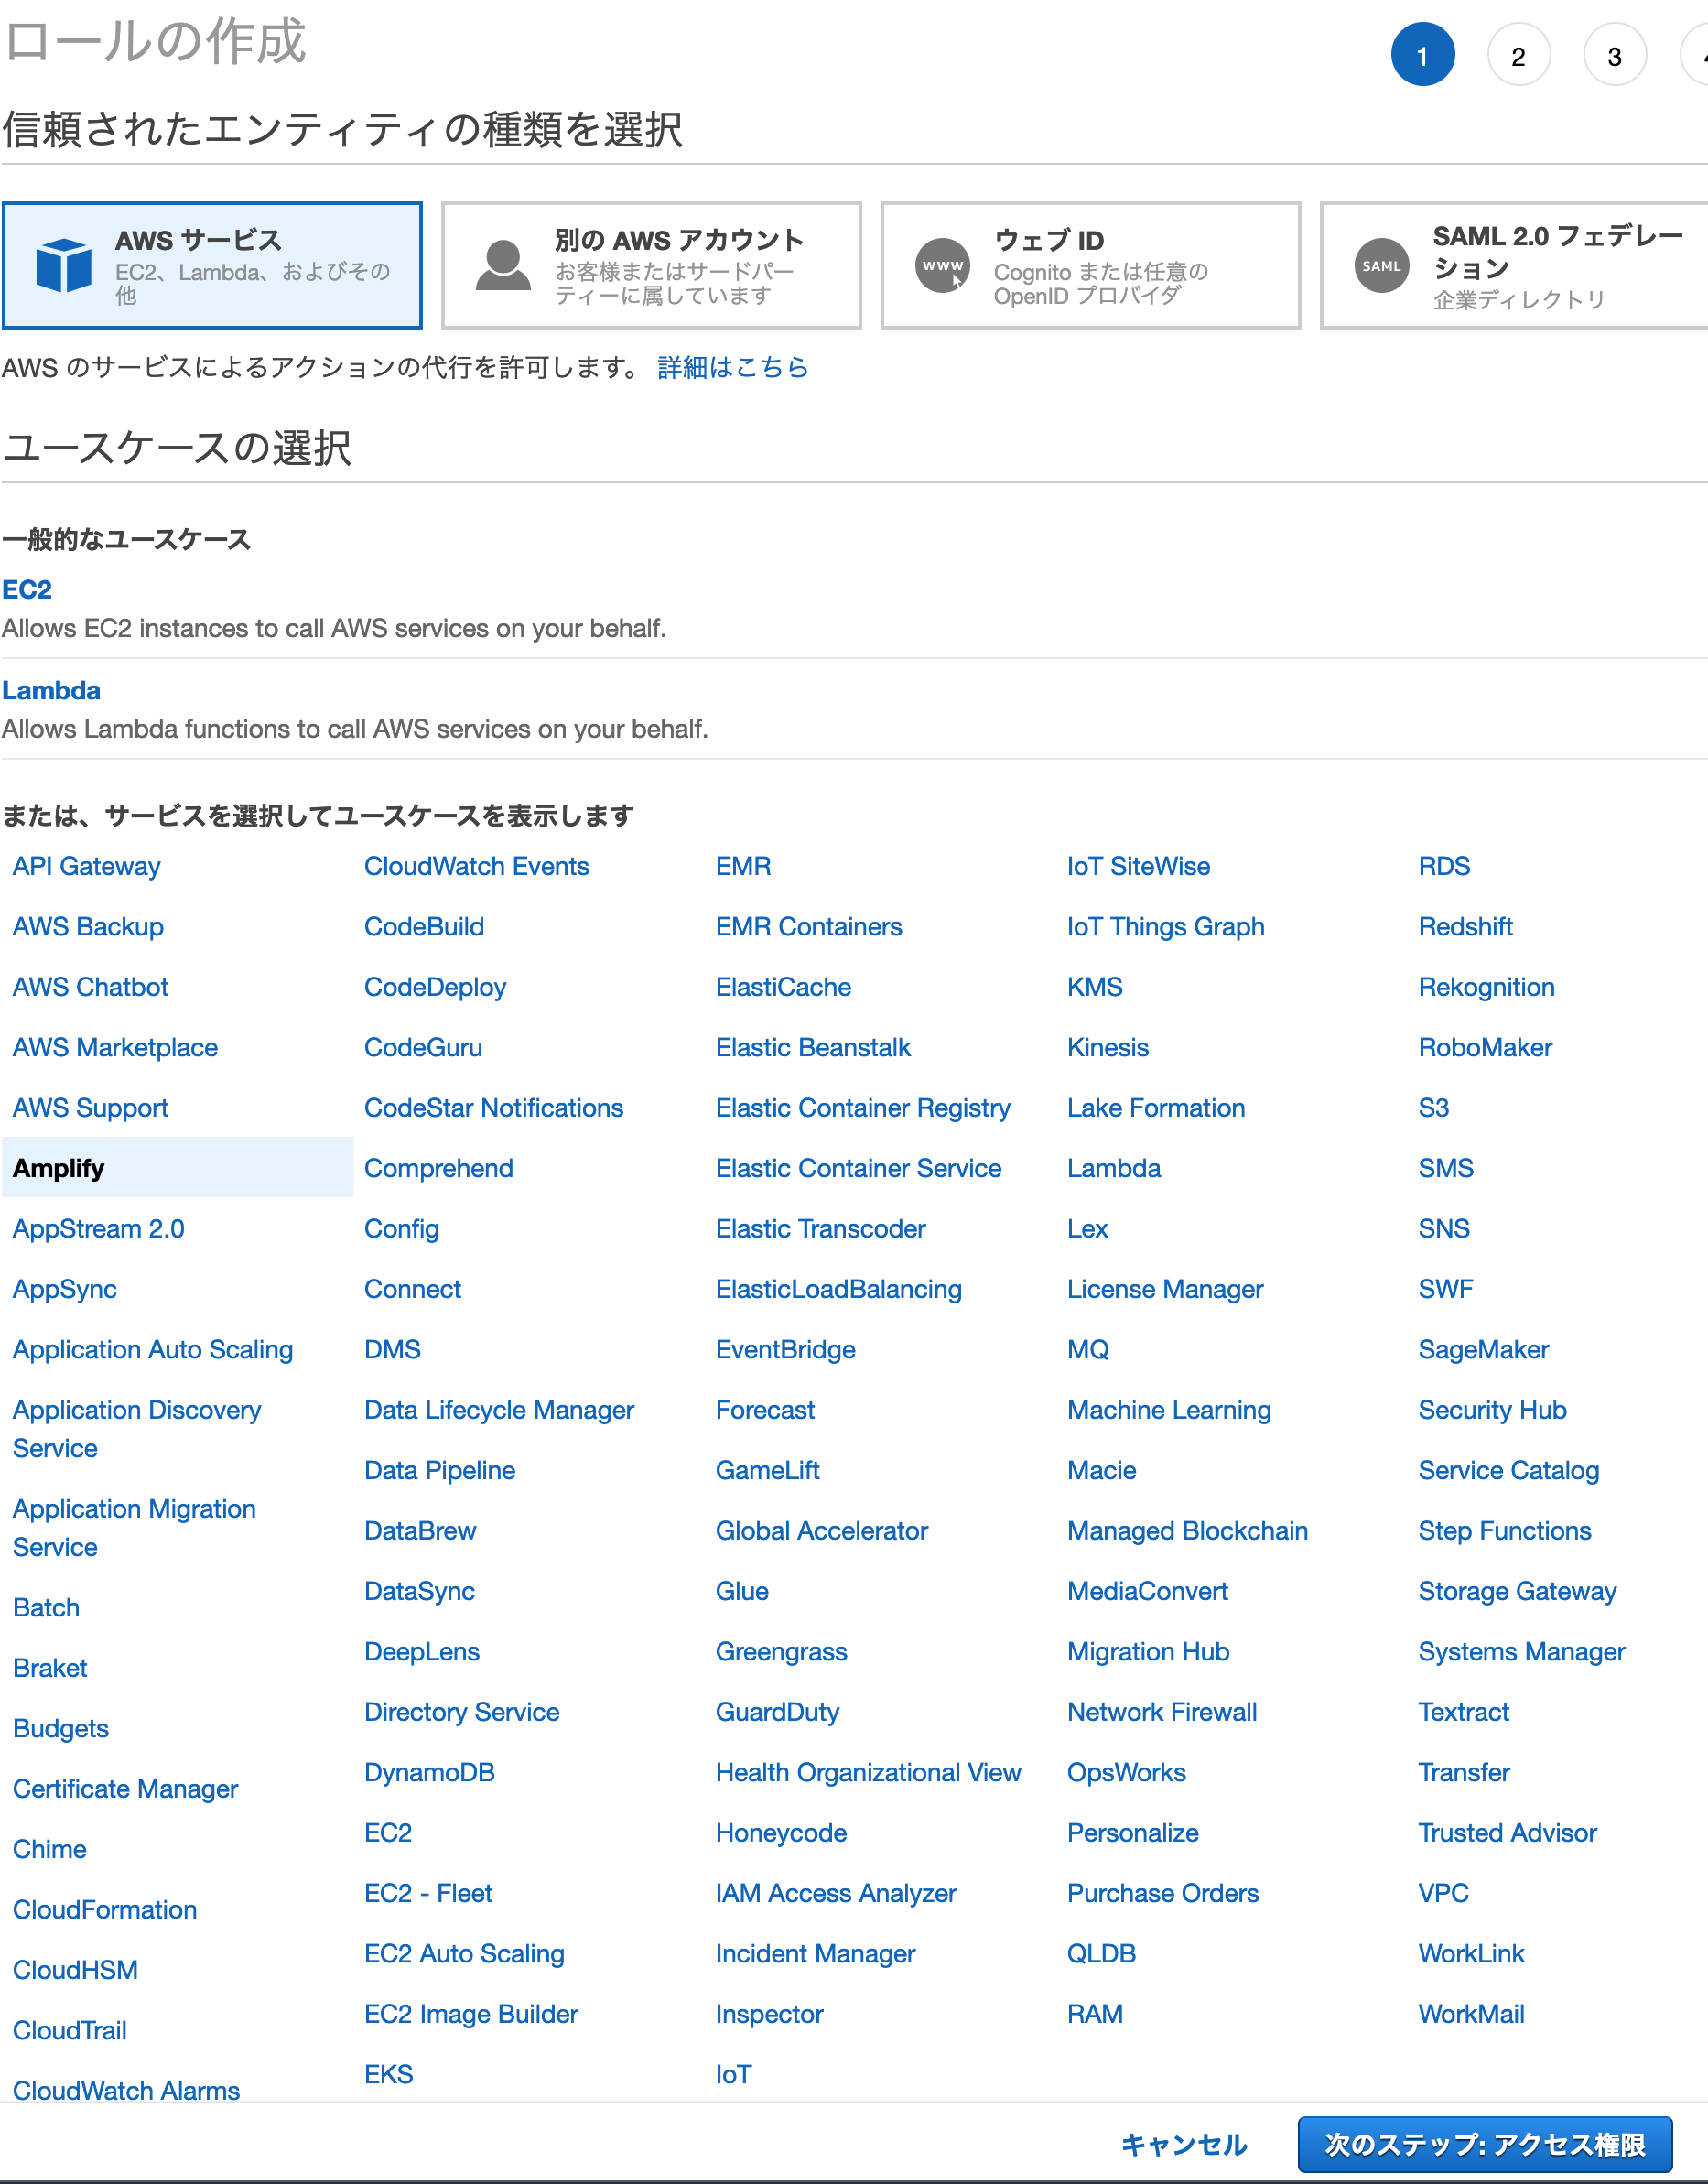
別タブで IAM Management Console が立ち上がります。
ユースケースは Amplify が選択されているので、そのままの設定で 次のステップ: アクセス権限 ボタンを押下します。
アクセス権限ポリシーは AdministratorAccess-Amplify が設定されているので、 次のステップ: タグ ボタンを押下します。
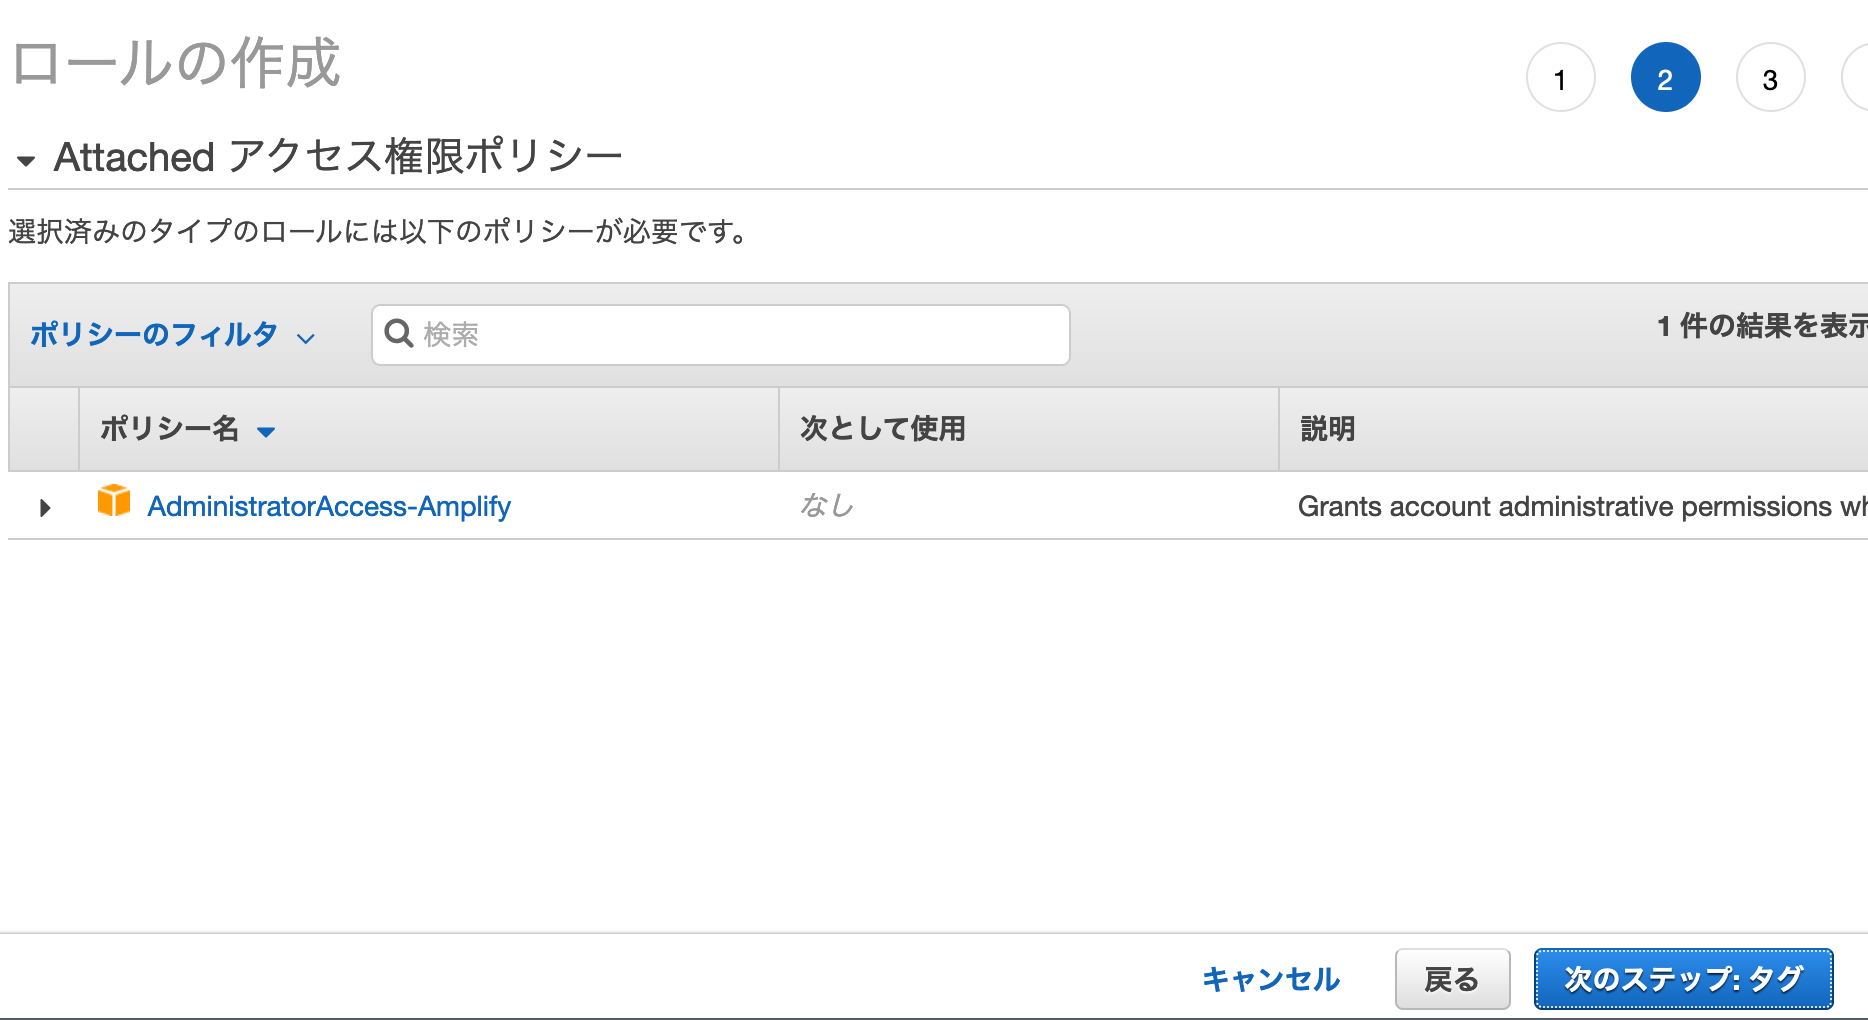
一点、この権限だけではデプロイ時に以下 AccessDenied エラーが発生します。
2021-09-14T01:52:54.002Z [INFO]: Starting SSR Build...
2021-09-14T01:55:06.580Z [ERROR]: AccessDenied: Access Denied
                                  at Request.extractError (/root/.//node_modules/aws-sdk/lib/services/s3.js:714:35)
                                  at Request.callListeners (/root/.//node_modules/aws-sdk/lib/sequential_executor.js:106:20)
                                  at Request.emit (/root/.//node_modules/aws-sdk/lib/sequential_executor.js:78:10)
                                  at Request.emit (/root/.//node_modules/aws-sdk/lib/request.js:688:14)
                                  at Request.transition (/root/.//node_modules/aws-sdk/lib/request.js:22:10)
                                  at AcceptorStateMachine.runTo (/root/.//node_modules/aws-sdk/lib/state_machine.js:14:12)
                                  at /root/.//node_modules/aws-sdk/lib/state_machine.js:26:10
                                  at Request.<anonymous> (/root/.//node_modules/aws-sdk/lib/request.js:38:9)
                                  at Request.<anonymous> (/root/.//node_modules/aws-sdk/lib/request.js:690:12)
                                  at Request.callListeners (/root/.//node_modules/aws-sdk/lib/sequential_executor.js:116:18) {
                                  code: 'AccessDenied',
                                  region: null,
                                  time: 2021-09-14T01:55:06.099Z,
                                  requestId: '81FQNS87NP9PKW5B',
                                  extendedRequestId: 'wSHTPqc9dKHP9f0NIsdJqlkAqmOnOWkynaT0JFcXCLgp/unh4q0Cxabyz68gEK4IWAqbBxx/D3o=',
                                  cfId: undefined,
                                  statusCode: 403,
                                  retryable: false,
                                  retryDelay: 87.40817592478093
                                  }
Terminating logging...
これを回避する為に、後述する role を作成後更に権限を付与する作業をします。
次にタグの追加は適宜行ってください。 次のステップ: 確認 ボタンを押下します。
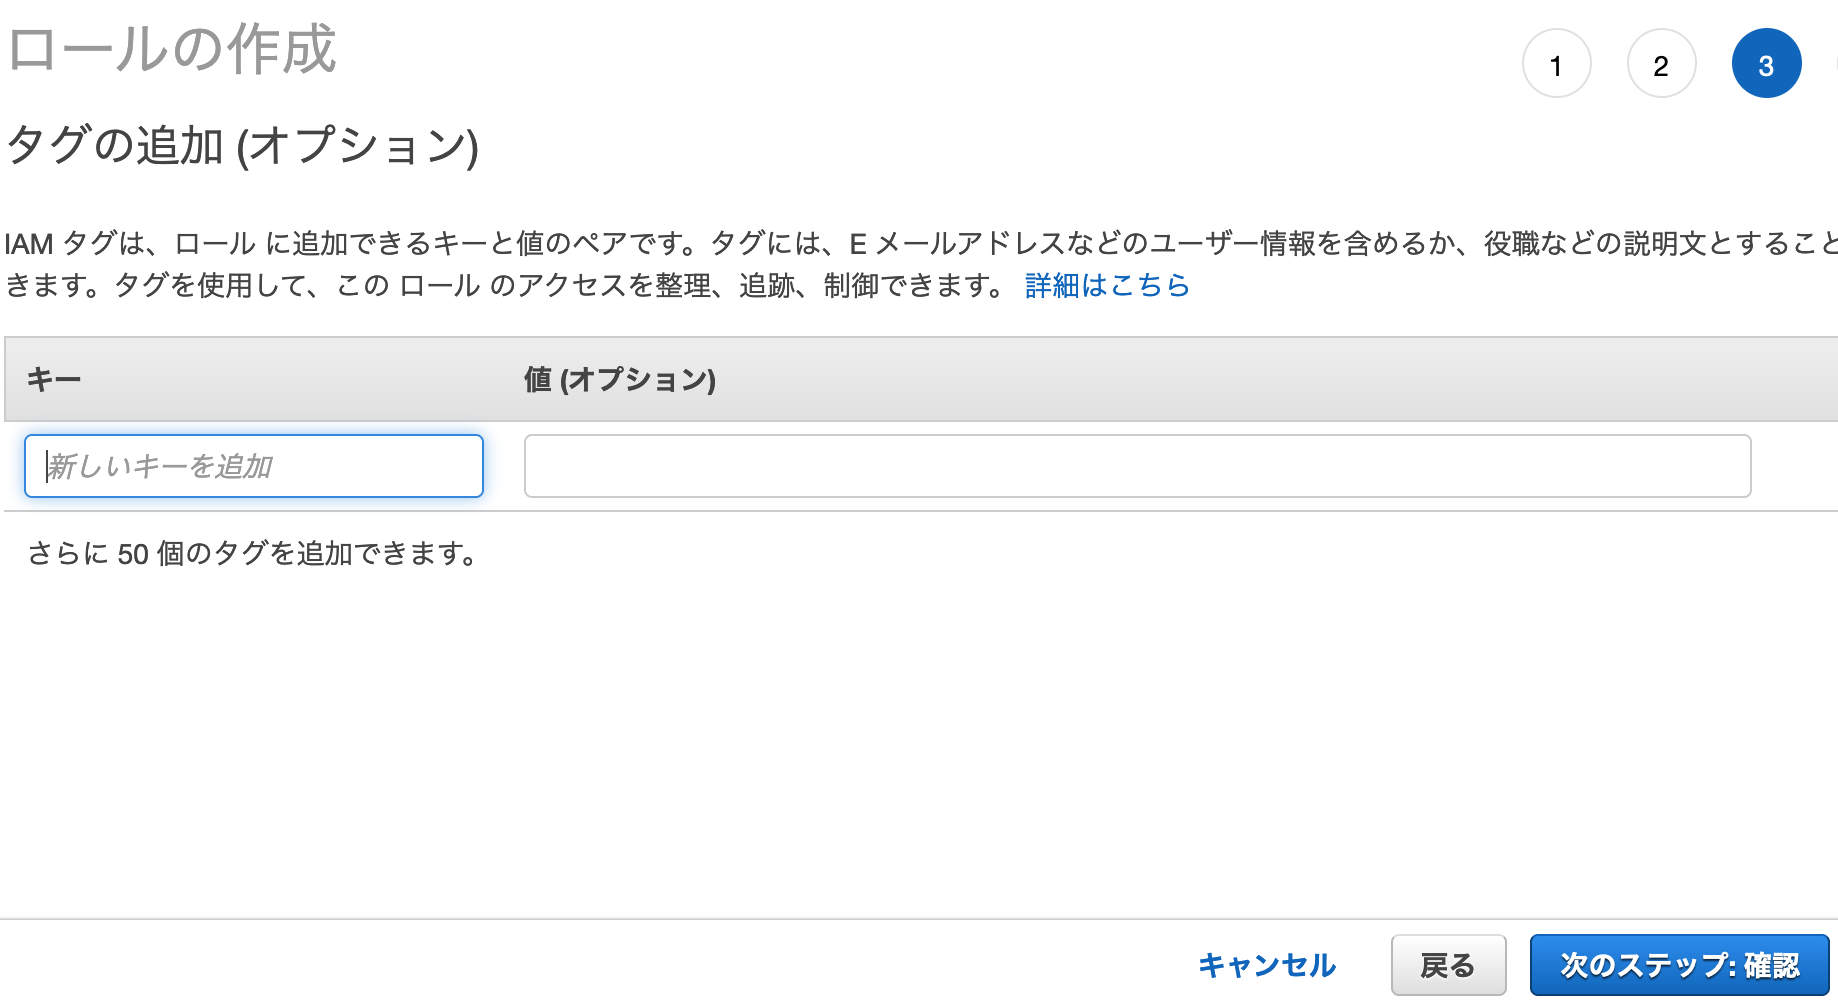
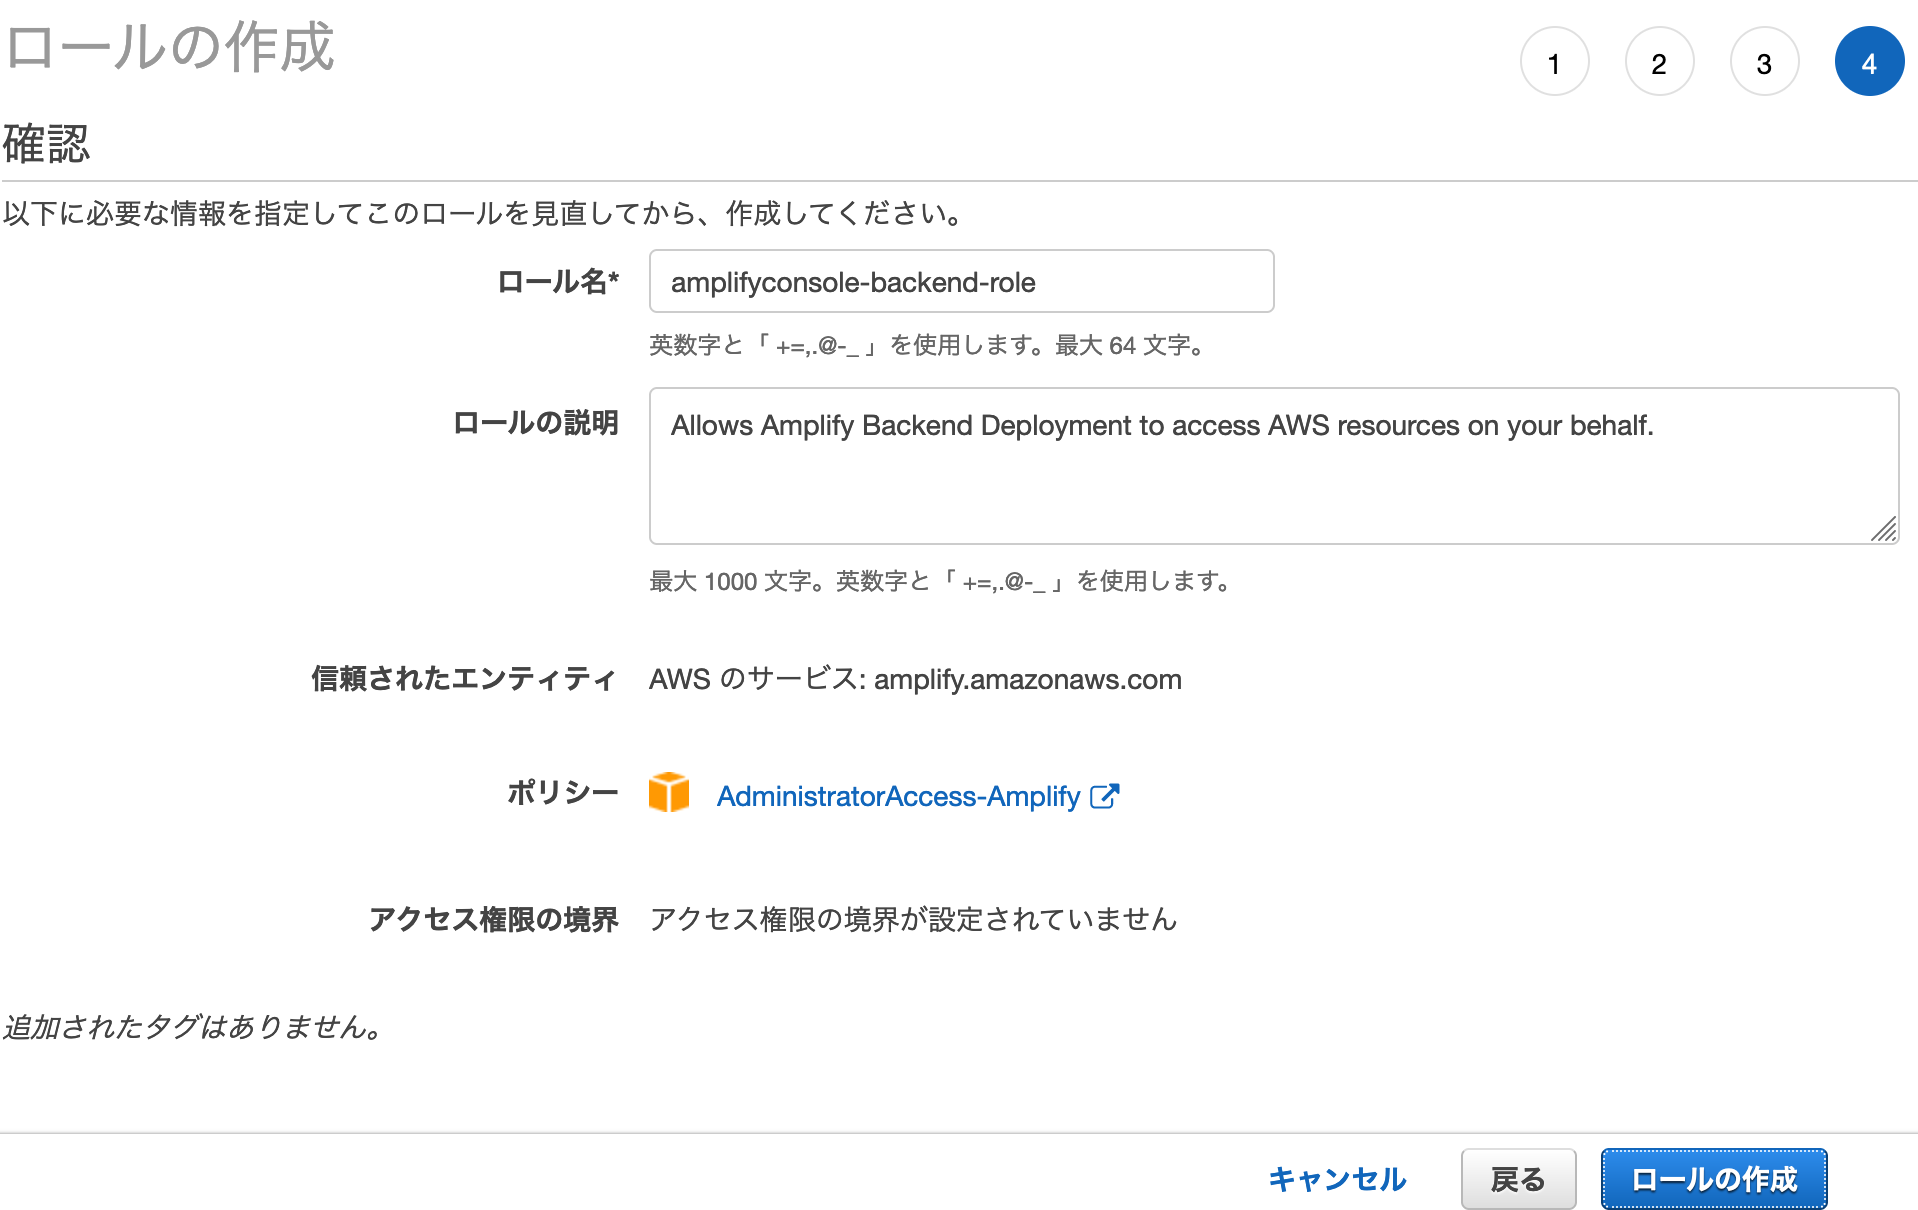
確認画面で設定した内容を確認します。問題無ければ ロールの作成 ボタンを押下します。
別タブを開いて、IAM コンソールのロール画面に移動してください。
作成した amplifyconsole-backend-role に AdministratorAccess ポリシーをアタッチします。
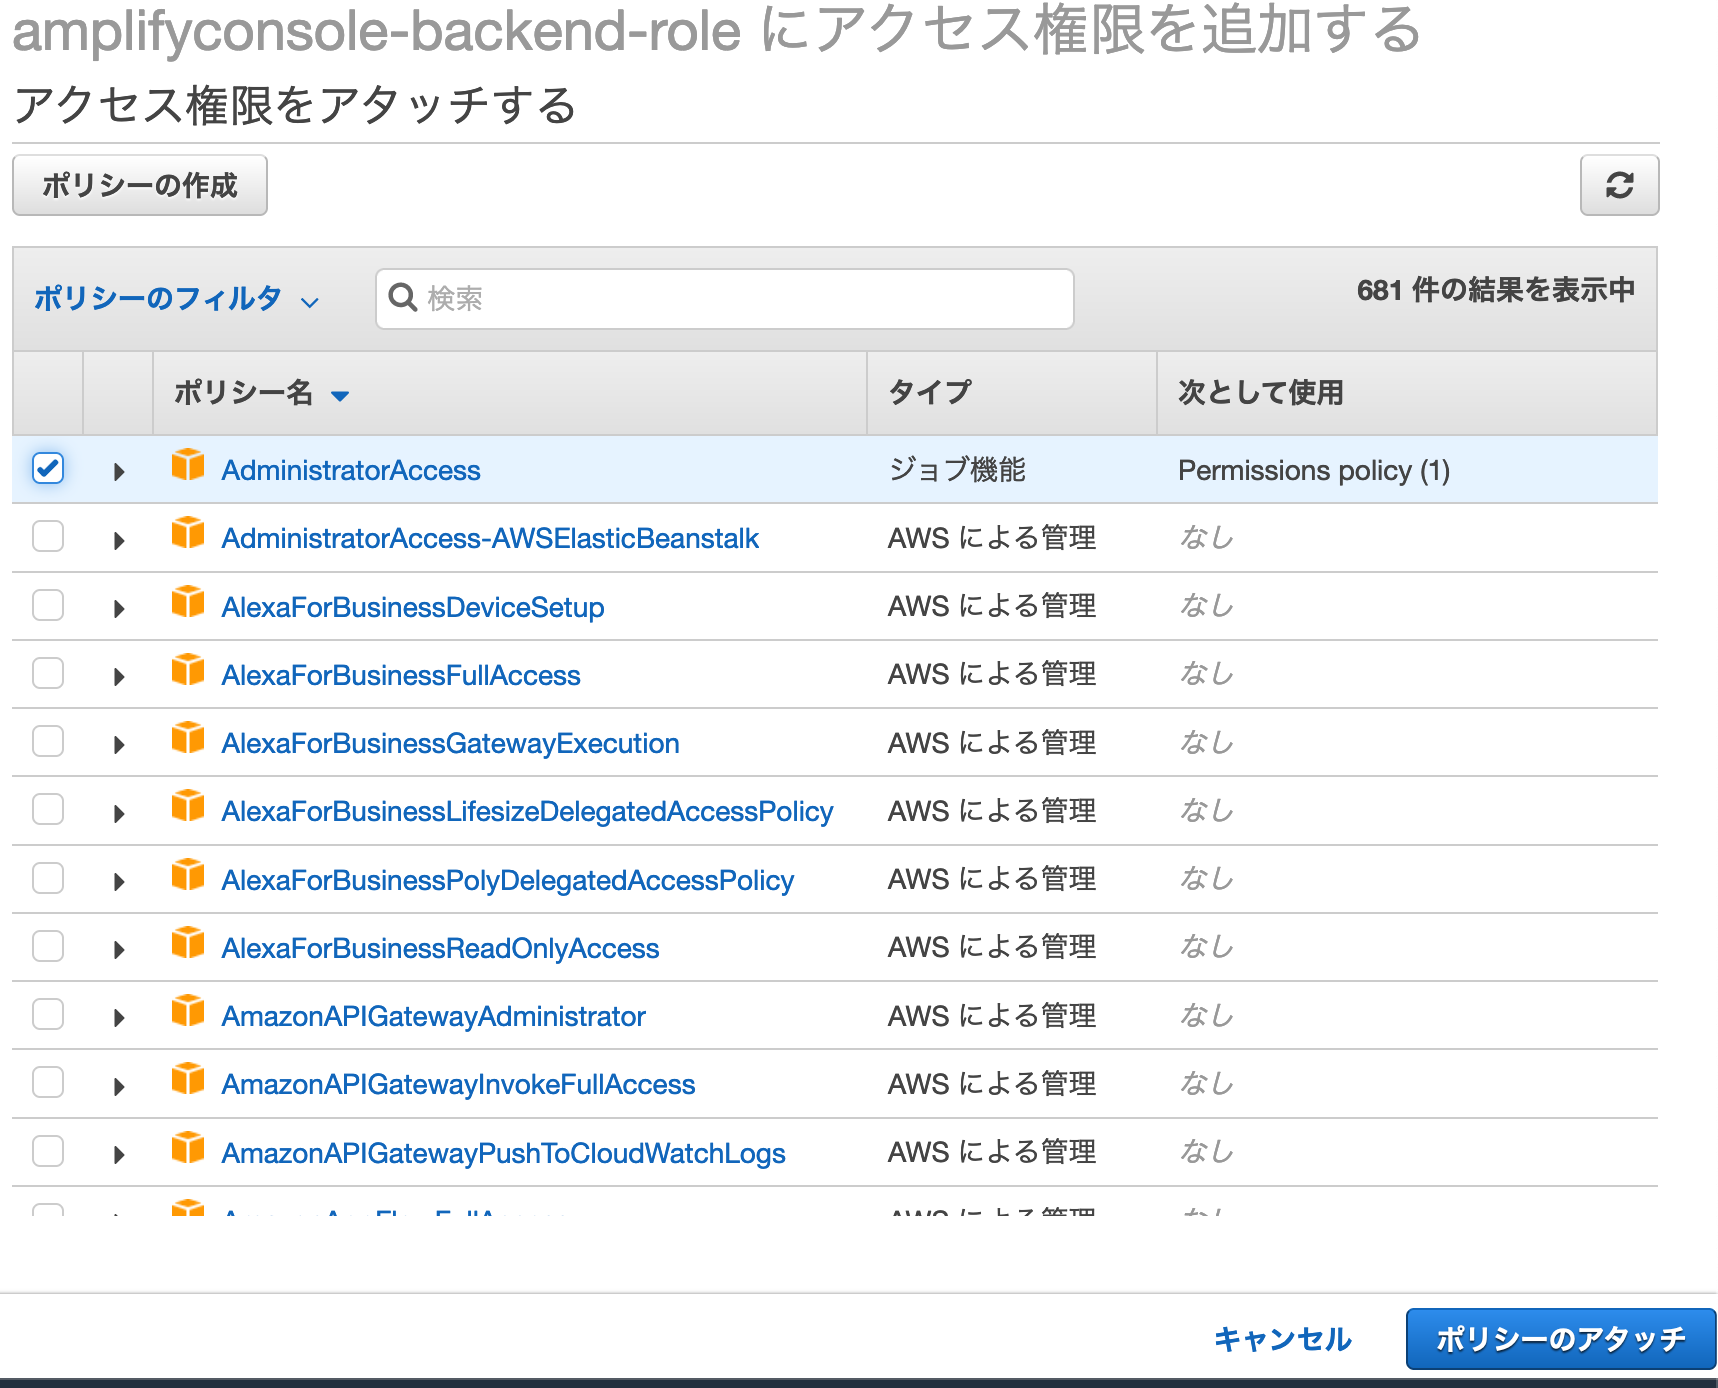
本来、以下のように管理者権限を付与するのはよろしくないのですが、今回は検証の為、ロールに管理者ポリシーをアタッチしてます。
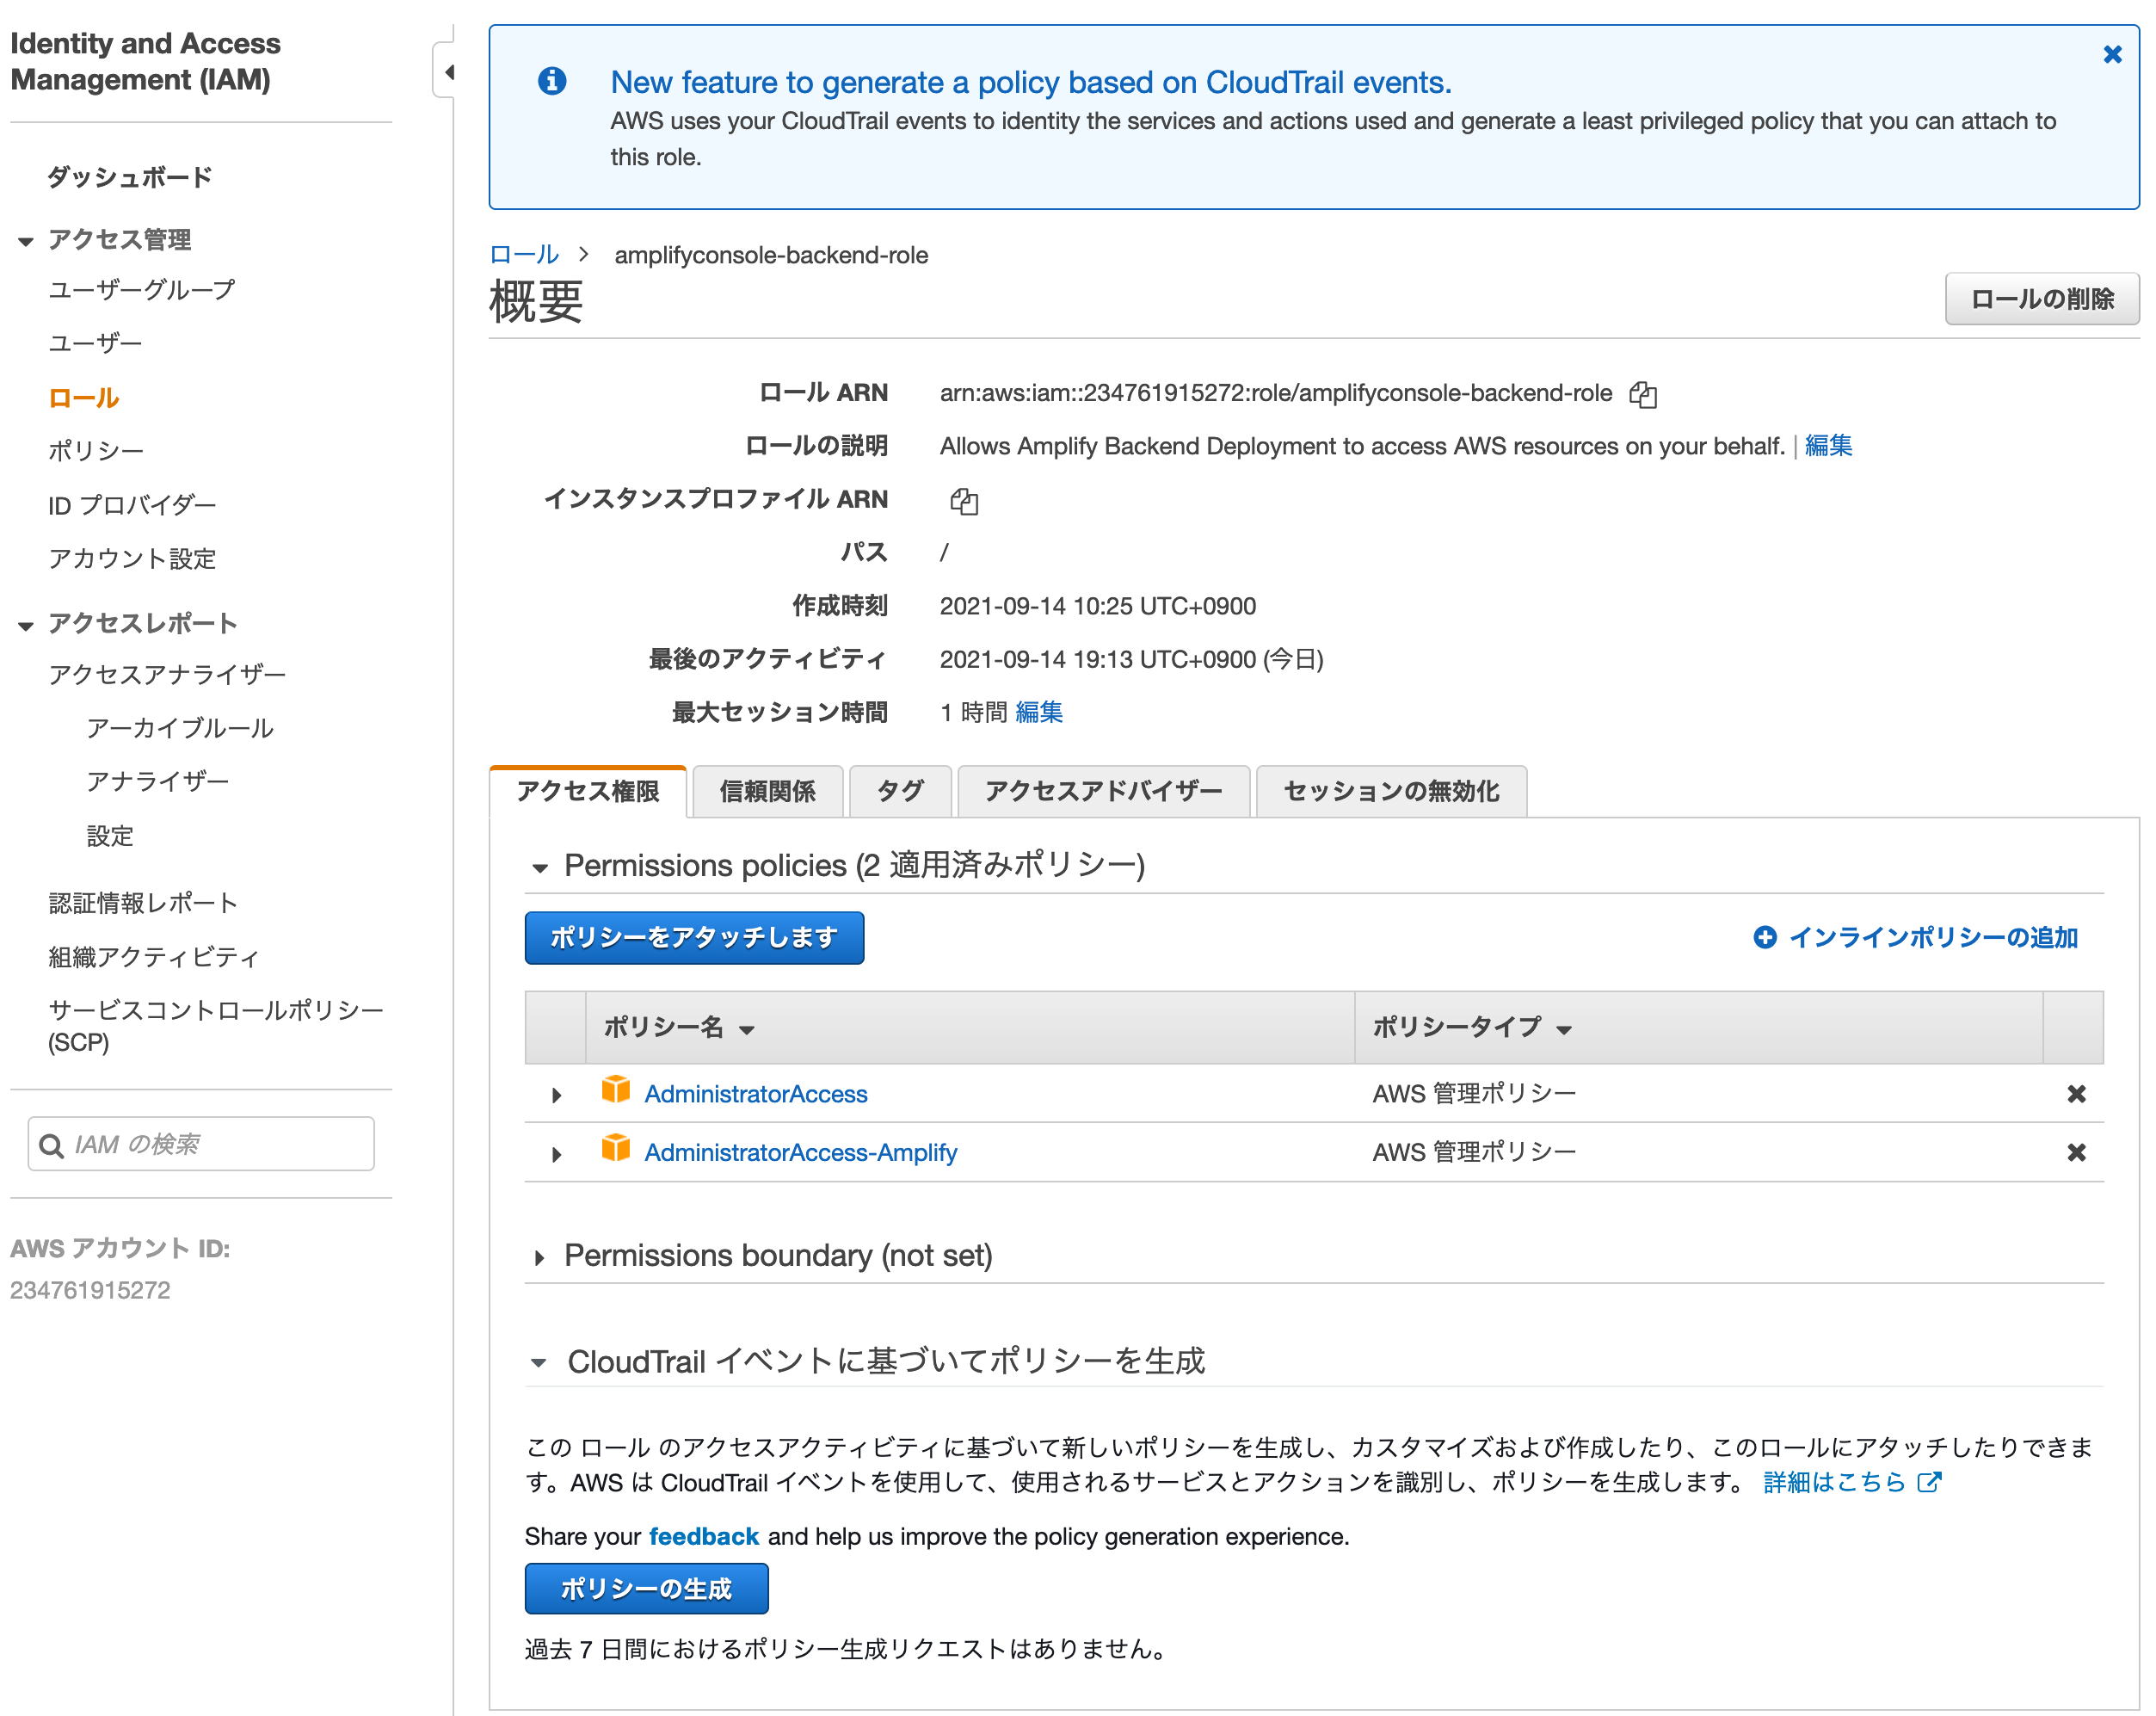
Amplify コンソール画面の戻り、role 設定プルダウンのリフレッシュボタンを押下して amplifyconsole-backend-role が選択出来ることを確認してください。
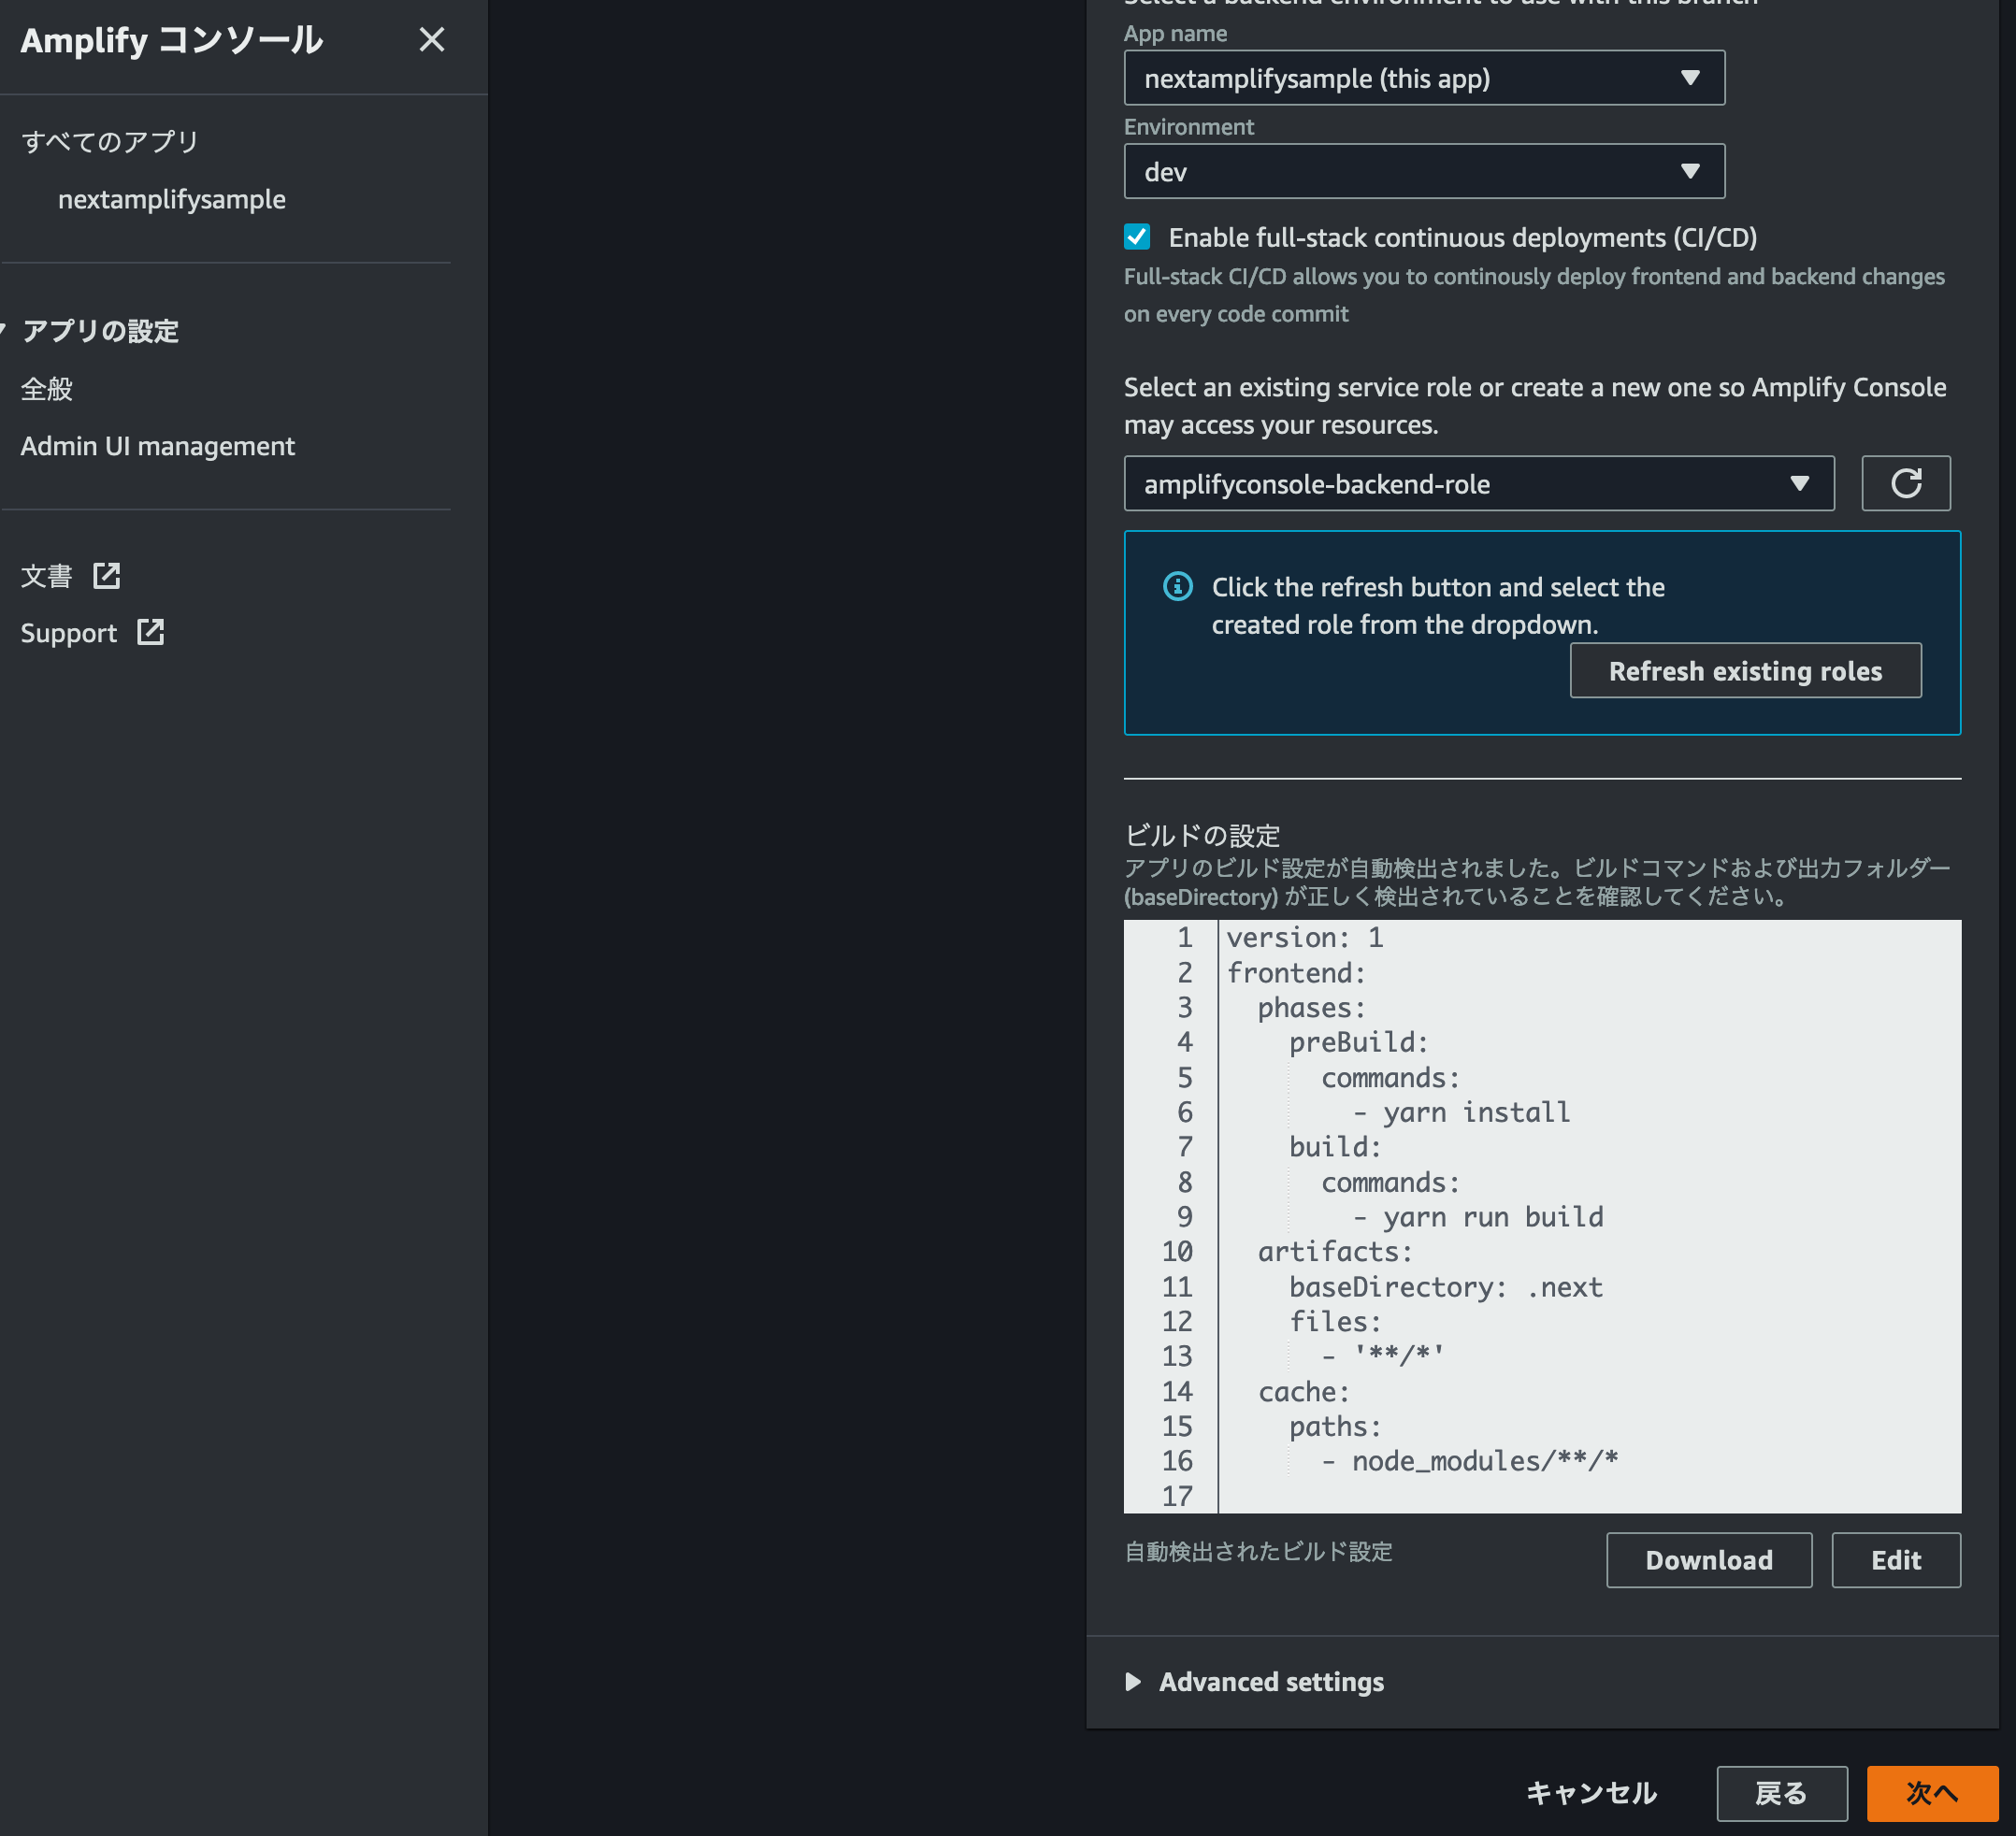
次に画面下部にある Advanced settings を展開し Live package updates の Add package version override プルダウンをから Next.js version を選択します。

Next.js version の Text box が追加されるので、 latest を入力します。
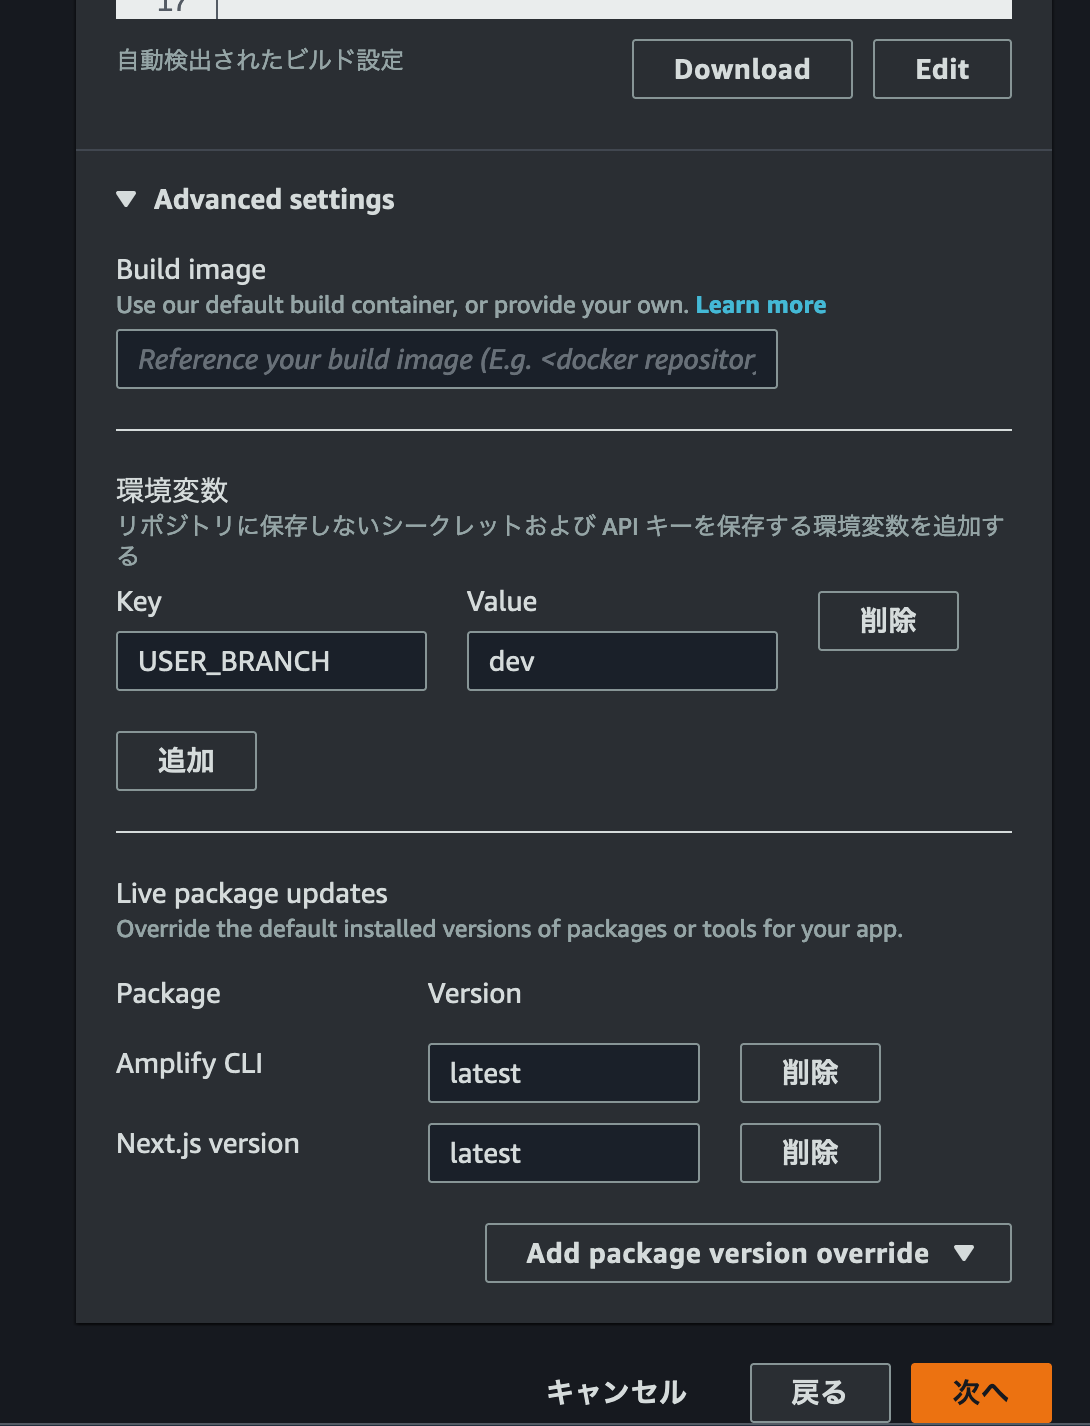
この設定について詳しくは Amplify console guide line の Updating the Next.js version for an existing app を参照ください。
Next.js version を設定して 次へ ボタンを押下します。
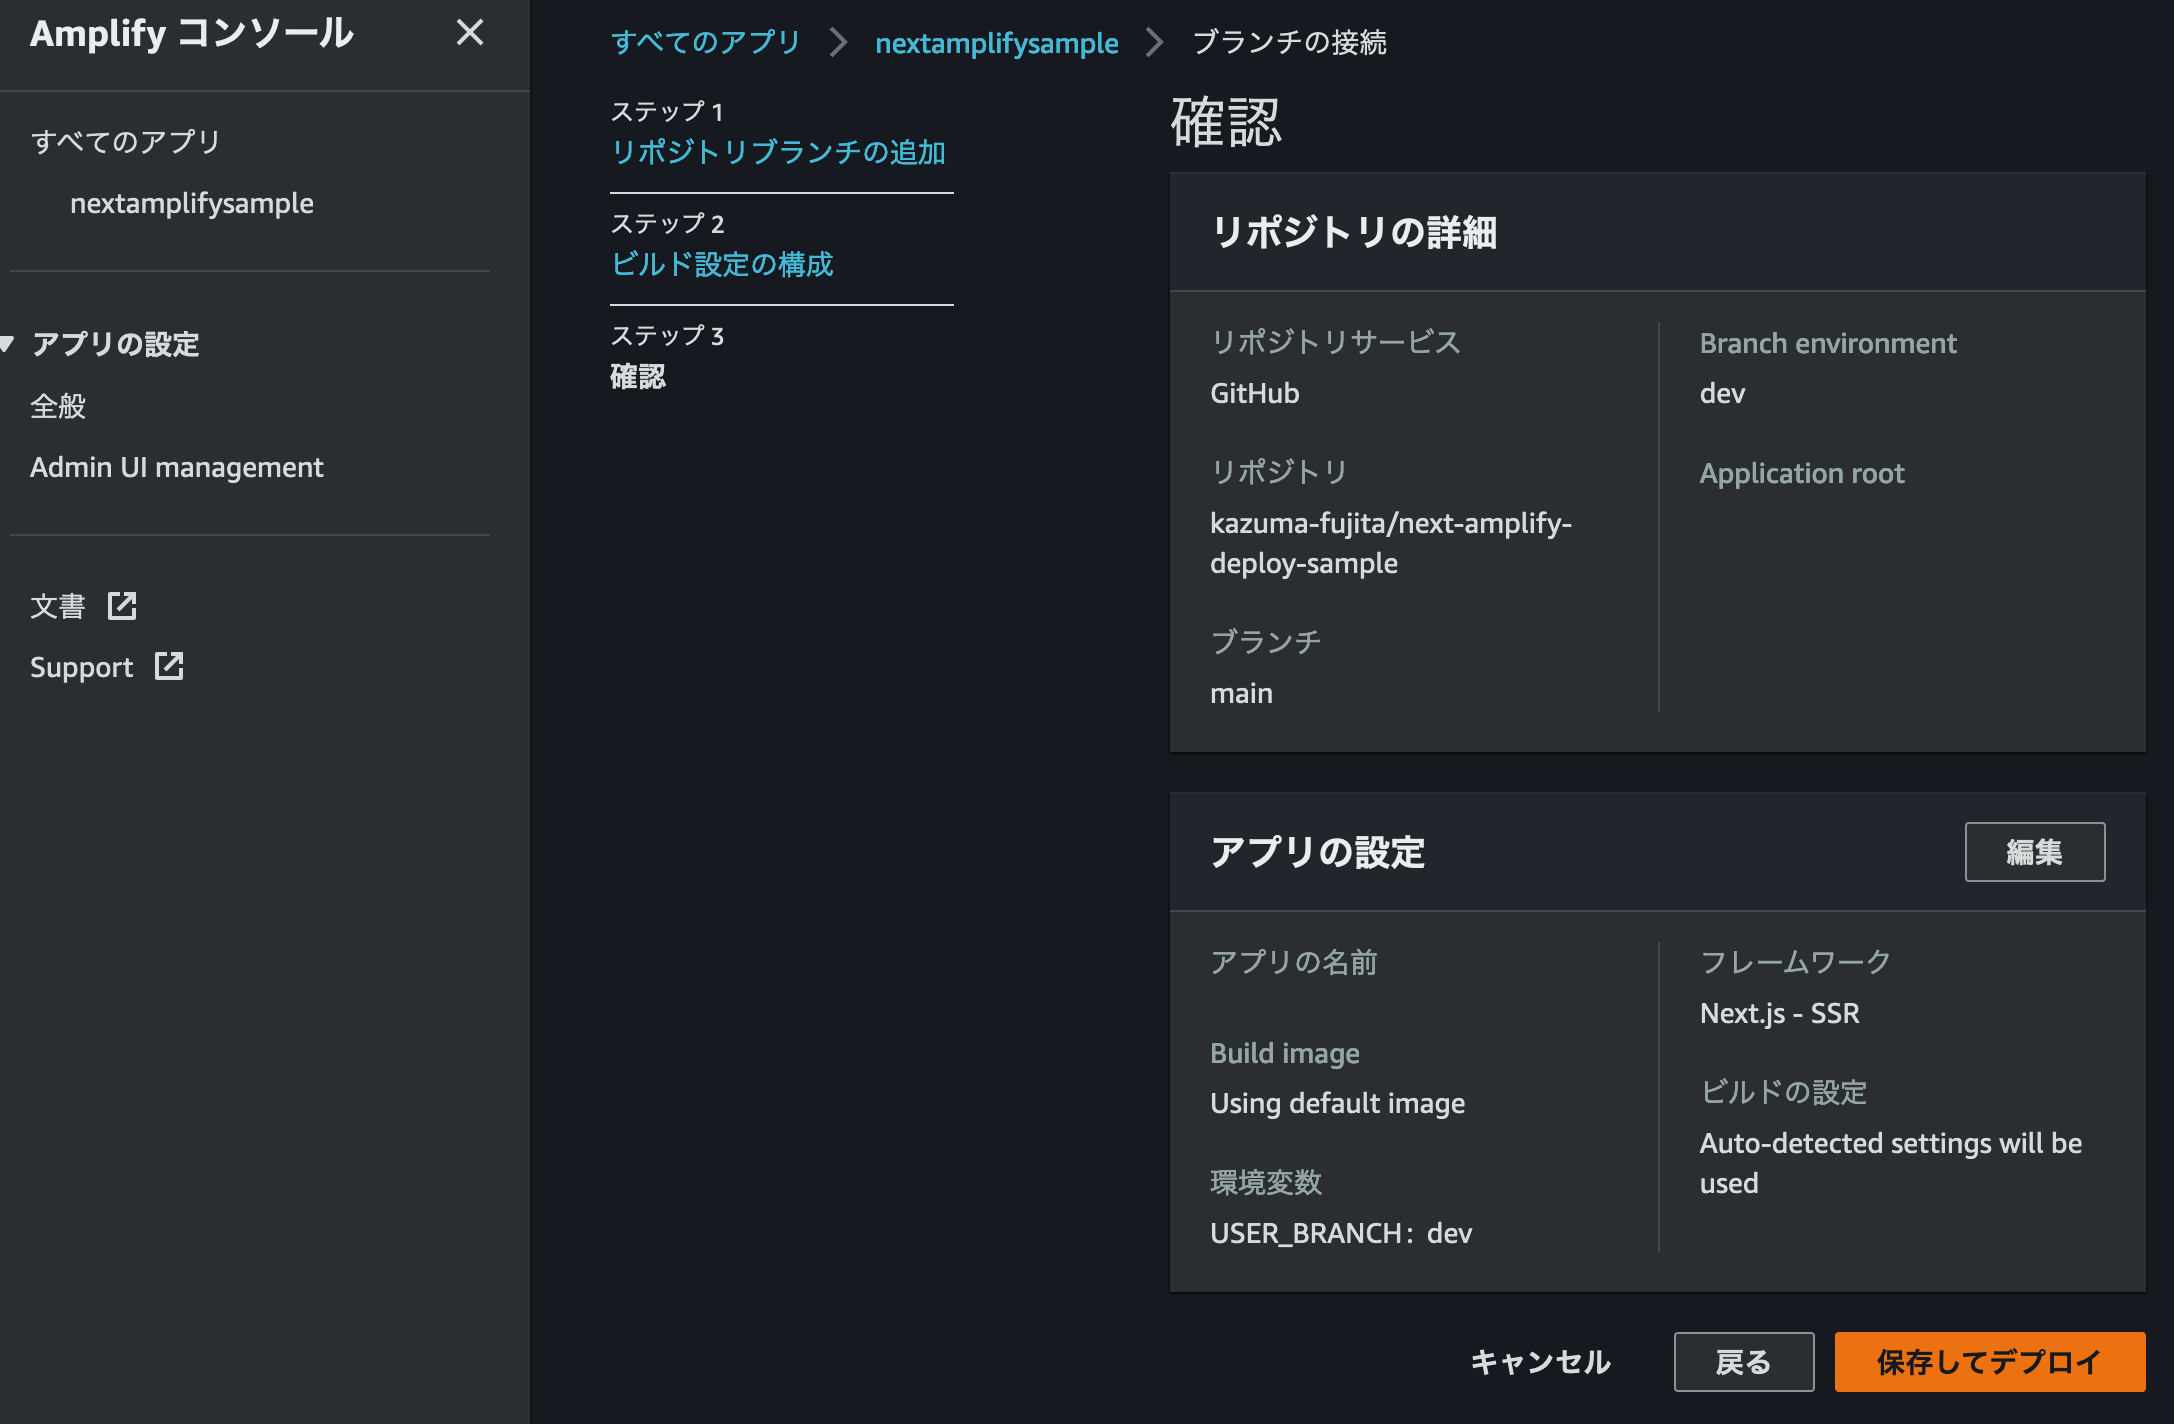
確認画面で設定項目を確認して問題無ければ 保存してデプロイ ボタンを押下します。
デプロイ完了まで暫く待ちます。
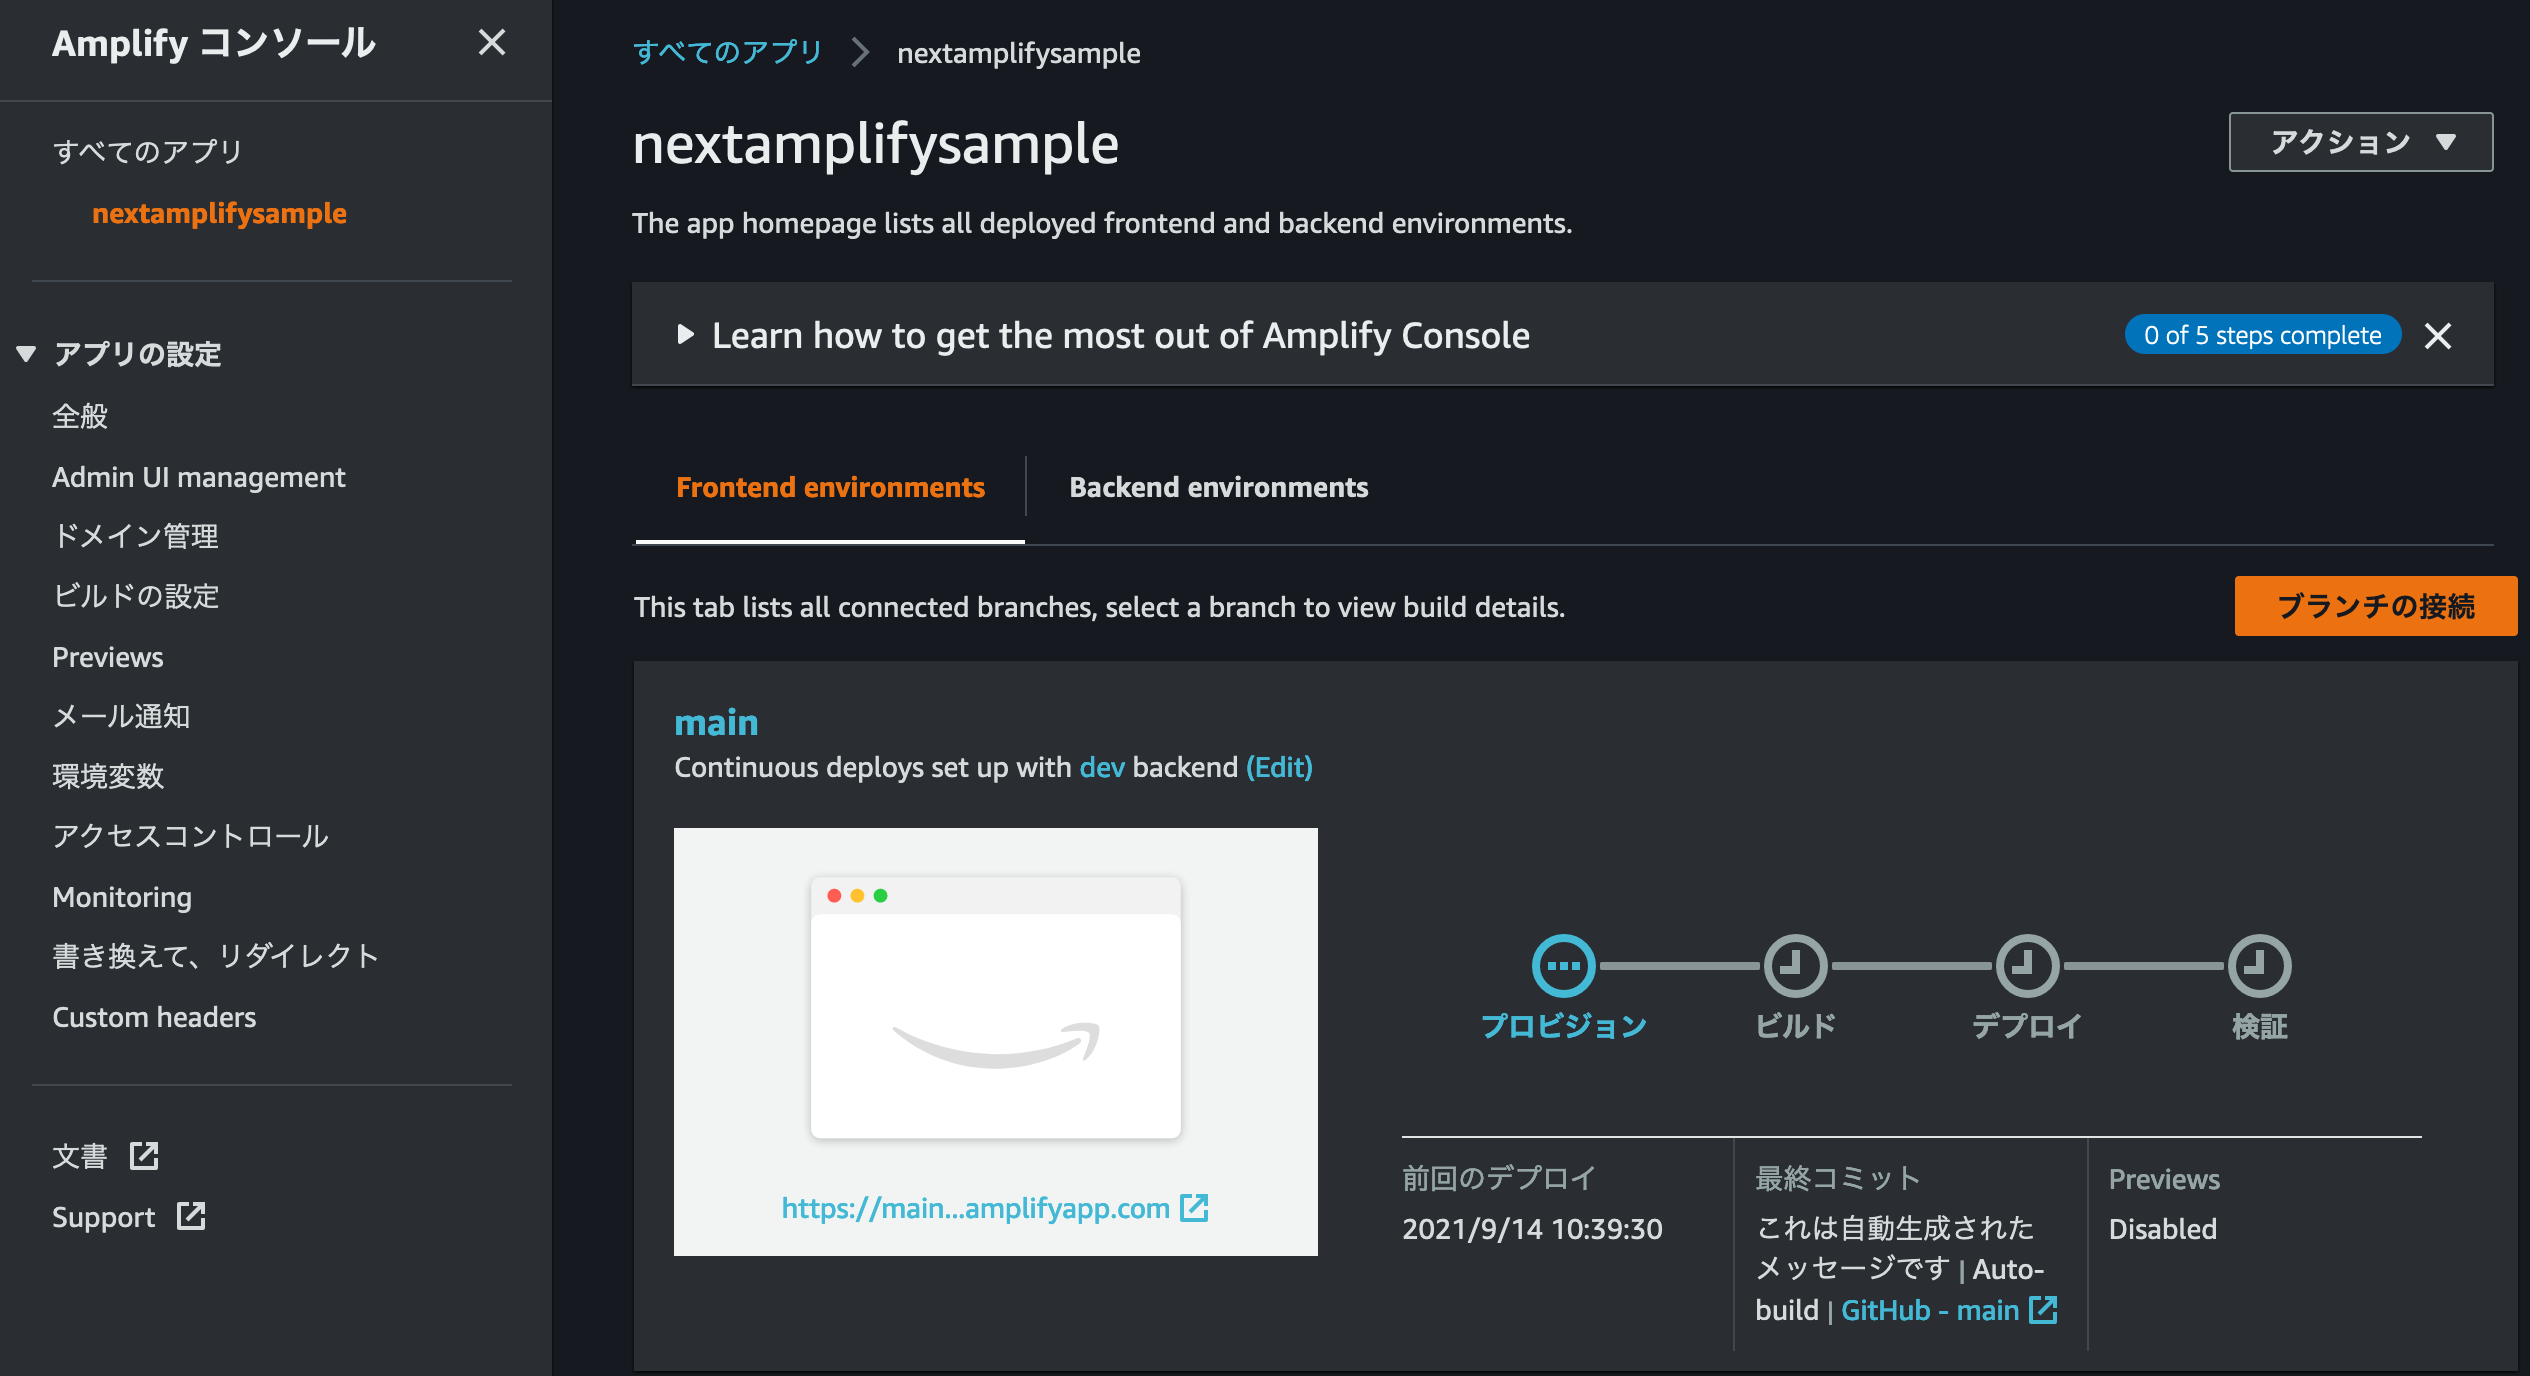
デプロイ後の動作確認
amplify add hosting を実行しているコンソールに戻り、Enter を押して連携出来ているか確認します。
? Continuous deployment is configured in the Amplify Console. Please hit enter once you connect your repository
Amplify hosting urls:
┌──────────────┬───────────────────────────────────────────┐
│ FrontEnd Env │ Domain                                    │
├──────────────┼───────────────────────────────────────────┤
│ main         │ https://main.XXXXXXXXXXXXX.amplifyapp.com │
└──────────────┴───────────────────────────────────────────┘
上記の Domain にアクセスしてください。
ISR、SSG、SSR 画面でそれぞれ画面リロードを数回行ってください。
SSR 画面は都度現在時刻が表示され、SSG 画面は時刻が変化せず、ISR 画面 は 5 秒毎時刻が変更されることを確認してください。
amplify add hosting をすると amplify 関連のソースコードで差分が出るので push をします。
また、再デプロイはソースコードを Github の main にプッシュするだけでデプロイが実行されます。
git add .
git commit -am 'Added Amplify hosting.'
git push origin main
Amplify の削除
Amplify の削除は以下コマンドを実行します。
amplify deleteコマンドを実行して削除確認で Yes を入力して Project deleted locally. メッセージが表示されれば削除完了です。
Amplify や CloudFront などリソースが全て削除されます。
$ amplify delete
? Are you sure you want to continue? This CANNOT be undone. (This will delete all the environments of the project from the cloud and wi
pe out all the local files created by Amplify CLI) Yes
⠋ Deleting resources from the cloud. This may take a few minutes...
Deleting env: dev.
✔ Project deleted in the cloud.
Project deleted locally.
SSG のみで動作させる
今回、Next.js を ISR/SSG/SSR で動作させてますが、SSG しか使わない場合、SSG モードで動作させることができます。
こちらの AWS Amplify User Guide の Package.json file settings に記載されている通り、SSG のみ利用する場合は package.json を編集します。
package.json を開いて build に && next export を追加してください。
"scripts": {
  "dev": "next dev",
  "build": "next build && next export",
  "start": "next start"
},
また、SSG のみで動作させる為には、amplify.yml の baseDirectory を out に変更する必要があります。
Amplify コンソールのビルドの設定から amplify.yml をダウンロードします。
以下のように baseDirectory を .next から out に変更します。
version: 1
frontend:
  phases:
    preBuild:
      commands:
        - yarn install
    build:
      commands:
        - yarn run build
  artifacts:
    baseDirectory: out
    files:
      - '**/*'
  cache:
    paths:
      - node_modules/**/*
ダウンロードした yml を package.json と同じプロジェクトルートに配置します。
再度 Github に push してビルド〜デプロイを実行します。
トラブルシューティング
Next.js のビルド時に以下エラーが発生した場合の対処方法です。
Amplify はまだ Image Optimization をサポートしてません。
import Image from 'next/image' と Image コンポーネントを利用している箇所を削除するか、Image コンポーネントを img タグに変更して再度デプロイします。
2021-09-14T06:09:57.708Z [WARNING]: Error: Image Optimization using Next.js' default loader is not compatible with `next export`.
                                    Possible solutions:
                                    - Use `next start` to run a server, which includes the Image Optimization API.
                                    - Use any provider which supports Image Optimization (like Vercel).
                                    - Configure a third-party loader in `next.config.js`.
                                    - Use the `loader` prop for `next/image`.
                                    Read more: https://nextjs.org/docs/messages/export-image-api
                                    at /codebuild/output/src278414653/src/next-amplify-deploy-sample/node_modules/next/dist/export/index.js:257:23
                                    at async Span.traceAsyncFn (/codebuild/output/src278414653/src/next-amplify-deploy-sample/node_modules/next/dist/telemetry/trace/trace.js:60:20)
2021-09-14T06:09:57.721Z [WARNING]: error Command failed with exit code 1.
2021-09-14T06:09:57.721Z [INFO]: info Visit https://yarnpkg.com/en/docs/cli/run for documentation about this command.
2021-09-14T06:09:57.727Z [ERROR]: !!! Build failed
2021-09-14T06:09:57.727Z [ERROR]: !!! Non-Zero Exit Code detected
2021-09-14T06:09:57.727Z [INFO]: # Starting environment caching...
2021-09-14T06:09:57.728Z [INFO]: # Environment caching completed
参考サイト
大変分かりやすく参考にさせて頂きました。