
Cypress/TypeScriptでGoogleの店舗クチコミ情報をスクレイピングする
今回は Cypress を利用して Web スクレイピングをします。
また、TypeScript Deep Dive - Cypress を参考に TypeScript にも対応します。
Cypress とは Web E2E テストを実行するテスティングフレームワークです。
Cypress には有料/無料プランがありますが、無料枠だけでも十分利用を実行できます。
プランについて詳しくは Cypress Dashboard Pricing Plans を参照ください。
Web E2E テストではブラウザを起動して要素を選択する為のクエリをクリックで検出できるので、Google の検索結果の店舗クチコミ情報をスクレイピングしてみたいと思います。
本来の E2E テストの使い方では無いのですが、イメージを掴みやすくする為にスクレイピングを題材にしました。
※ Web 上のデータにも著作権があるので、スクレイピングしたデータは解析用に自分で使う程度にしましょう。
環境
- OS
- macOS Big Sur 11.1
- VSCode
- 1.52.1
- Node
- 14.9.0
- yarn
- 1.22.4
作業ディレクトリを作成する
以下コマンドを実行して作業ディレクトリを作成します。
mkdir cypress-scraping-sample && cd cypress-scraping-sampleCypress を install する
cypress を install します。
yarn add -D cypresscypress は E2E テストを行うツールですので、オプション -D で devDependencies に install します。
次に TypeScript を install します。
yarn add typescriptinstall が完了したら package を確認します。
$ yarn list --depth=0 | grep -e cypress -e typescript -e
├─ @cypress/listr-verbose-renderer@0.4.1
├─ @cypress/request@2.88.5
├─ @cypress/xvfb@1.2.4
├─ cypress@6.3.0
├─ typescript@4.1.3
tsconfig.json を scaffold する
以下コマンドを実行して TypeScript の設定ファイルである tsconfig.json を生成します。
yarn tsc --init --types cypress --lib dom,es6生成された tsconfig.json を確認します。
様々な設定がコメントアウトで記述されていますが、かいつまんでデフォルトで有効な設定が以下になります。
{
  "compilerOptions": {
    "target": "es5",
    "module": "commonjs",
    "lib": ["dom","es6"],
    "strict": true,
    "types": ["cypress"],
    "esModuleInterop": true,
    "skipLibCheck": true,
    "forceConsistentCasingInFileNames": true
  }
}
.gitignore を作成する
プロジェクトを git 管理する場合は cypress の .gitignore を作成します。
オフィシャルの example にある cypress-example-recipes/.gitignore ファイルの内容を追記してください。
- .gitignore
node_modules
.tmp
.sass-cache
.DS_Store
npm-debug.log
tmp
.projects
*.orig

screenshots
videos
out.js
examples/*/cypress/logs
examples/*/cypress/downloads
snapshots.js
.nyc_output
coverage
dist
test-data.json
Cypress を起動する
以下のコマンドで cypress を GUI モードで起動します。
./node_modules/.bin/cypress open実行してみましょう。
$ ./node_modules/.bin/cypress open
It looks like this is your first time using Cypress: 6.3.0

  ✔  Verified Cypress! /Users/XXXX/Library/Caches/Cypress/6.3.0/Cypress.app

Opening Cypress...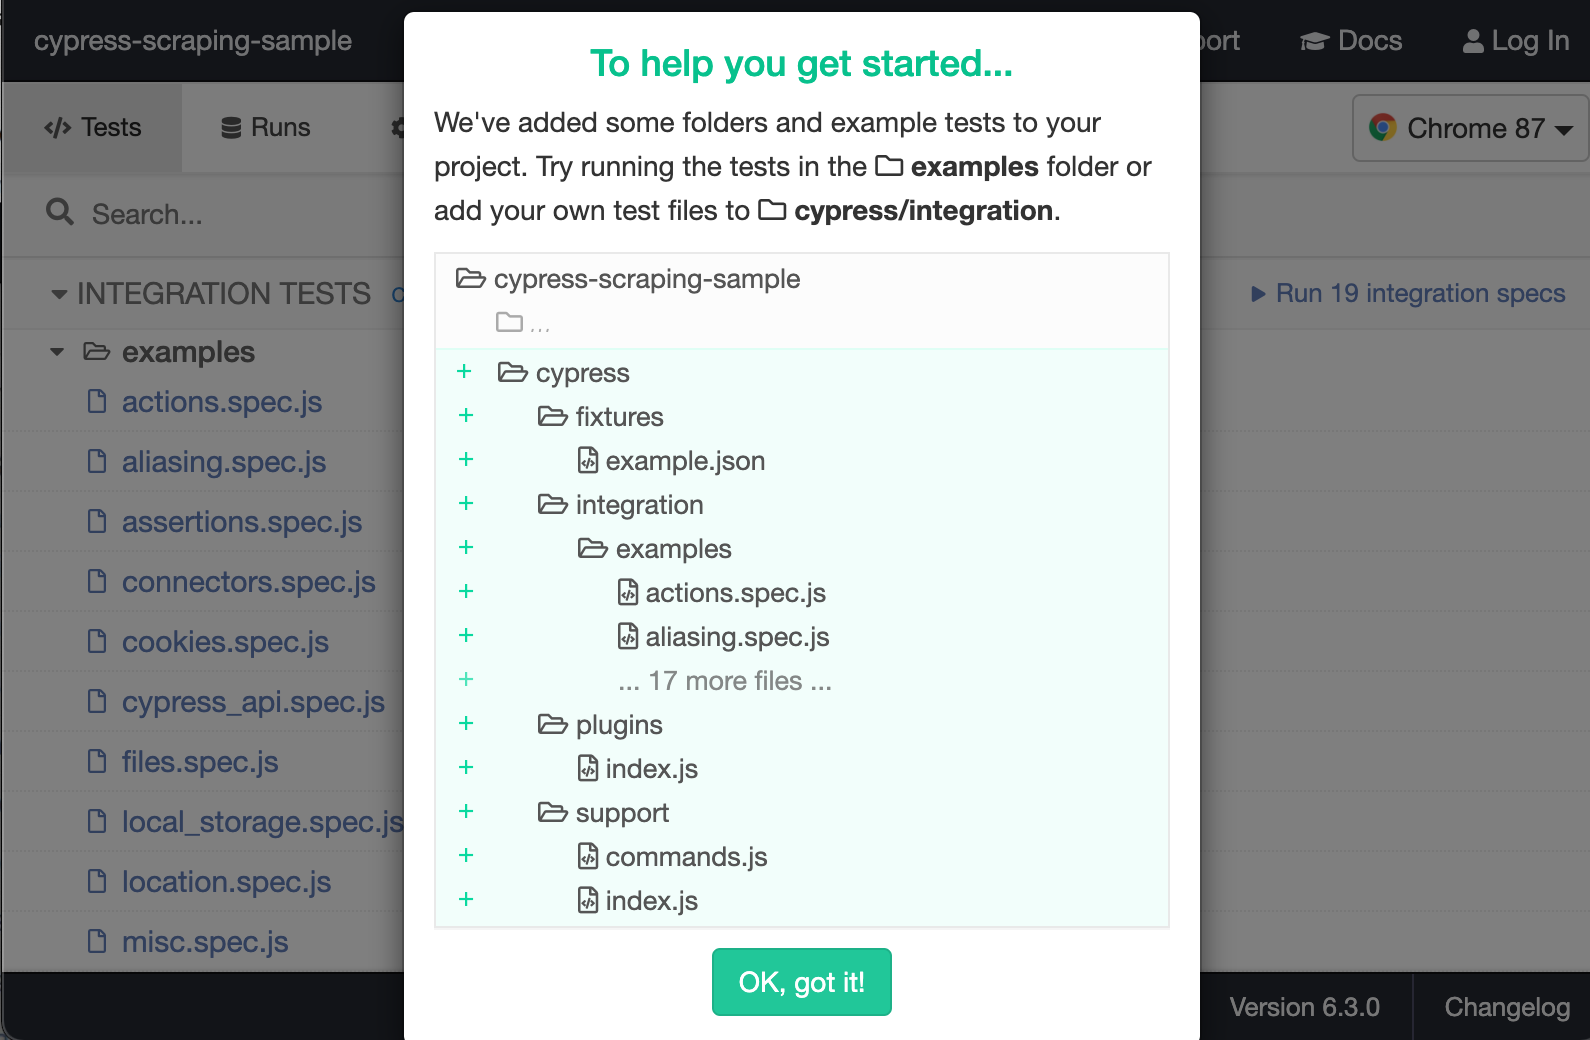
コマンドを実行すると cypress のコンソールが立ち上がります。
ターミナルに戻ると自動で cypress ディレクトリが scaffold されています。
$ tree cypress
cypress
├── fixtures
│   └── example.json
├── integration
│   └── examples
│       ├── actions.spec.js
│       ├── aliasing.spec.js
│       ├── assertions.spec.js
│       ├── connectors.spec.js
│       ├── cookies.spec.js
│       ├── cypress_api.spec.js
│       ├── files.spec.js
│       ├── local_storage.spec.js
│       ├── location.spec.js
│       ├── misc.spec.js
│       ├── navigation.spec.js
│       ├── network_requests.spec.js
│       ├── querying.spec.js
│       ├── spies_stubs_clocks.spec.js
│       ├── traversal.spec.js
│       ├── utilities.spec.js
│       ├── viewport.spec.js
│       ├── waiting.spec.js
│       └── window.spec.js
├── plugins
│   └── index.js
└── support
    ├── commands.js
    └── index.js

5 directories, 23 files
今後 integration ディレクトリ配下にテストコードのファイルを作成していきます。
また、各機能例を examples に用意してくれています。
Cypress を yarn コマンドで実行できるようにする
cypress の実行に毎回 ./node_modules/.bin/cypress open と入力したくないので yarn から起動できるようにします。
package.json に以下追記してください。
"scripts": {
  "cy:open": "cypress open",
  "cy:run": "cypress run",
  "cy:run:chrome": "cypress run --browser chrome",
  "cy:run:firefox": "cypress run --browser firefox"
}
以後、以下のコマンドで cypress を GUI で起動できるようになります。
yarn run cy:opencypress のコンソールを立ち上げず、ヘッドレス(CUI で動作させる)モードで cypress を実行した場合は cy:run を指定します。
yarn run cy:runヘッドレスモードは主に CI で使用します。
また、ブラウザを指定して実行したい場合は以下コマンドを実行します。
yarn run cy:run:firefoxCypress の最初のコードを書いてみる
integration/first.spec.ts を作成して以下追記してください。
describe("Cypress first test.", () => {
  it("is working.", () => {
    expect(true).to.equal(true);
  });
});
以下コマンドで cypress を実行します。
オプション -s で実行するファイルを個別に指定できます。
yarn run cy:run -s cypress/integration/first.spec.ts (Run Finished)
Spec Tests Passing Failing Pending Skipped
┌────────────────────────────────────────────────────────────────────────────────────────────────┐
│ ✔ first.spec.ts 56ms 1 1 - - - │
└────────────────────────────────────────────────────────────────────────────────────────────────┘
✔ All specs passed! 56ms 1 1 - - -
✨ Done in 10.47s.こちらのログが流れたら成功です。
Cypress で Google 検索をしてみる
まず cypress.json にスクレイピングする対象の URL を設定します。
{
 "baseUrl": "https://www.google.com"
}
次に integration/second.spec.ts を作成して以下追記してください。
describe("google search", () => {
  it("should perform basic google search", () => {
    cy.visit("/");
    cy.get('[name="q"]').type("Hello world").type("{enter}");
  });
});
cy.visit("/") で cypress.json の baseUrl に記述された URL のページ開きます。
あとは検索ボックスに Hello world と入力して Enter をしているだけです。
ちなみに type("Hello world").type("{enter}") は type("Hello world{enter}") とまとめて記述できます。
では以下コマンドで実行してください。
yarn run cy:run -s cypress/integration/second.spec.ts Spec Tests Passing Failing Pending Skipped
┌────────────────────────────────────────────────────────────────────────────────────────────────┐
│ ✔ second.spec.ts 00:07 1 1 - - - │
└────────────────────────────────────────────────────────────────────────────────────────────────┘
✔ All specs passed! 00:07 1 1 - - -こちらのログが表示されれば成功です。
次に以下コマンドで実行結果の動画を確認してみましょう。
open cypress/videos/second.spec.ts.mp4cypress コンソール内でブラウザが立ち上がり、Google 検索ページを開き Hello world とキーワード検索をしています。
Google の飲食店のクチコミ情報をスクレイピングする
飲食店の Google クチコミ情報をスクレイピングしてみます。
まず検索キーワードを定義します。
fixtures ディレクトリに search_keywords.json ファイルを作成してください。
- fixtures/search_keywords.json
{
  "keywords": ["ラーメン ブタヒロ", "ラーメン英二", "立川マシマシ"]
}
fixtures 配下に置いたファイルは cy.fixture で取得することができます。
次にクチコミ情報を取得するコードを実装します。
integration ディレクトリに review.spec.ts ファイルを作成してください。
- integration/review.spec.ts
const SCROLL_DURATION = 1000;
const WAIT_TIME = 500;

context("Google review search.", () => {
  it("Do a Google search to get all reviews.", () => {
    // fixtures/search_keywords.jsonから検索キーワードを一覧を取得
    cy.fixture("search_keywords").then(
      (jsonData: { keywords: Array<string> }) => {
        jsonData.keywords.map((keyword) => {
          cy.visit("/");
          // Googleキーワード検索
          cy.get('[name="q"]').type(keyword).type("{enter}");
          // 検索結果表示までNms待機
          cy.wait(WAIT_TIME);
          // 「Googleのクチコミ」リンクを検索
          cy.get("[data-async-trigger=reviewDialog]").each(
            (element: JQuery<HTMLElement>, index: number) => {
              // 検索結果画面内のリンクが複数ある為、最初に取得したリンクをクリック
              if (index === 0) {
                cy.wrap(element).click({ force: true });
                // クチコミ一覧ダイアログが表示されるまでNms待機
                cy.wait(WAIT_TIME);
                // 「Googleのクチコミ(n)」のクチコミ数nを取得
                const reviewCounts = element[0].innerText
                  .toString()
                  .match(/\d+/) as RegExpMatchArray;
                // クチコミ全件表示の為、review数を10で割って四捨五入繰り上げ数分loop
                const loopCount = Math.ceil(parseInt(reviewCounts[0], 10) / 10);
                // クチコミダイアログのクチコミを全件表示するまでscroll
                Array(loopCount)
                  .fill(0)
                  .forEach(() => {
                    cy.get(".review-dialog-list").scrollTo("bottom", {
                      duration: SCROLL_DURATION,
                    });
                    cy.wait(WAIT_TIME);
                  });
                // クチコミダイアログの画面内に表示されている「もっと見る」リンクを全てクリック
                cy.get(".review-more-link").each(
                  (childElement: JQuery<HTMLElement>) => {
                    cy.wrap(childElement).click();
                  }
                );
                // クチコミを表示分全て取得
                cy.get(".gws-localreviews__google-review").each(
                  (childElement: JQuery<HTMLElement>) => {
                    cy.log(childElement[0].innerText);
                  }
                );
              }
            }
          );
        });
      }
    );
  });
});
以下のような流れの処理をしています。
- 先程の
search_keywords.jsonデータを取得して Google キーワード検索 - 検索結果からクチコミ一覧ダイアログを表示
- クチコミ全件を取得する為、クチコミ一覧を件数分スクロール
- 全件表示後、もっと見るリンクをクリックして本文を全て表示
- クチコミ本文を全件取得後ログ出力
注意点として、Google の仕様が変更になり、セレクター名が変わるとスクレイピングは失敗してしまいます。
その場合は cy.get するセレクターは新しいセレクター名に置き換える必要があります。
それでは以下コマンドで cypress コンソールを立ち上げて review.spec.ts を実行しましょう。
yarn run cy:open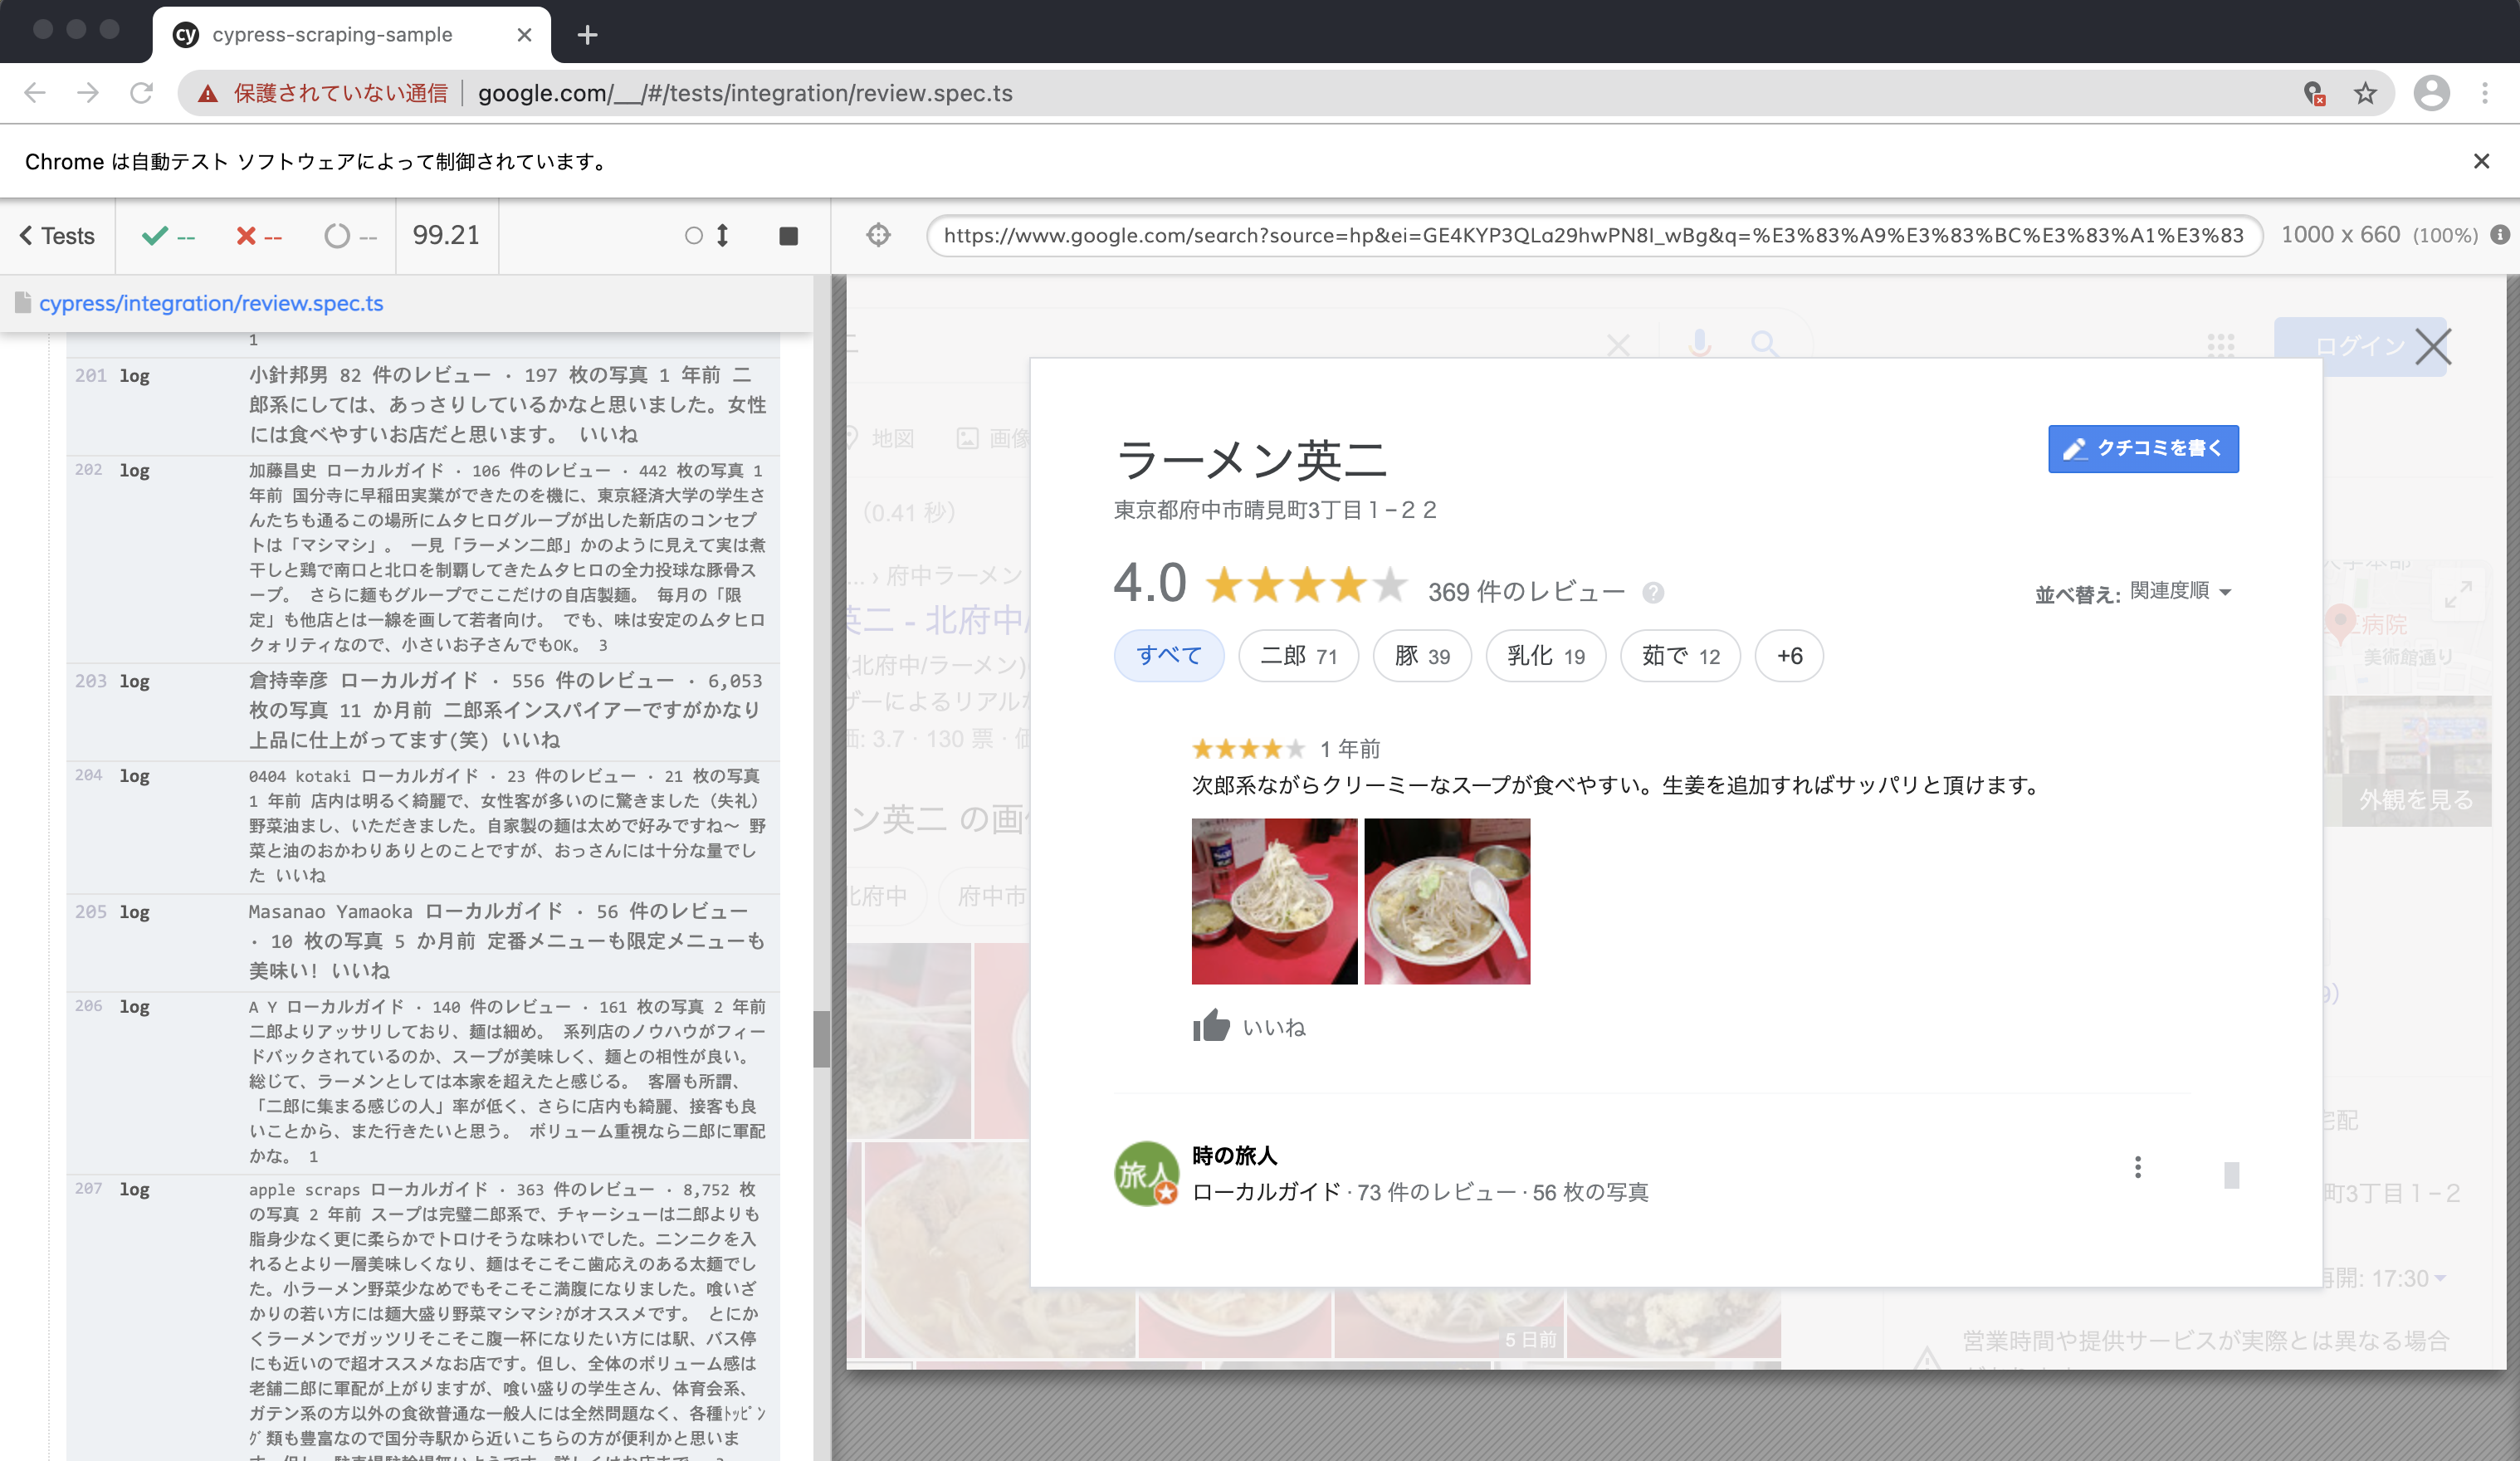
コンソール画面右側に取得したクチコミ情報が出力されました。
終わりに
今回は Cypress と TypeScript のセットアップ、簡単な Web スクレイピングをやってみました。
今回はイメージを掴む為にスクレイピングをしましたが、スクレイプングをするなら Node.js + Puppeteer 等で実装します。
本来 Cypress は E2E テストツールですので、 以下のようにコードを評価する為に使用します。
cy.get('.error').should('be.empty');
cy.contains('Login').should('be.visible');
cy.wrap({ foo: 'bar' }).its('foo').should('eq', 'bar');
Cypress は Selenium に比べて高速に動作して導入も簡単ですので、ぜひ一度お試しください。
最後に、今回実装したサンプルコードは Github にありますので参照ください。