AmplifyでNext.jsアプリに認証機能を追加してログイン画面を実装する
筆者は最近 Next.js と AWS Amplify をかじっている Web アプリ開発初心者です。
本ブログでは今後数回に渡って Next.js と Amplify で Web アプリを高速に作れないか検証していきます。
今回は Amplify CLI を利用して amplify add auth で認証機能をアプリケーションに追加します。
環境
- macOS Big Sur 11.15.2
- Amplify 6.0.1
- Next.js 11.1.2
- Typescript 4.4.3
Next.js のプロジェクトを作成
以下のコマンドを実行します。
yarn create next-app next-amplify-auth-sample --typescriptアプリケーション作成完了後、プロジェクトのルートディレクトリへ移動します。
cd next-amplify-auth-sampleAmplify CLI のインストール
以下のコマンドを実行します。
npm install -g @aws-amplify/cliAmplify IAM ユーザの作成
Amplify 用の IAM ユーザーを作成します。
amplify configure コマンドを実行すると簡単に IAM ユーザーを作成できます。
amplify configure については以前の記事で解説しているので参照ください。
Amplify 環境の作成
amplify init コマンドで Amplify 環境を作成します。
amplify initamplify init コマンドを実行して、Amplify プロジェクト名を入力してください。
$ amplify init
Note: It is recommended to run this command from the root of your app directory
? Enter a name for the project nextamplifysample (Amplifyプロジェクト名)
The following configuration will be applied:
次に、Amplify のレコメンド設定を使うか選択します。
Distribution Directory Path を変更するので、n を入力してください。
Project information
| Name: nextamplifysample
| Environment: dev
| Default editor: Visual Studio Code
| App type: javascript
| Javascript framework: react
| Source Directory Path: src
| Distribution Directory Path: build
| Build Command: npm run-script build
| Start Command: npm run-script start

? Initialize the project with the above configuration? (Y/n)
Distribution Directory Path に .next を入力してください。
その他の項目はデフォルトで進めます。
? Initialize the project with the above configuration? No
? Enter a name for the environment dev
? Choose your default editor: Visual Studio Code
? Choose the type of app that you're building javascript
Please tell us about your project
? What javascript framework are you using react
? Source Directory Path:  src
? Distribution Directory Path: .next   (.nextを入力)
? Build Command:  npm run-script build
? Start Command: npm run-script start
Distribution Directory Path を .next とすると、amplify.yml の baseDirectory が.next となります。
詳しくは Amplify console guide line の Amplify build settings を参照ください。
最後に使用する AWS Profiles を選択します。
ここでは amplify configure を実行した時に作成した profile を選択します。
For more information on AWS Profiles, see:
https://docs.aws.amazon.com/cli/latest/userguide/cli-configure-profiles.html

? Please choose the profile you want to use amplify-cli-zuma-user
profile を選択し Enter を押して Initialized your environment successfully. が表示されれば amplify init は完了です。
amplify に認証機能を追加する
Amplify 環境を作成後、amplify CLI で認証機能を追加する為、以下コマンドを実行します。
amplify add auth以降設問に答えて初期設定を行います。
今回はメールアドレスとパスワードを利用したシンプルな認証方式を採用します。
- デフォルトの認証およびセキュリティ構成を使用しますか?
Default configuration を選択します。
 Do you want to use the default authentication and security configuration? (Use arrow keys)
❯ Default configuration
  Default configuration with Social Provider (Federation)
  Manual configuration
I want to learn more.- ユーザーがどのようにサインインできるようにしますか?
Email を選択します。
警告:これらの選択を編集することはできません と表示されている通り、この設定は後から変更できない為注意が必要です。
 Warning: you will not be able to edit these selections.
 How do you want users to be able to sign in?
  Username
❯ Email
  Phone Number
  Email or Phone Number
I want to learn more.- 詳細設定を構成しますか?
詳細設定は後ほど変更できるので、No, I am done を選択します。
 Do you want to configure advanced settings? (Use arrow keys)
❯ No, I am done.
  Yes, I want to make some additional changes.
以下コマンドで認証設定をクラウドに反映します。
amplify push -y以下のログが流れれば正常終了です。
✔ Successfully pulled backend environment develop from the cloud.

Current Environment: develop

| Category | Resource name          | Operation | Provider plugin   |
| -------- | ---------------------- | --------- | ----------------- |
| Auth     | authsampleXXXXXXXX     | Create    | awscloudformation |
? Are you sure you want to continue? Yes
          :
          :
          :
✔ All resources are updated in the cloud
以下コマンドを実行して現在の Amplify category のステータスを確認できます。
amplify statusAuth category の作成、クラウド反映直後は以下のように表示されます。
 amplify status

    Current Environment: dev

┌──────────┬────────────────────┬───────────┬───────────────────┐
│ Category │ Resource name      │ Operation │ Provider plugin   │
├──────────┼────────────────────┼───────────┼───────────────────┤
│ Auth     │ authsampleXXXXXXXX │ No Change │ awscloudformation │
└──────────┴────────────────────┴───────────┴───────────────────┘
以下コマンドで Cognito console を開くことができます。
amplify console authCognito console から ID プール/ユーザープールが作成されていることを確認してください。
認証機能をフロントエンドに実装する
シンプルにログイン画面とログイン後のダッシュボード画面の 2 画面構成です。
yarn または npm を使用してアプリに Amplify package を追加します。
- npm
npm install aws-amplify @aws-amplify/ui-react- yarn
yarn add aws-amplify @aws-amplify/ui-react最初に URL パスの src/constants.ts 定数ファイルを作成します。
export enum Path {
  Index = '/',
  Dashboard = 'dashboard',
}
次に pages/index.tsx を以下に書き換えます。
import { GetStaticPropsContext, InferGetStaticPropsType } from 'next';
import { useRouter } from 'next/router';
import Head from 'next/head';
import { useEffect } from 'react';
import Amplify, { Auth } from 'aws-amplify';
import { AmplifyAuthenticator } from '@aws-amplify/ui-react';
import { AuthState, onAuthUIStateChange } from '@aws-amplify/ui-components';
import awsconfig from '../src/aws-exports';
import styles from '../styles/Home.module.css';
import { Path } from '../src/constants';

Amplify.configure(awsconfig);

type Props = InferGetStaticPropsType<typeof getStaticProps>;

const AuthPage: React.FC<Props> = (props: Props) => {
  const router = useRouter();
  useEffect(() => {
    // 高速に遷移するため事前に遷移先画面をprefetchする
    router.prefetch(Path.Dashboard);
    (async () => {
      try {
        // 認証済みの場合dashboardへ遷移
        await Auth.currentAuthenticatedUser();
        router.replace(Path.Dashboard);
      } catch (error) {}
    })();
    return onAuthUIStateChange((nextAuthState, authData) => {
      if (nextAuthState === AuthState.SignedIn && authData) {
        router.replace(Path.Dashboard);
      }
    });
  }, []);

  return (
    <div className={styles.container}>
      <Head>
        <title>{props.pageTitle}</title>
      </Head>
      <AmplifyAuthenticator />
    </div>
  );
};

export default AuthPage;

export const getStaticProps = async (context: GetStaticPropsContext) => {
  return {
    props: {
      pageTitle: 'Authentication',
    },
  };
};
AmplifyAuthenticator は Amplify が提供する認証 UI のコンポーネントです。
AmplifyAuthenticator を利用する画面は SPA として動作します。
onAuthUIStateChange で画面切り替え毎に画面状態を nextAuthState で通知してくれます。
authData は認証成功後の User データ object です。
認証前の authData は undefine となります。
認証成功直後の nextAuthState は AuthState.SignedIn です。
AuthState.SignedIn かつ authData が存在すればダッシュボード画面へ遷移します。
実装のポイントは以下 useEffect でこの画面を初回表示時に router の prefetch で遷移先のダッシュボード画面を先読み込みさせています。
こうすることで、高速に画面遷移することができます。
また、認証済みユーザーが index にアクセスした場合はダッシュボード画面にリダイレクトさせたいです。
Auth.currentAuthenticatedUser で認証状態を確認し、エラーが発生しなければ認証済みですのでダッシュボード画面へリダイレクトします。
Auth.currentAuthenticatedUser は未認証の場合、The user is not authenticated エラーが発生します。
ここでは try catch でエラーを潰しています。
const router = useRouter();
useEffect(() => {
  router.prefetch(Path.Dashboard);
  (async () => {
    try {
      // 認証済みの場合dashboardへ遷移
      await Auth.currentAuthenticatedUser();
      router.replace(Path.Dashboard);
    } catch (error) {}
  })();
  return onAuthUIStateChange((nextAuthState, authData) => {
    if (nextAuthState === AuthState.SignedIn && authData) {
      router.replace(Path.Dashboard);
    }
  });
}, []);
最後にログイン後に表示するダッシュボード画面を作成します。
pages/dashboard.tsx
import { GetStaticPropsContext, InferGetStaticPropsType, NextPage } from 'next';
import { useRouter } from 'next/router';
import Head from 'next/head';
import { useState, useEffect } from 'react';
import Amplify, { Auth } from 'aws-amplify';
import { AmplifySignOut } from '@aws-amplify/ui-react';
import { CognitoUserInterface, onAuthUIStateChange, AuthState } from '@aws-amplify/ui-components';
import awsconfig from '../src/aws-exports';
import styles from '../styles/Home.module.css';
import { Path } from '../src/constants';
Amplify.configure(awsconfig);
type Props = InferGetStaticPropsType<typeof getStaticProps>;
const DashboardPage: NextPage<Props> = (props: Props) => {
const router = useRouter();
const [user, setUser] = useState<CognitoUserInterface | undefined>();

useEffect(() => {
  router.prefetch(Path.Index);
  (async () => {
    try {
      const user = await Auth.currentAuthenticatedUser();
      setUser(user);
    } catch (error) {
      // 未認証の場合The user is not authenticatedが発生する
      router.replace(Path.Index);
    }
  })();
  return onAuthUIStateChange((nextAuthState, authData) => {
    if (nextAuthState === AuthState.SignedOut) {
      router.replace(Path.Index);
    }
  });
}, []);
return (
<div className={styles.container}>
<Head>
<title>{props.pageTitle}</title>
</Head>
<main className={styles.main}>
<h1 className={styles.title}>{props.pageTitle}</h1>
<div className={styles.description}>
<div>Hello, {user && user.username}</div>
<div>It's {props.nowDate}.</div>
</div>
<AmplifySignOut />
</main>
</div>
);
};
export default DashboardPage;
export const getStaticProps = async (context: GetStaticPropsContext) => {
return {
props: {
nowDate: new Date().toLocaleString(),
pageTitle: 'Dashboard',
},
};
};この画面は Sign out ボタンがついてますので、ボタンが押されたことをハンドリングしてログイン画面へリダイレクトする必要があります。
ここでも onAuthUIStateChange を利用して画面状態をハンドリングします。
nextAuthState が AuthState.SignedOut だった場合にログイン画面に遷移させています。
実装のポイントは、ここでも router.prefetch で遷移先の画面を先読みさせています。
また、未認証ユーザーが ダッシュボード画面 URL を直叩きした場合はログイン画面へリダイレクトさせたいです。
Auth.currentAuthenticatedUser で認証状態を判定し、未認証の場合エラーが発生するのでログイン画面にリダイレクトさせます。
プロダクトで実装する場合、認証状態は Redux-toolkit や useContext で状態管理するべきですがここでは簡略化させる為、currentAuthenticatedUser を利用しています。
const router = useRouter();
const [user, setUser] = useState<CognitoUserInterface | undefined>();
useEffect(() => {
router.prefetch(Path.Index);
(async () => {
try {
const user = await Auth.currentAuthenticatedUser();
setUser(user);
} catch (error) {
// 未認証の場合The user is not authenticatedが発生する
router.replace(Path.Index);
}
})();
return onAuthUIStateChange((nextAuthState, authData) => {
if (nextAuthState === AuthState.SignedOut) {
router.replace(Path.Index);
}
});
}, []);yarn dev コマンドでアプリを起動してローカル環境にアクセスします。
ログイン画面が表示されました。
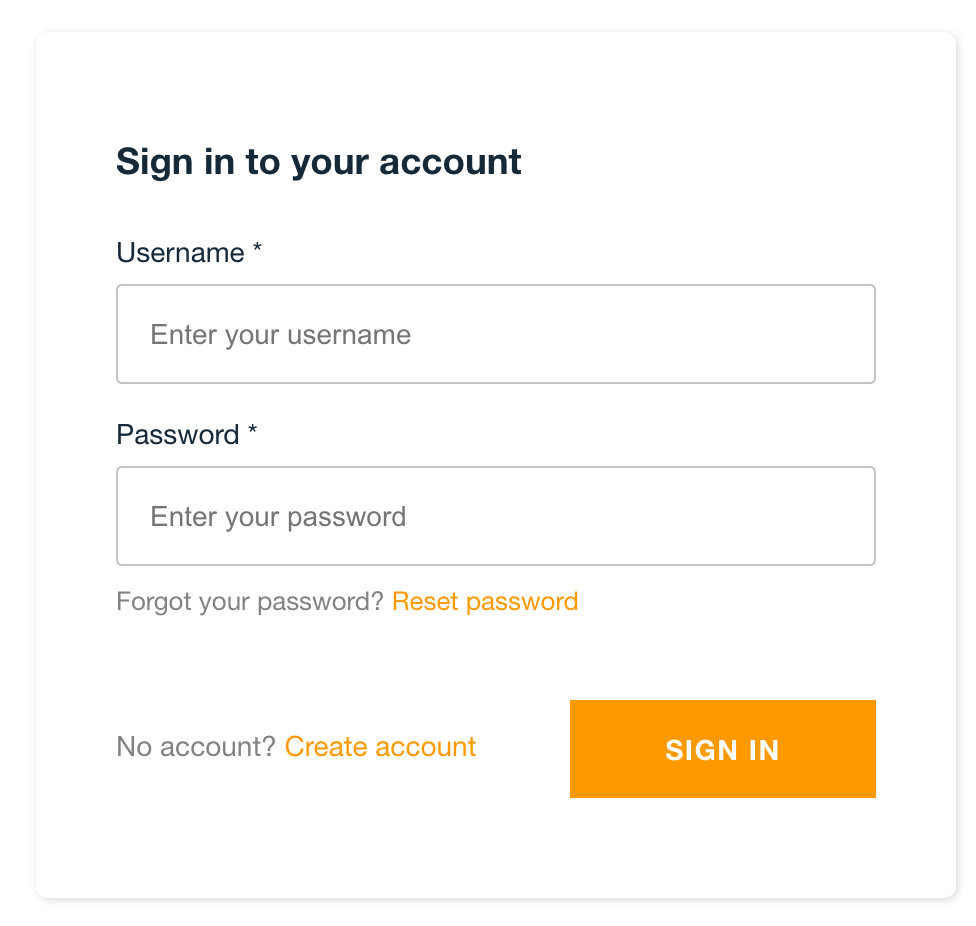
Create account リンクをクリックしてアカウント作成画面を表示した状態です。
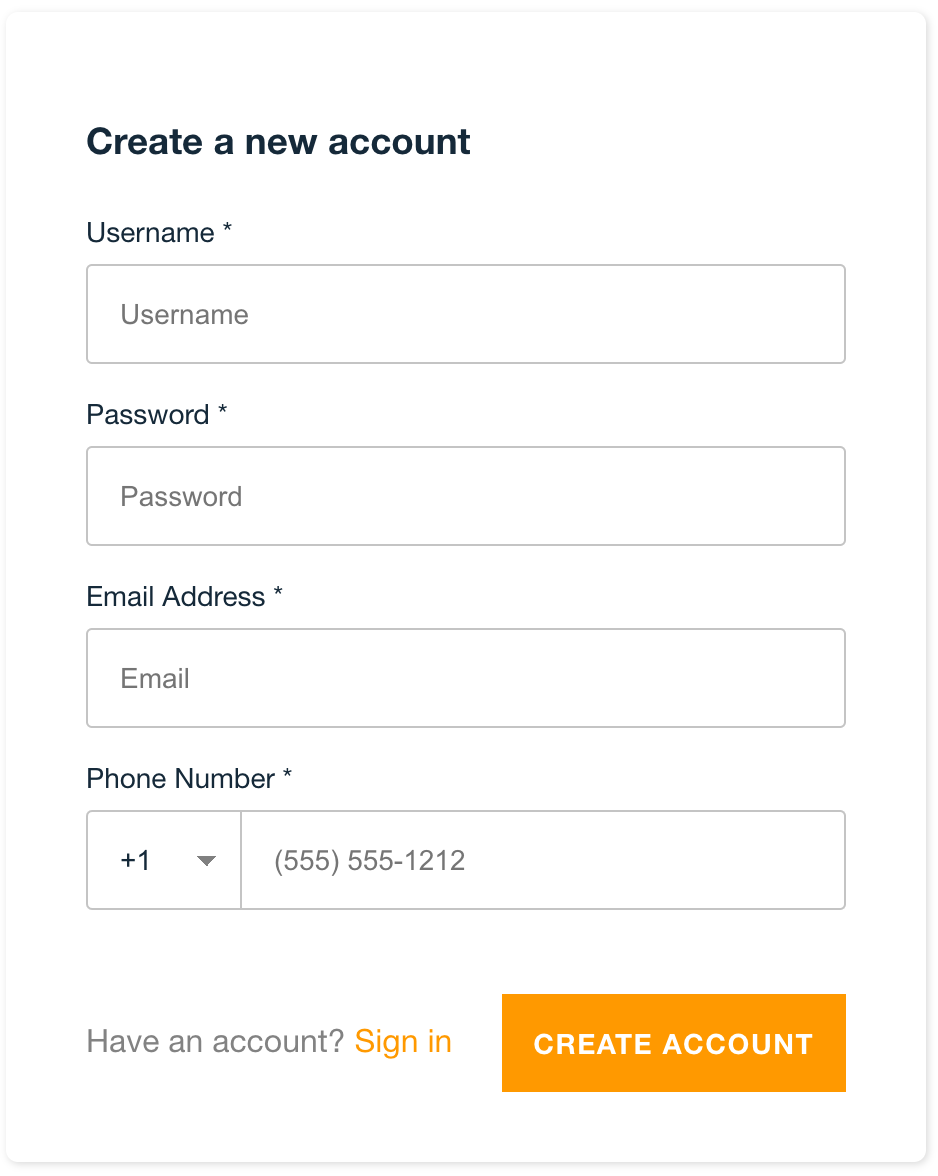
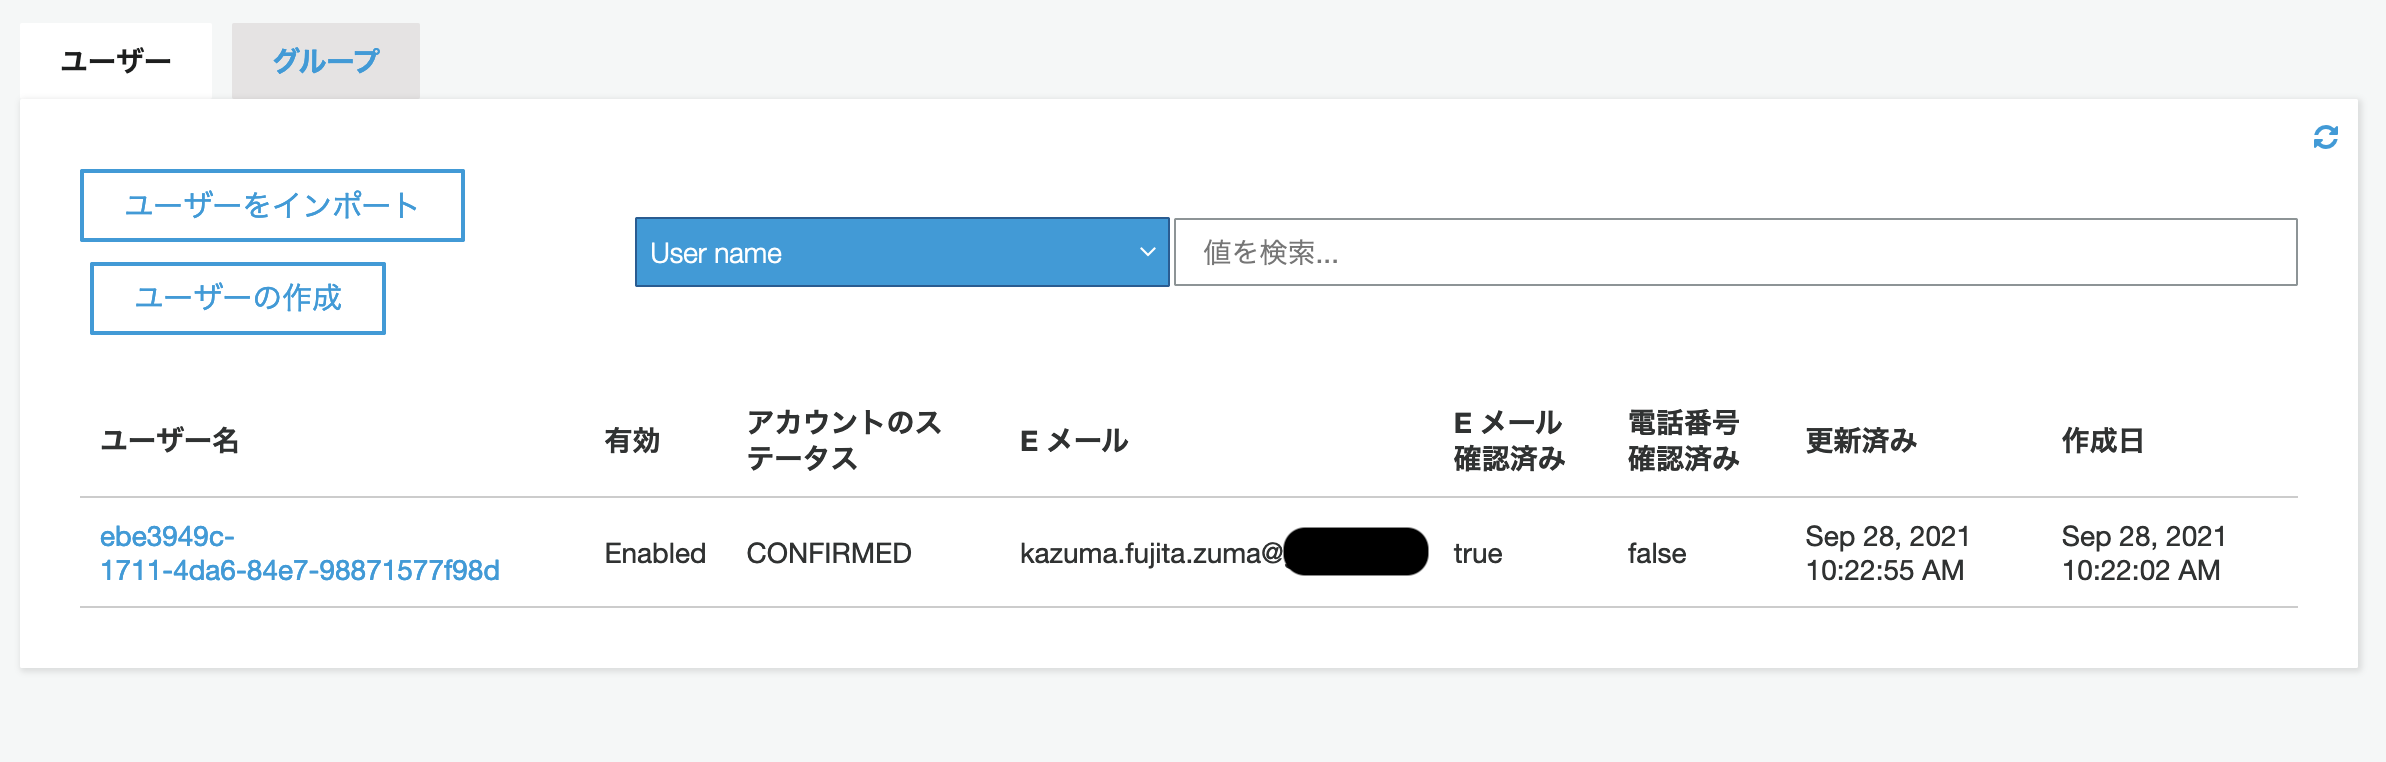
試しにアカウントを作成し、Cognito のユーザープールを確認するとユーザーが追加されてます。
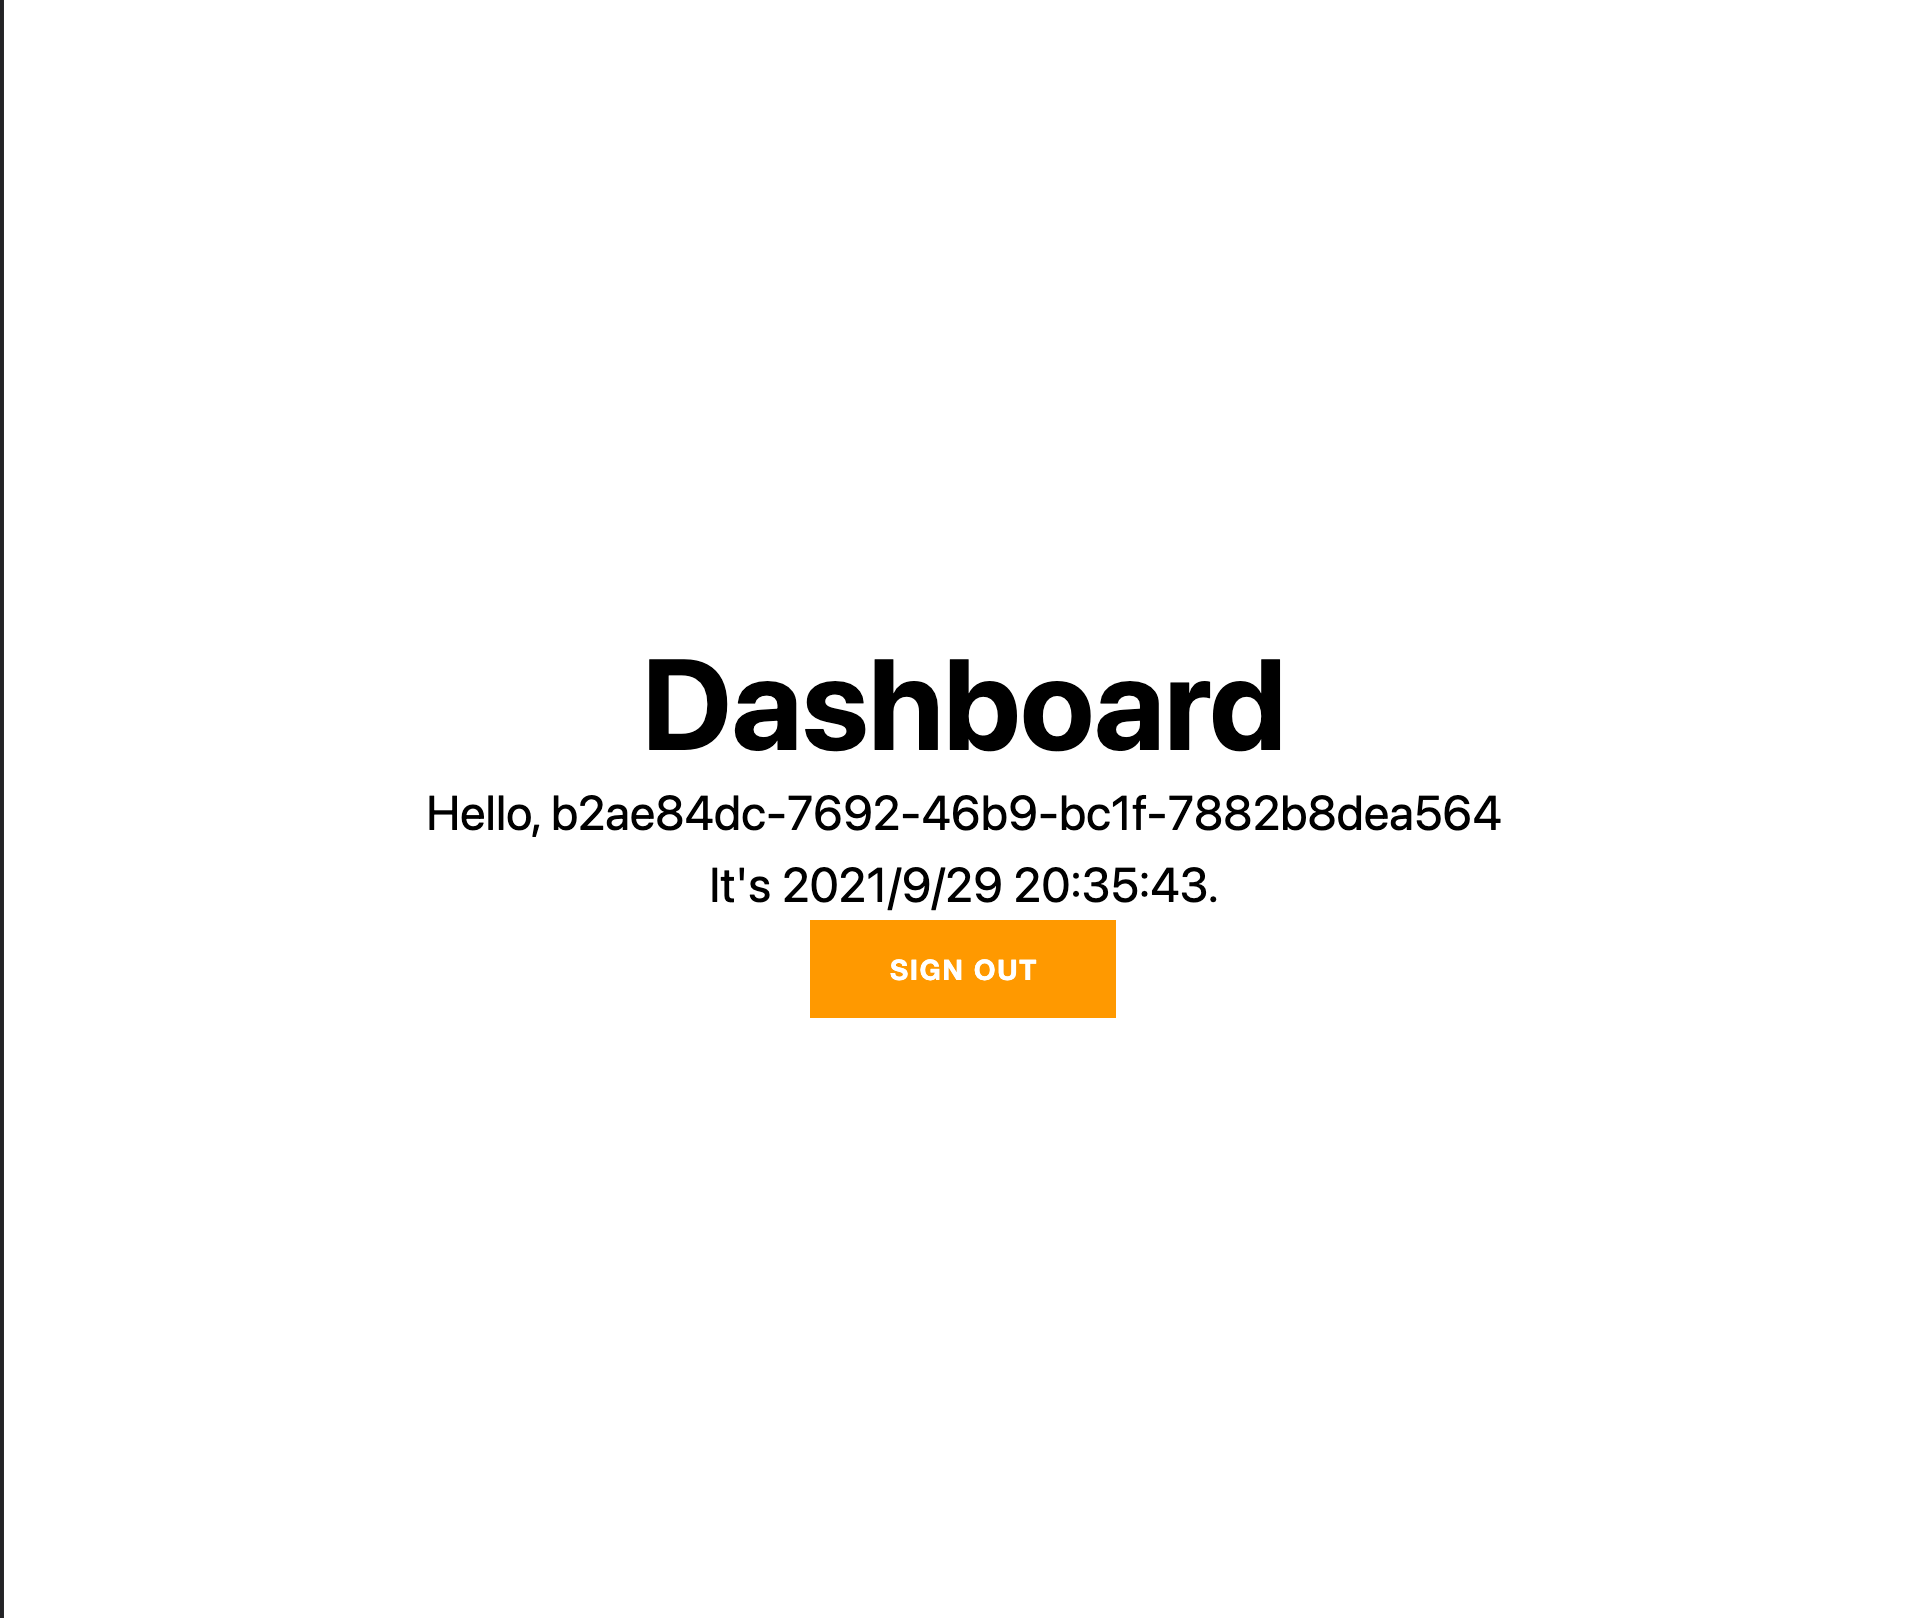
ログイン後、以下のダッシュボード画面が表示されます。
パスワードポリシー(password validation)を設定する
デフォルト設定ではパスワードの validation は大文字小文字を含む英数字、記号の入力が必須になっています。
今回試しにこのパスワードポリシーを変更してみます。
まず、各種設定を変更するには、共有で以下のコマンドを実行します。
amplify update auth最初にどの設定をアップデートしたいのか聞かれるので Walkthrough all the auth configurations を選択してください。
 What do you want to do?
  Apply default configuration with Social Provider (Federation)
❯ Walkthrough all the auth configurations
  Create or update Cognito user pool groups
  Create or update Admin queries API
以降の設問はデフォルトのままで良いので以下のように選択します。
 Select the authentication/authorization services that you want to use: User Sign-Up, Sign-In, connected with AWS IAM controls (Enables per-user Storage features for images or other content,
 Analytics, and more)
 Allow unauthenticated logins? (Provides scoped down permissions that you can control via AWS IAM) No
 Do you want to enable 3rd party authentication providers in your identity pool? No
 Do you want to add User Pool Groups? No
 Do you want to add an admin queries API? No
 Multifactor authentication (MFA) user login options: OFF
 Email based user registration/forgot password: Enabled (Requires per-user email entry at registration)
 Please specify an email verification subject: Your verification code
 Please specify an email verification message: Your verification code is {####}
以下の設問でパスワードポリシーを変更するか聞かれので y を入力してください。
Do you want to override the default password policy for this User Pool? (y/N) y次にパスワードの最低文字長を設定します。デフォルトは 8 文字です。
Enter the minimum password length for this User Pool: (8)最後にバリデーションを設定します。
 Select the password character requirements for your userpool:
 ◉ Requires Lowercase
 ◉ Requires Uppercase
❯◉ Requires Numbers
 ◯ Requires Symbols
以降の設問は以下のように回答します。
 Specify the app's refresh token expiration period (in days): 30
 Do you want to specify the user attributes this app can read and write? No
 Do you want to enable any of the following capabilities? (何も選択せずenter)
 Do you want to use an OAuth flow? No
? Do you want to configure Lambda Triggers for Cognito? No
後は以下のコマンドでクラウドに設定を反映して完了です。
amplify push -yパスワードポリシーを CloudFormation template から設定する
Amplify CLI から設定を変更できますが、CloudFormation template から直接設定も可能です。
以下のパスに CloudFormation の template があります。
amplify/backend/auth/{Resource name}/{Resource name}-cloudformation-template.yml
設定を変更する前に amplify status で amplify の状態を確認します。
Operation が No Change になっています。
$ amplify status

    Current Environment: dev

┌──────────┬────────────────────┬───────────┬───────────────────┐
│ Category │ Resource name      │ Operation │ Provider plugin   │
├──────────┼────────────────────┼───────────┼───────────────────┤
│ Auth     │ authsampleXXXXXXXX │ No Change │ awscloudformation │
└──────────┴────────────────────┴───────────┴───────────────────┘
{Resource name}-cloudformation-template.yml を開いて PasswordPolicy を変更してみます。
RequireSymbols を false にしてパスワードの記号の入力必須を外しています。
Policies:
  PasswordPolicy:
    MinimumLength: !Ref passwordPolicyMinLength
    RequireLowercase: true
    RequireNumbers: true
    RequireSymbols: false
    RequireUppercase: true
再度 amplify status を実行すると Operation が Update に変わっています。
$ amplify status

    Current Environment: dev

┌──────────┬────────────────────┬───────────┬───────────────────┐
│ Category │ Resource name      │ Operation │ Provider plugin   │
├──────────┼────────────────────┼───────────┼───────────────────┤
│ Auth     │ authsampleXXXXXXXX │ Update    │ awscloudformation │
└──────────┴────────────────────┴───────────┴───────────────────┘
最後に amplify push でクラウドに設定を反映します。
amplify push -yE メール検証メッセージを CloudFormation template でローカライズする
Amplify CLI でできることは CloudFormation template でも同様の設定ができることが分かりました。
次は E メール検証メッセージを英語から日本語にローカライズしてみます。
E メール検証メッセージとはユーザーがアカウントを新規作成後に行う本人認証の為のメール件名と本文のことです。
デフォルトだと以下のメールが送信されます。
- 件名
Your verification code- 本文
{####}には 6 桁の確認コード(数字)が入ります。
Your verification code is {####}以下に CloudFormation template があるので日本語に変更します。
amplify/backend/auth/{Resource name}/{Resource name}-cloudformation-template.yml
EmailVerificationSubject の箇所を探します。
デフォルトだと以下設定になっています。
EmailVerificationMessage: !Ref emailVerificationMessage
EmailVerificationSubject: !Ref emailVerificationSubject
EmailVerificationSubject と EmailVerificationMessage を変更します。
EmailVerificationSubject: XXXXからセキリティコードをお送りします
EmailVerificationMessage: |
  Eメールアドレスの確認のため、セキュリティコードを入力してください。<br>
  セキリティコードは {####} です。<br>
ちなみに、SmsVerificationMessage は電話番号検証の為の SMS メッセージです。
こちらもローカライズ可能です。
MfaConfiguration: !Ref mfaConfiguration
SmsVerificationMessage: 電話番号の確認のため、セキリティコードを入力してください。セキリティコードは {####} です。
SmsAuthenticationMessage: !Ref smsAuthenticationMessage
SmsConfiguration:
  SnsCallerArn: !GetAtt SNSRole.Arn
  ExternalId: authsacf91498b_role_external_id
amplify push を実行してクラウドに反映して完了です。
アカウントを新規作成して E メール検証メールを送信してみます。
以下のようにローカライズされたメッセージが送信されます。
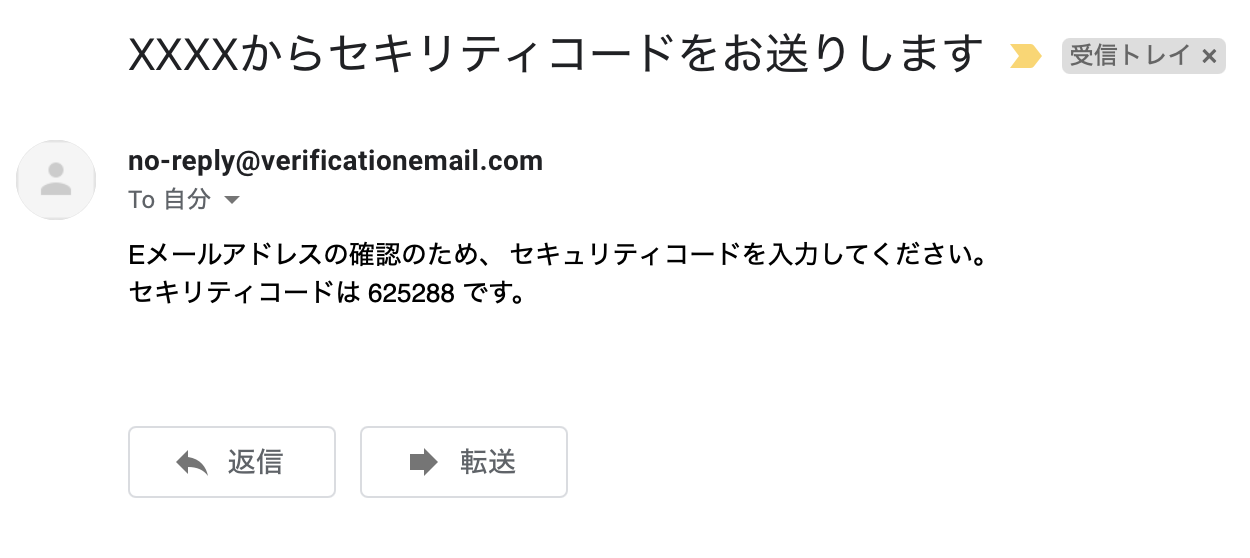
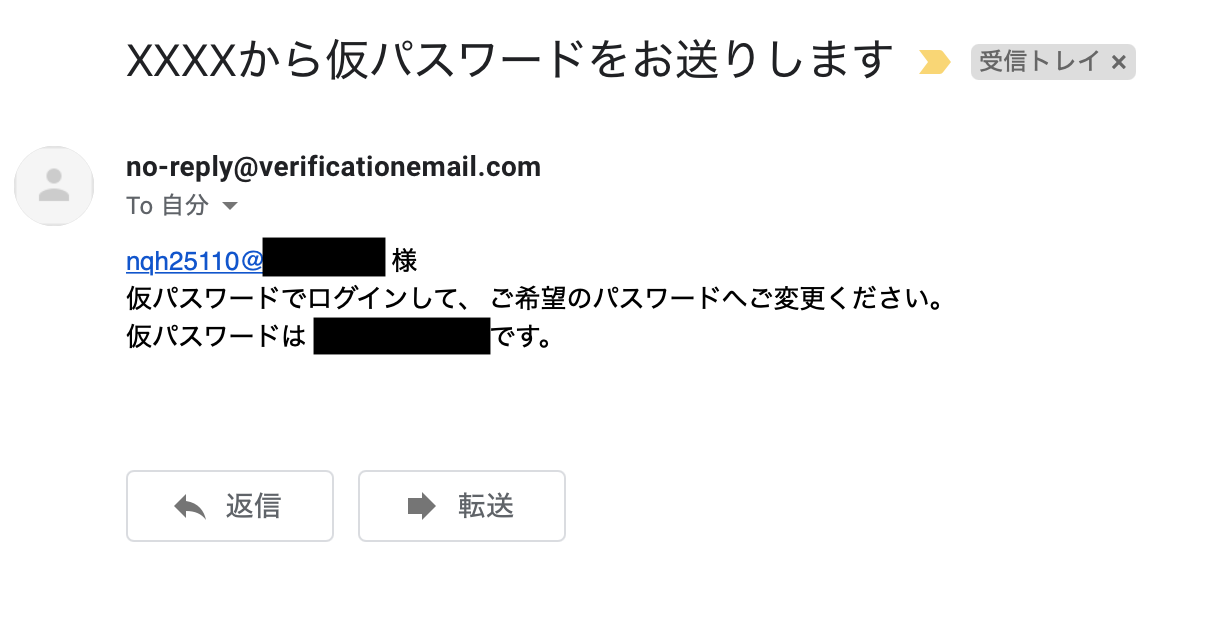
ユーザー招待メッセージを CloudFormation template でローカライズする
次は ユーザー招待メッセージを英語から日本語にローカライズしてみます。
Cognito コンソール、もしくは Amplify の新機能である adminUI からユーザーを作成後、仮パスワードを記載したメールがユーザーに送信されます。
ユーザー招待メッセージとは、その仮パスワードメールの件名と本文のことです。
デフォルトだと以下のメールが送信されます。
- 件名
Your temporary password- 本文
{username}にはメールアドレス、{####}には仮パスワードが入ります。
Your username is {username} and temporary password is {####}.以下に CloudFormation template があるので日本語に変更します。
amplify/backend/auth/{Resource name}/{Resource name}-cloudformation-template.yml
E メール検証メッセージとは違い、招待メッセージは新規で項目を追加する必要があります。
先程変更した EmailVerificationMessage の下に AdminCreateUserConfig を追加してください。
EmailVerificationSubject: XXXXからセキリティコードをお送りします
EmailVerificationMessage: |
  Eメールアドレスの確認のため、セキュリティコードを入力してください。<br>
  セキリティコードは {####} です。<br>

AdminCreateUserConfig:
  InviteMessageTemplate:
    EmailMessage: |
      {username} 様<br>
      仮パスワードでログインして、ご希望のパスワードへご変更ください。<br>
      仮パスワードは {####} です。<br>
    EmailSubject: XXXXから仮パスワードをお送りします
    SMSMessage: |
      {username} 様の仮パスワードは {####} です。
ここでは SMSMessage で SMS での招待メッセージもローカライズしています。
amplify push を実行してクラウドに反映して完了です。
Cognito コンソール、もしくは adminUI から招待メールを送信してみます。
以下のようにローカライズされたメッセージが送信されます。